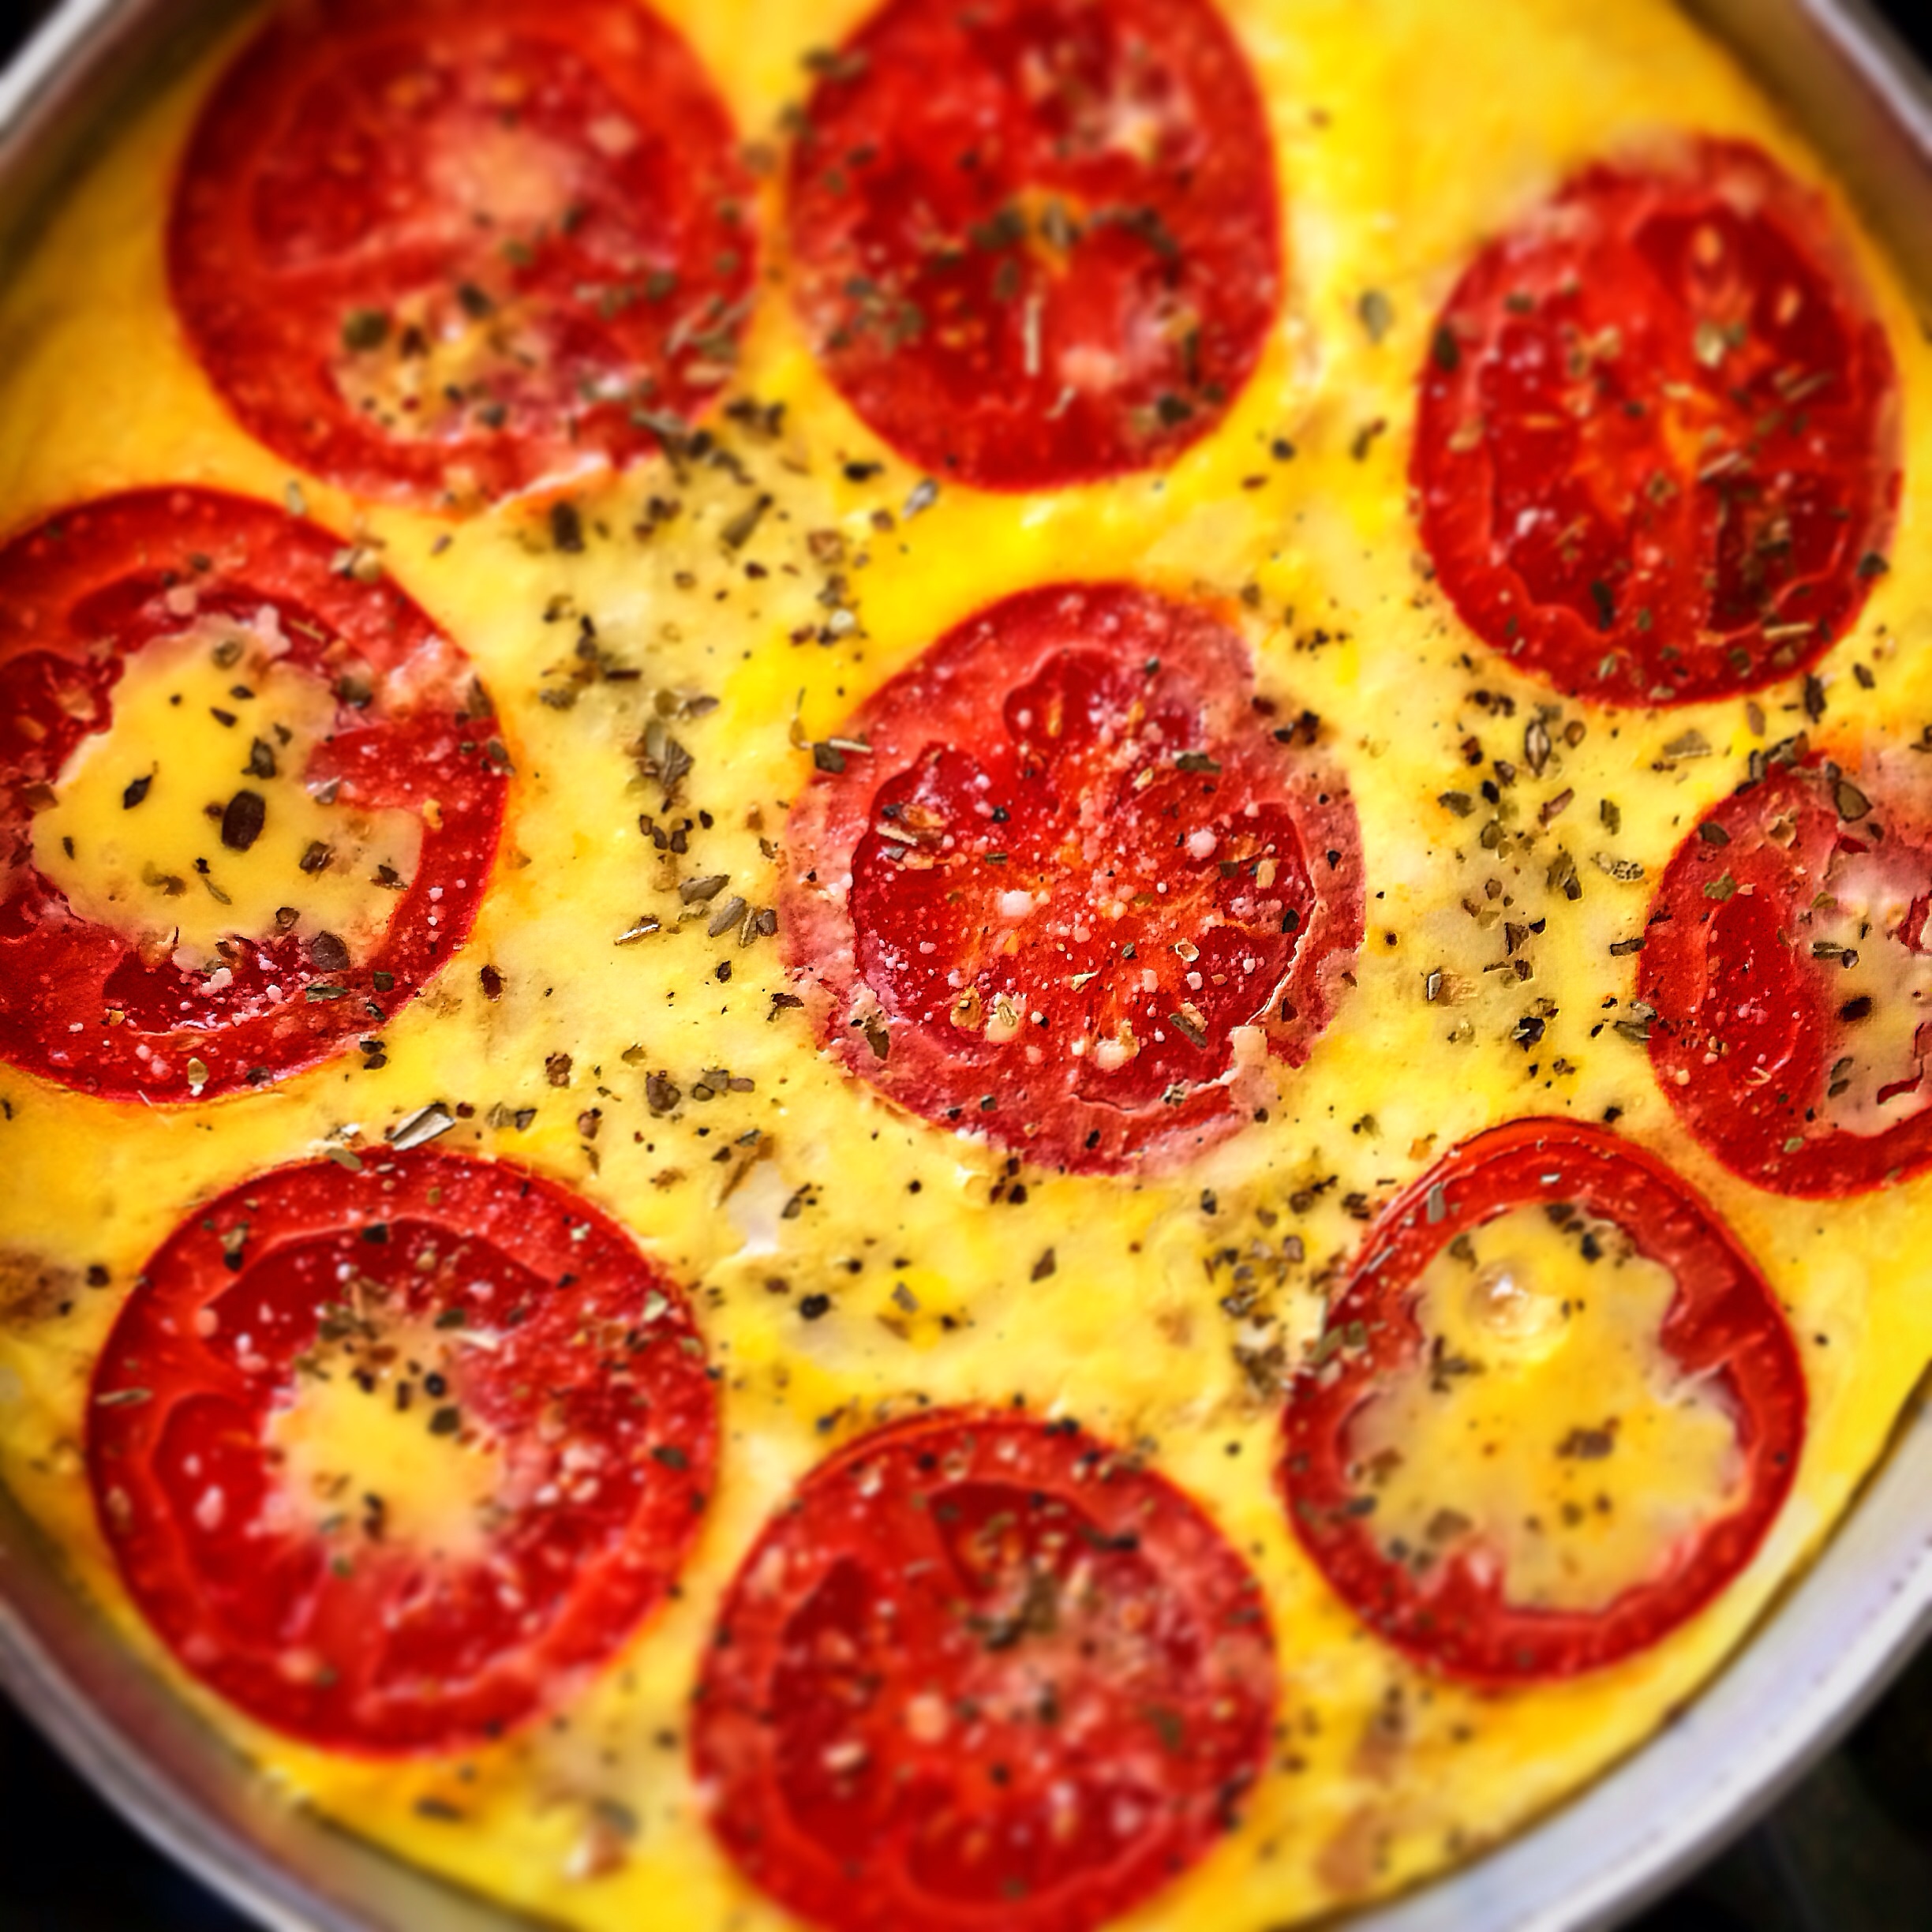
Prosciutto Cotto, Mozzarella, Tomato and Oregano Frittata
A frittata is a flat Italian style omelette in which the ingredients are mixed into the eggs instead of being stuffed like a traditional omelette. The top layer is the creative, artistic finishing touch. I like to serve a gorgeous frittata by using vibrant colored vegetables. Like a traditional omelette, a frittata can be healthy, or not.
How to make a healthy frittata:
Use egg whites
Add healthy vegetables
Sprinkle in chia seeds
In this frittata, I wanted to use some beautiful prosciutto cotto. Prosciutto cotto is the highest quality Italian cooked ham with a smooth mild flavor. Perfectly paired with a gooey mozzarella or fontina on a panini, or in this case, baked into a frittata.
Prosciutto Cotto and Mozzarella Frittata
Ingredients:
3 eggs
2 tbsp. milk
1/2 cup shredded mozzarella or fontina cheese
4 slices prosciutto cotto, chopped
1 small tomato sliced
2 tbsp. Oregano
2 tbsp. Parmesan cheese
Salt/Pepper
Directions:
Preheat oven 350 degrees.
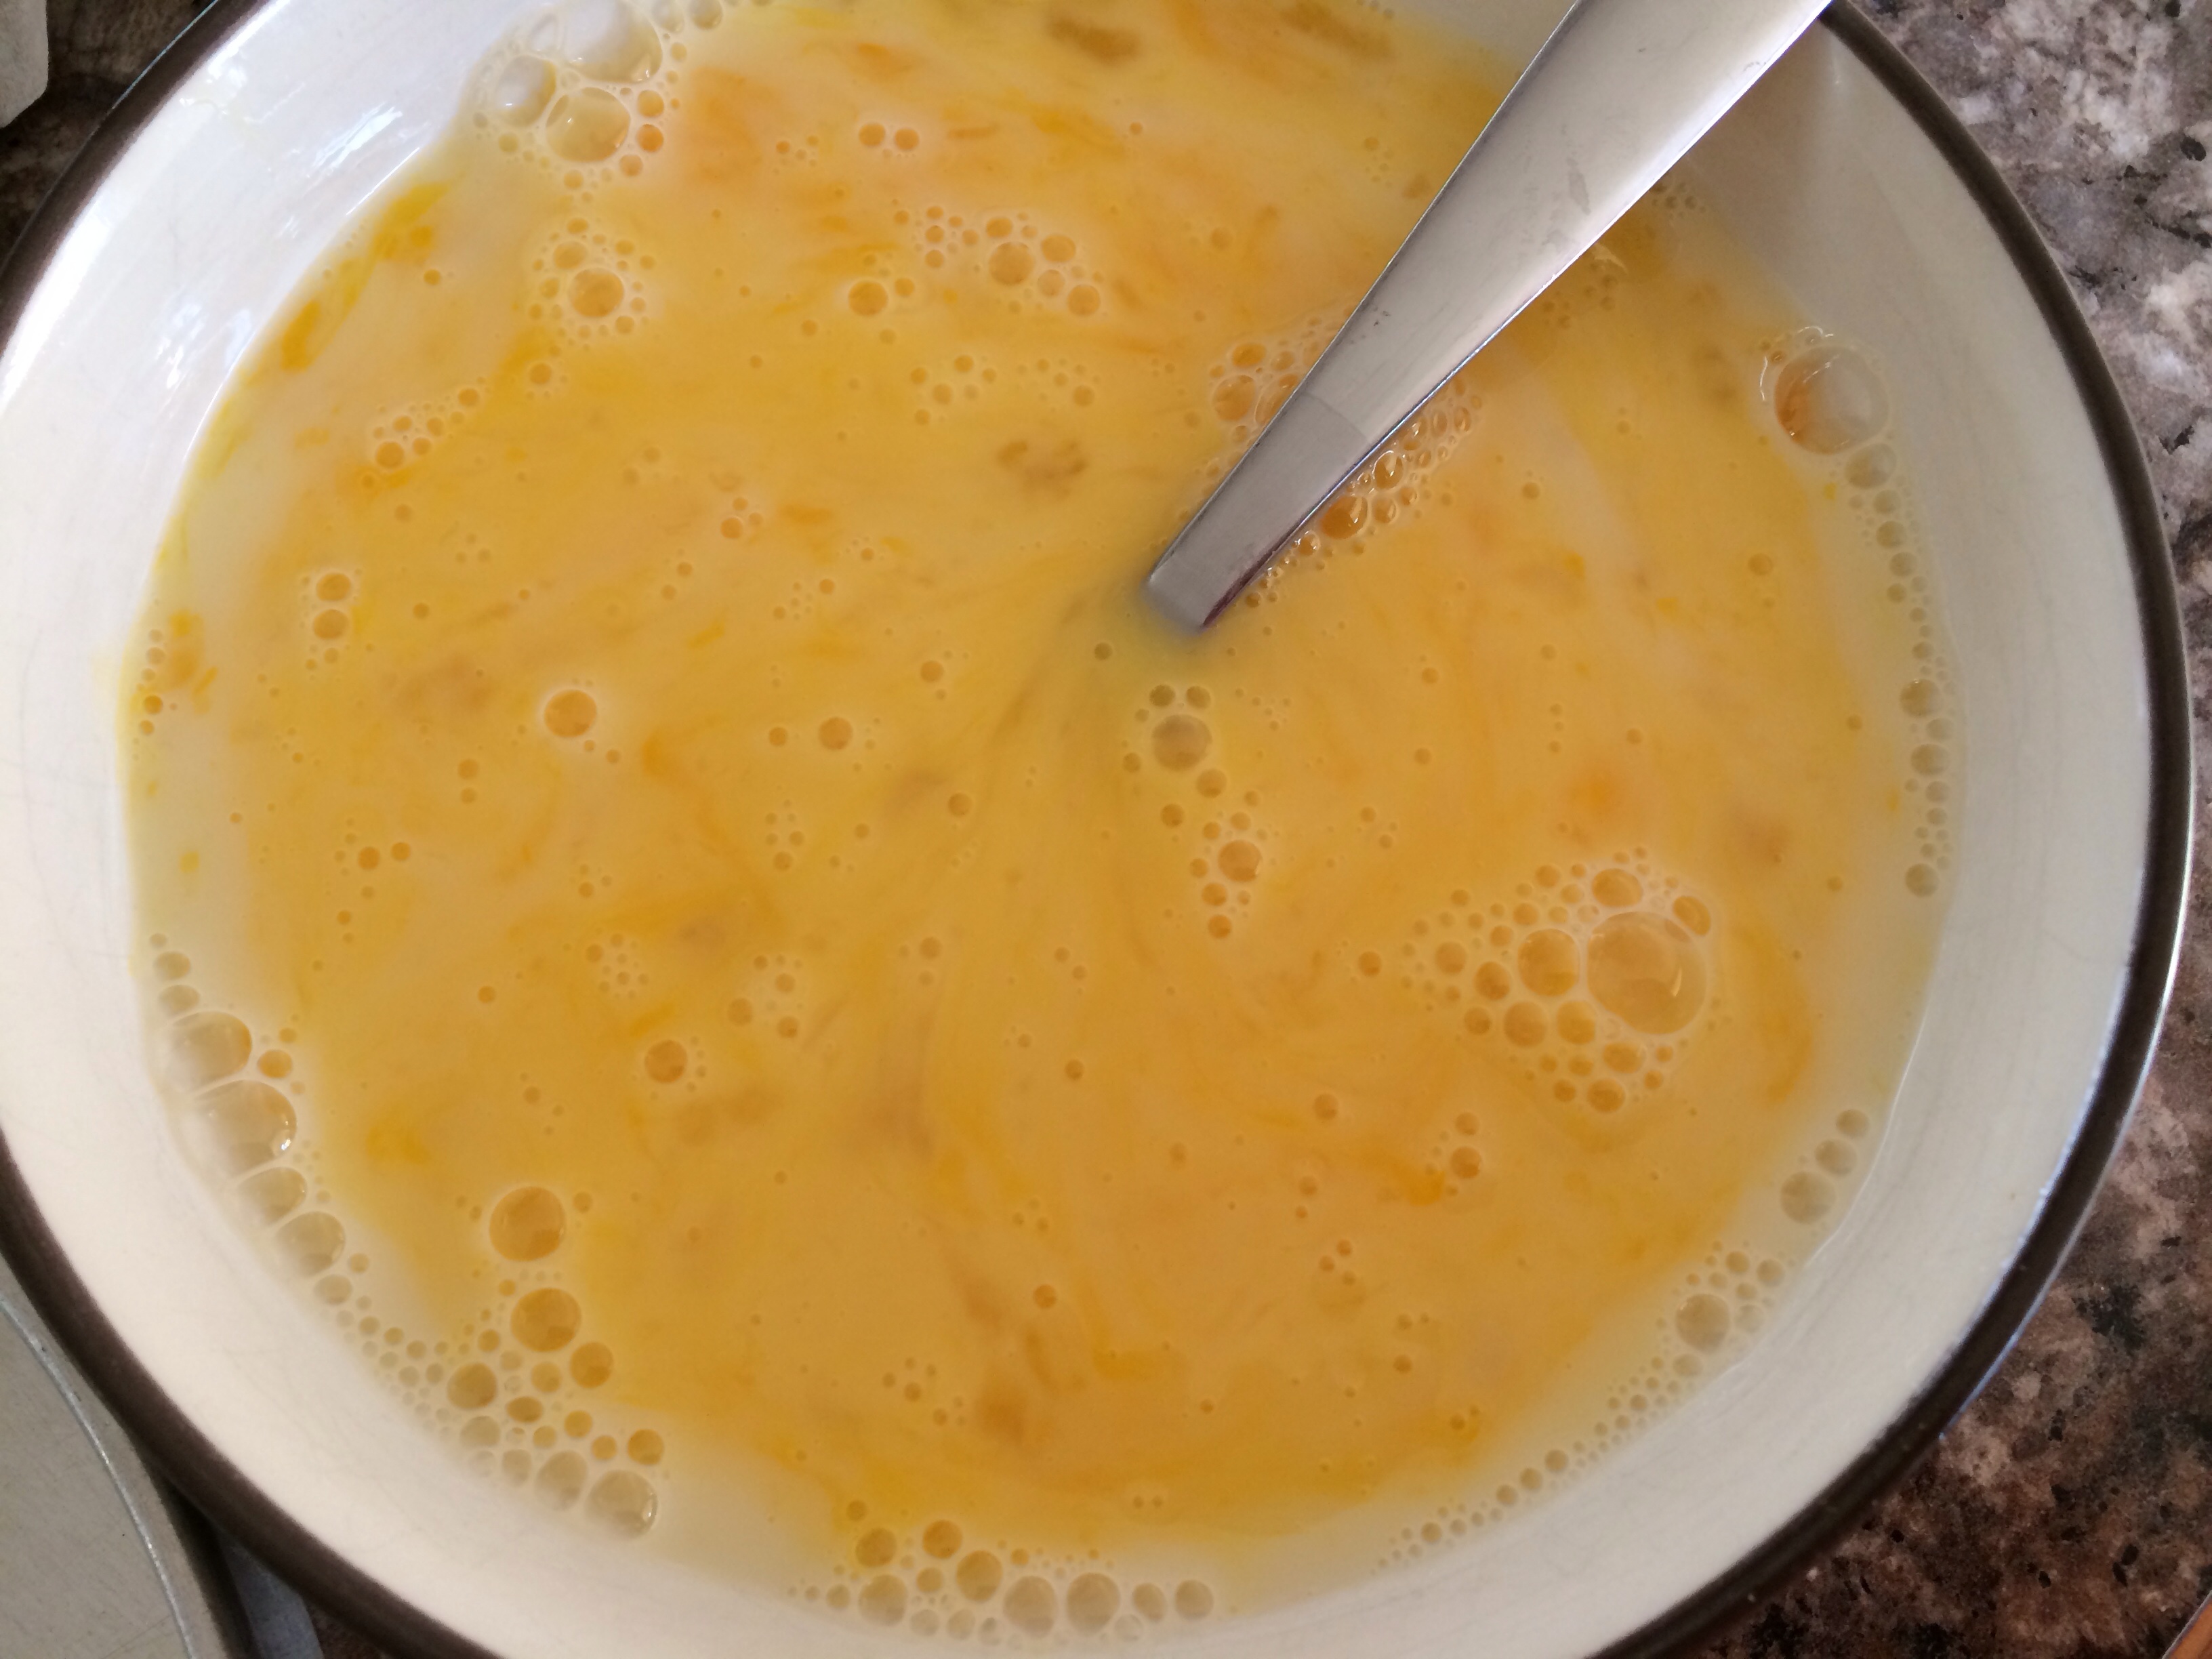
In a small mixing bowl, beat eggs with a whisk.
Continue whisking while adding milk until egg turns pale yellow in color.
Or just use a fork to beat the eggs!
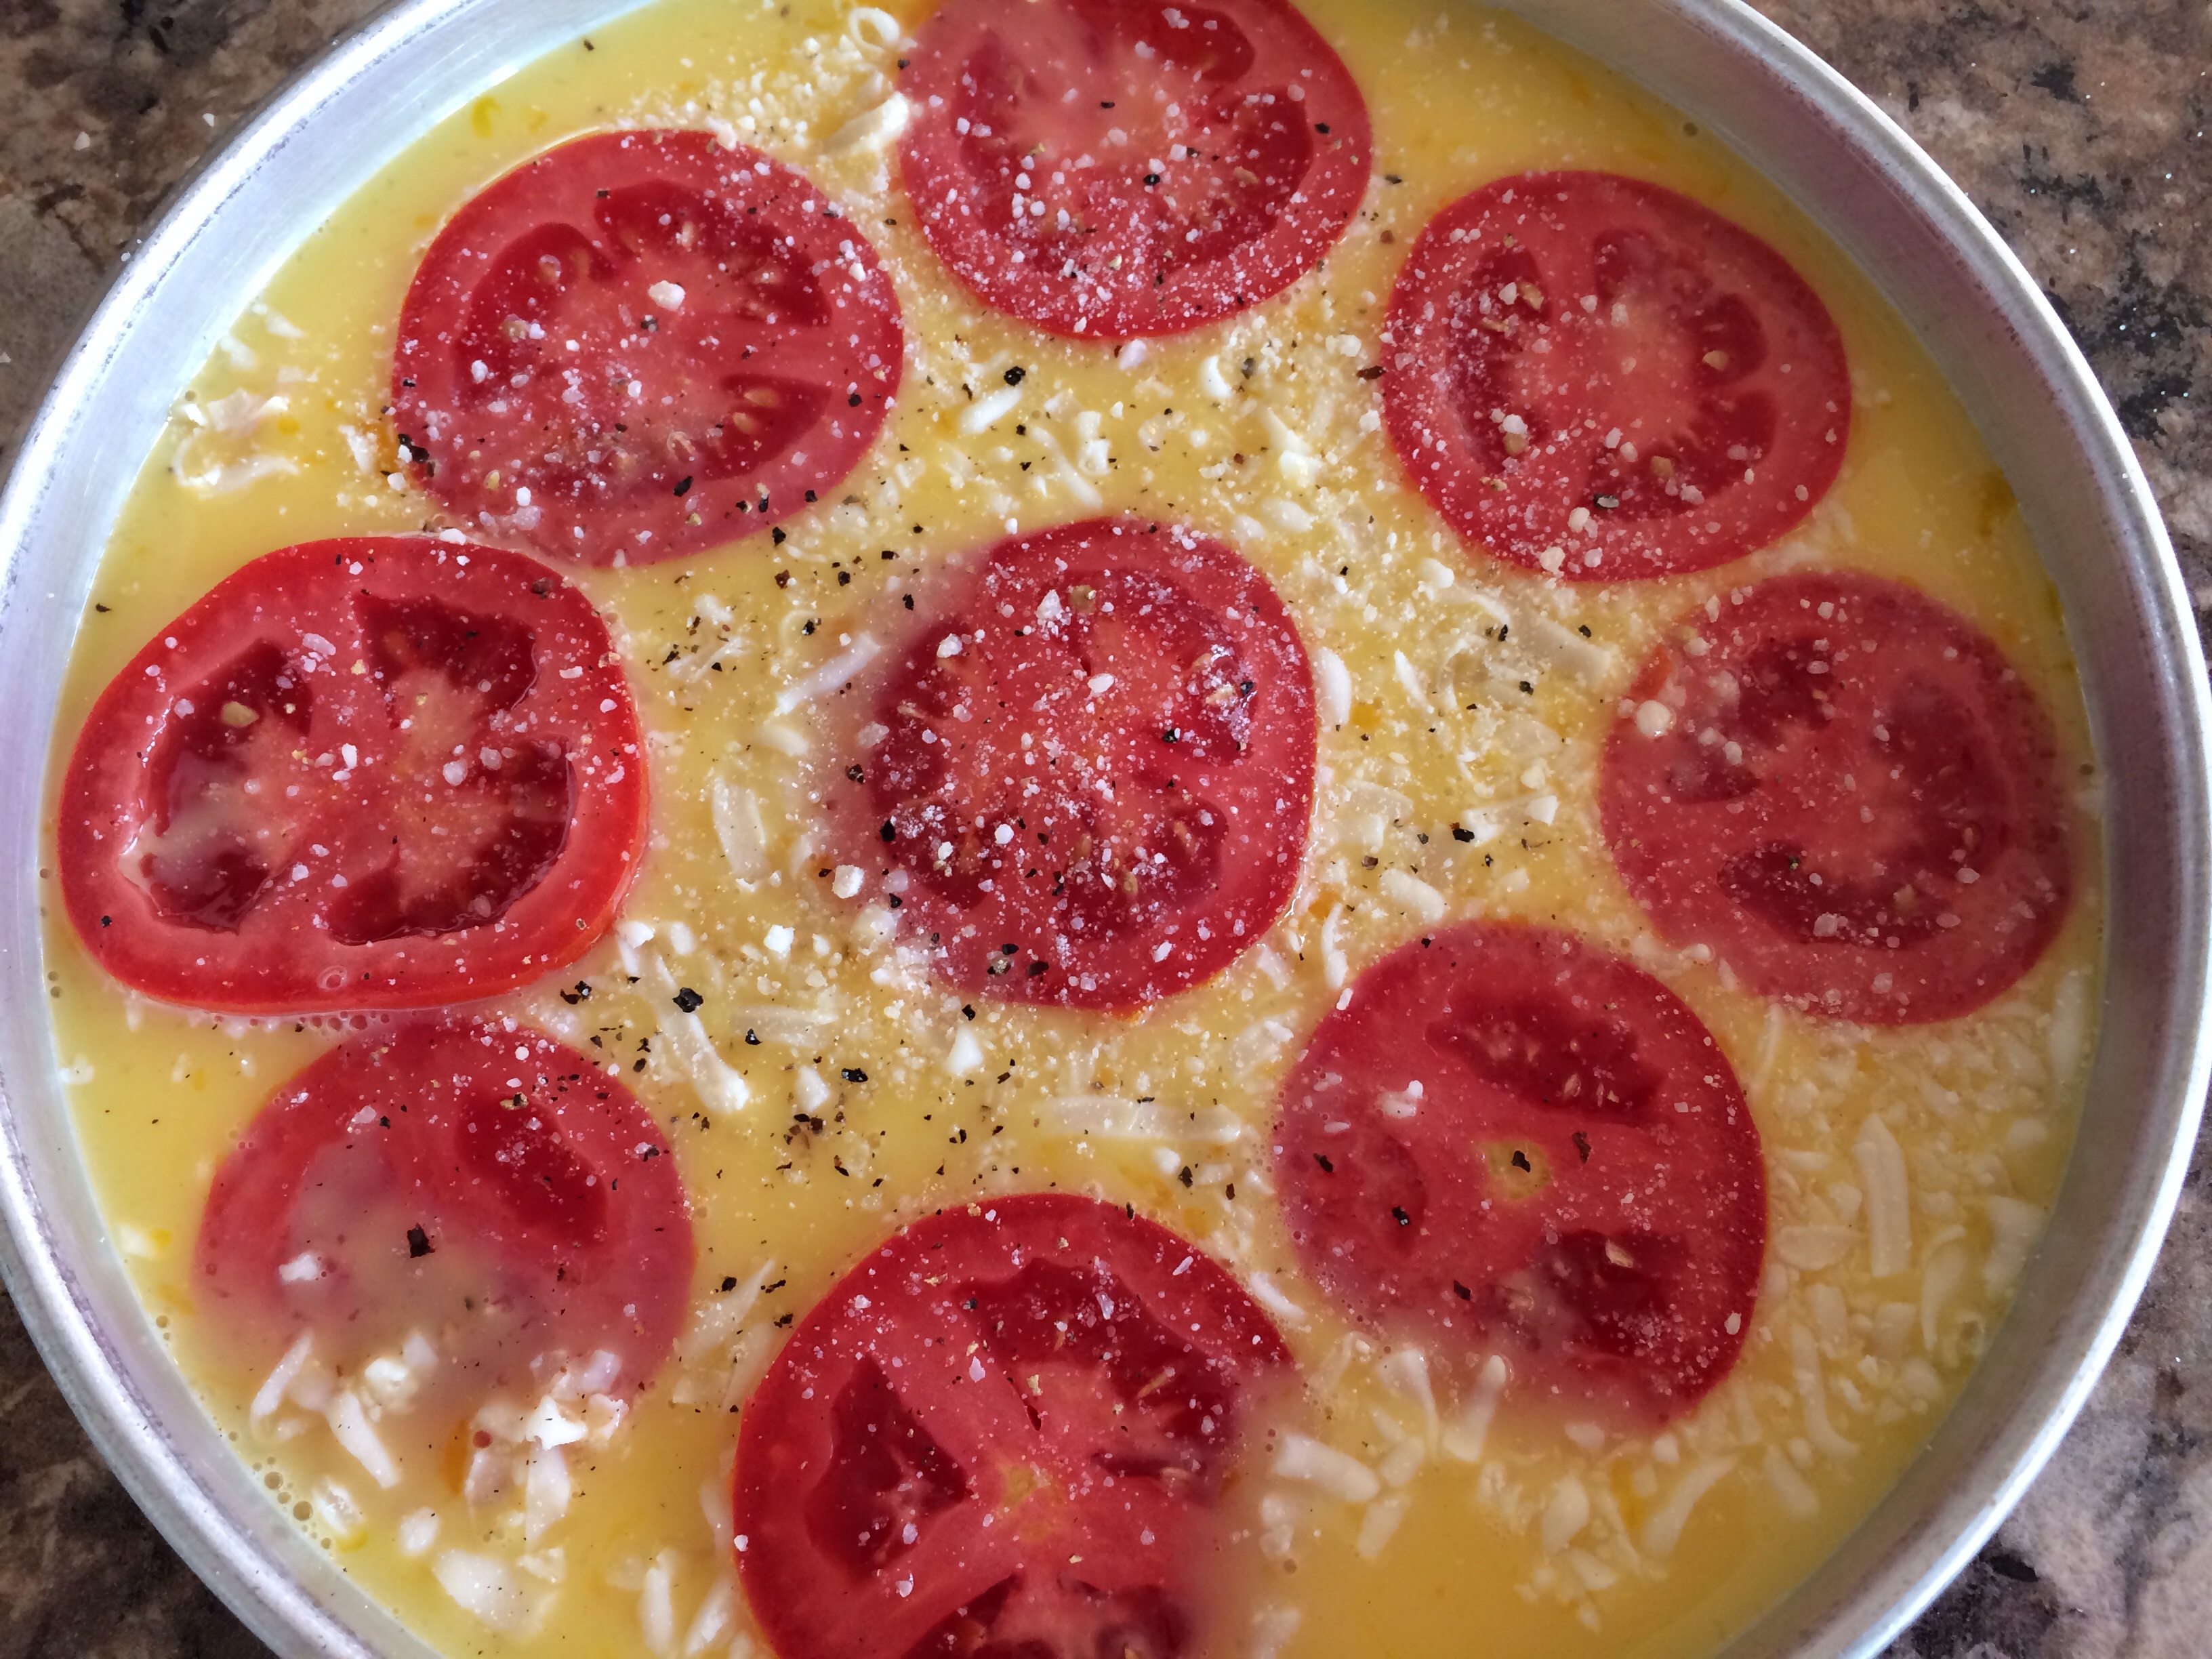
Add cheese and prosciutto cotto and stir.
Pour into a Pam coated 9″ round cake pan.
Top with sliced tomato, oregano, Parmesan, salt and pepper.
Although the mixture is uncooked, the toppings are the beautiful finish of a frittata. Like the red ripe tomatoes, greens pop also such as spinach and kale!
Bake 20-30 minutes or until the egg is cooked through and set.
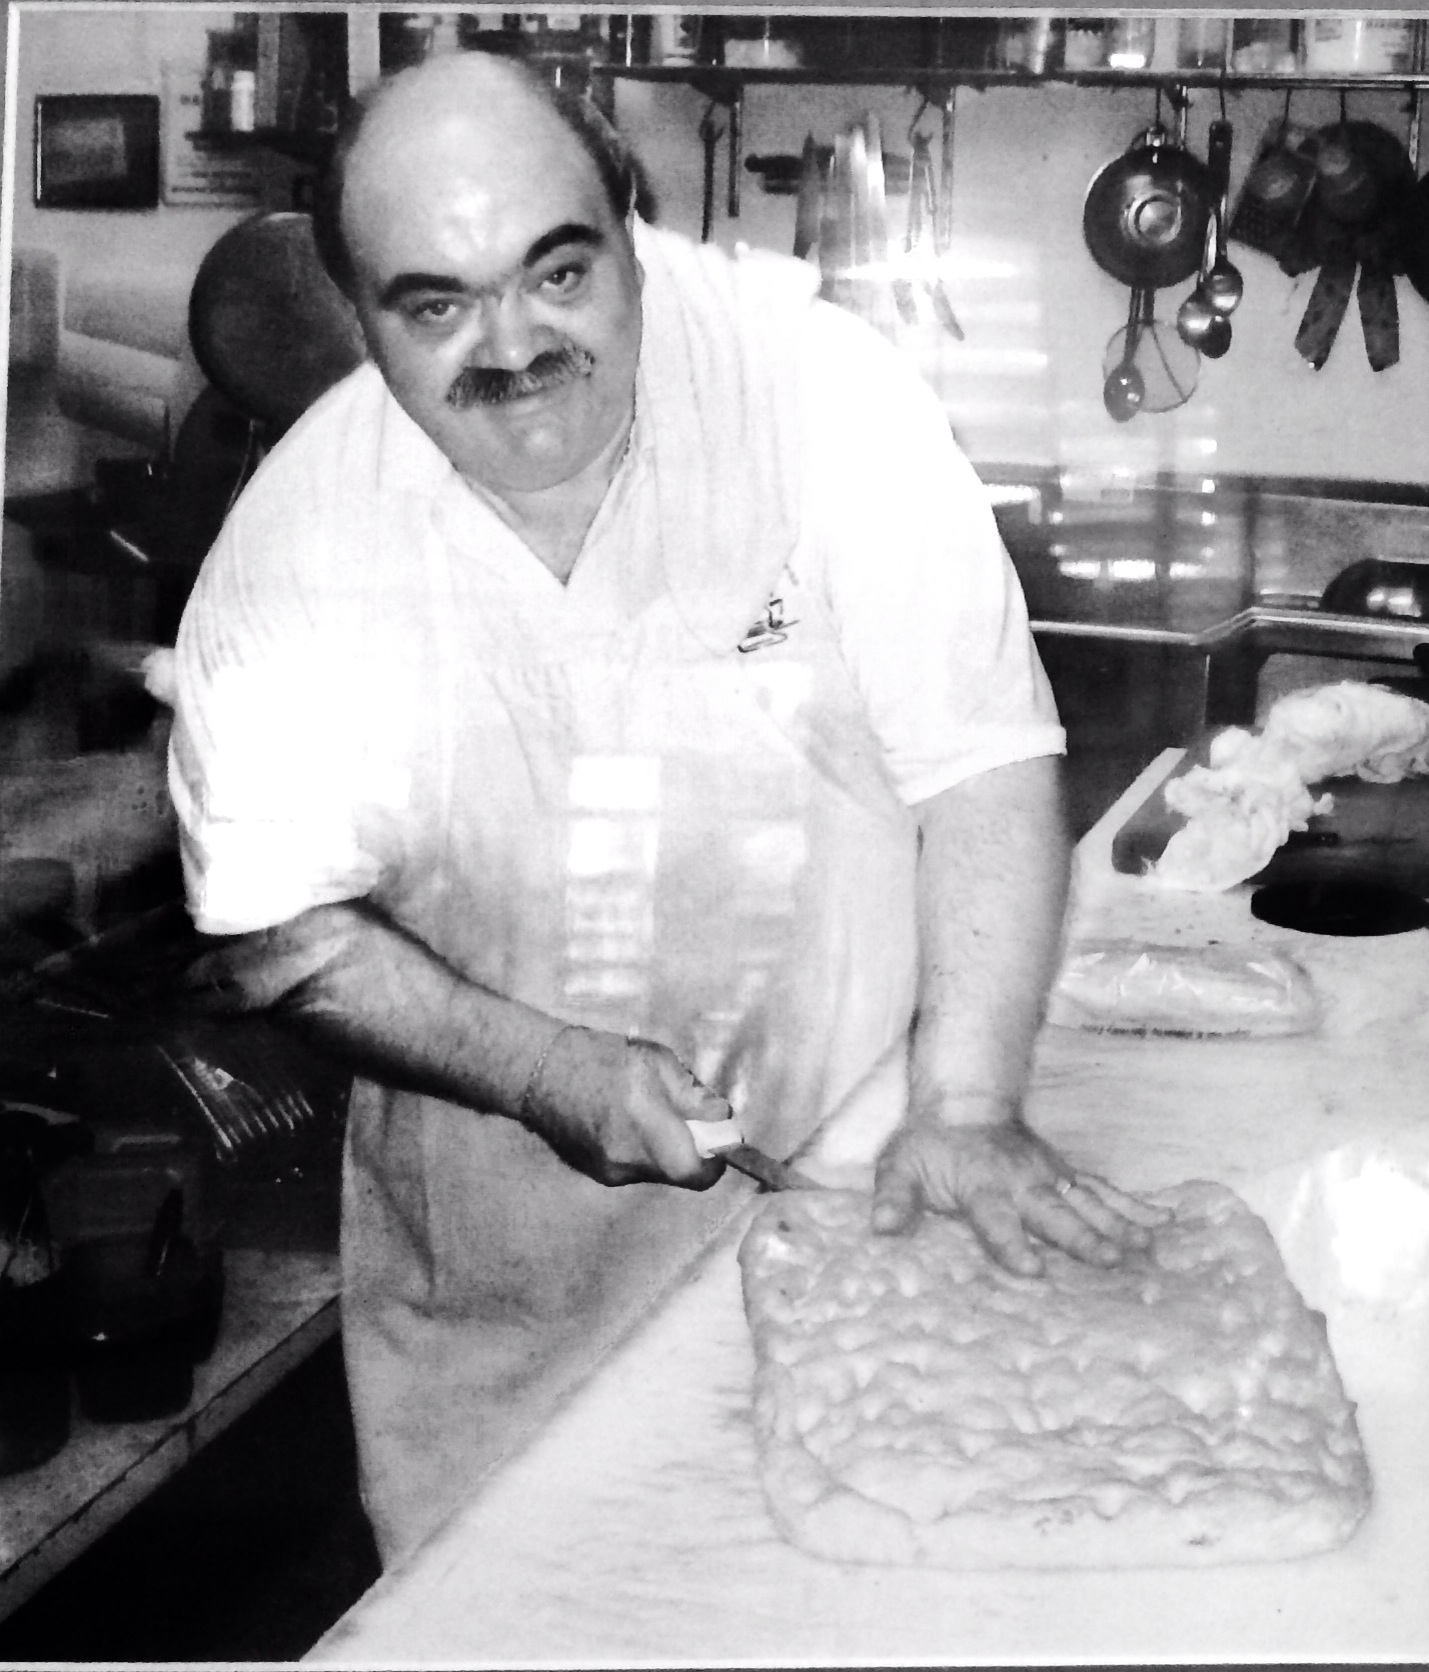
Antonio Branduzzi must be proud to have the Colangelo family celebrate his legacy by continuing the traditions and recipes of Il Piccolo Forno. As a testament to the late baker’s impeccable reputation with colleagues, customers and friends, it was no surprise when Braduzzi’s close friends Nicholas and Denese Colangelo decided to carry on the baker’s legacy.
This framed photo and tribute hangs on the wall of Colangelo’s Bakery. Antonio Branduzzi (1949-2007)
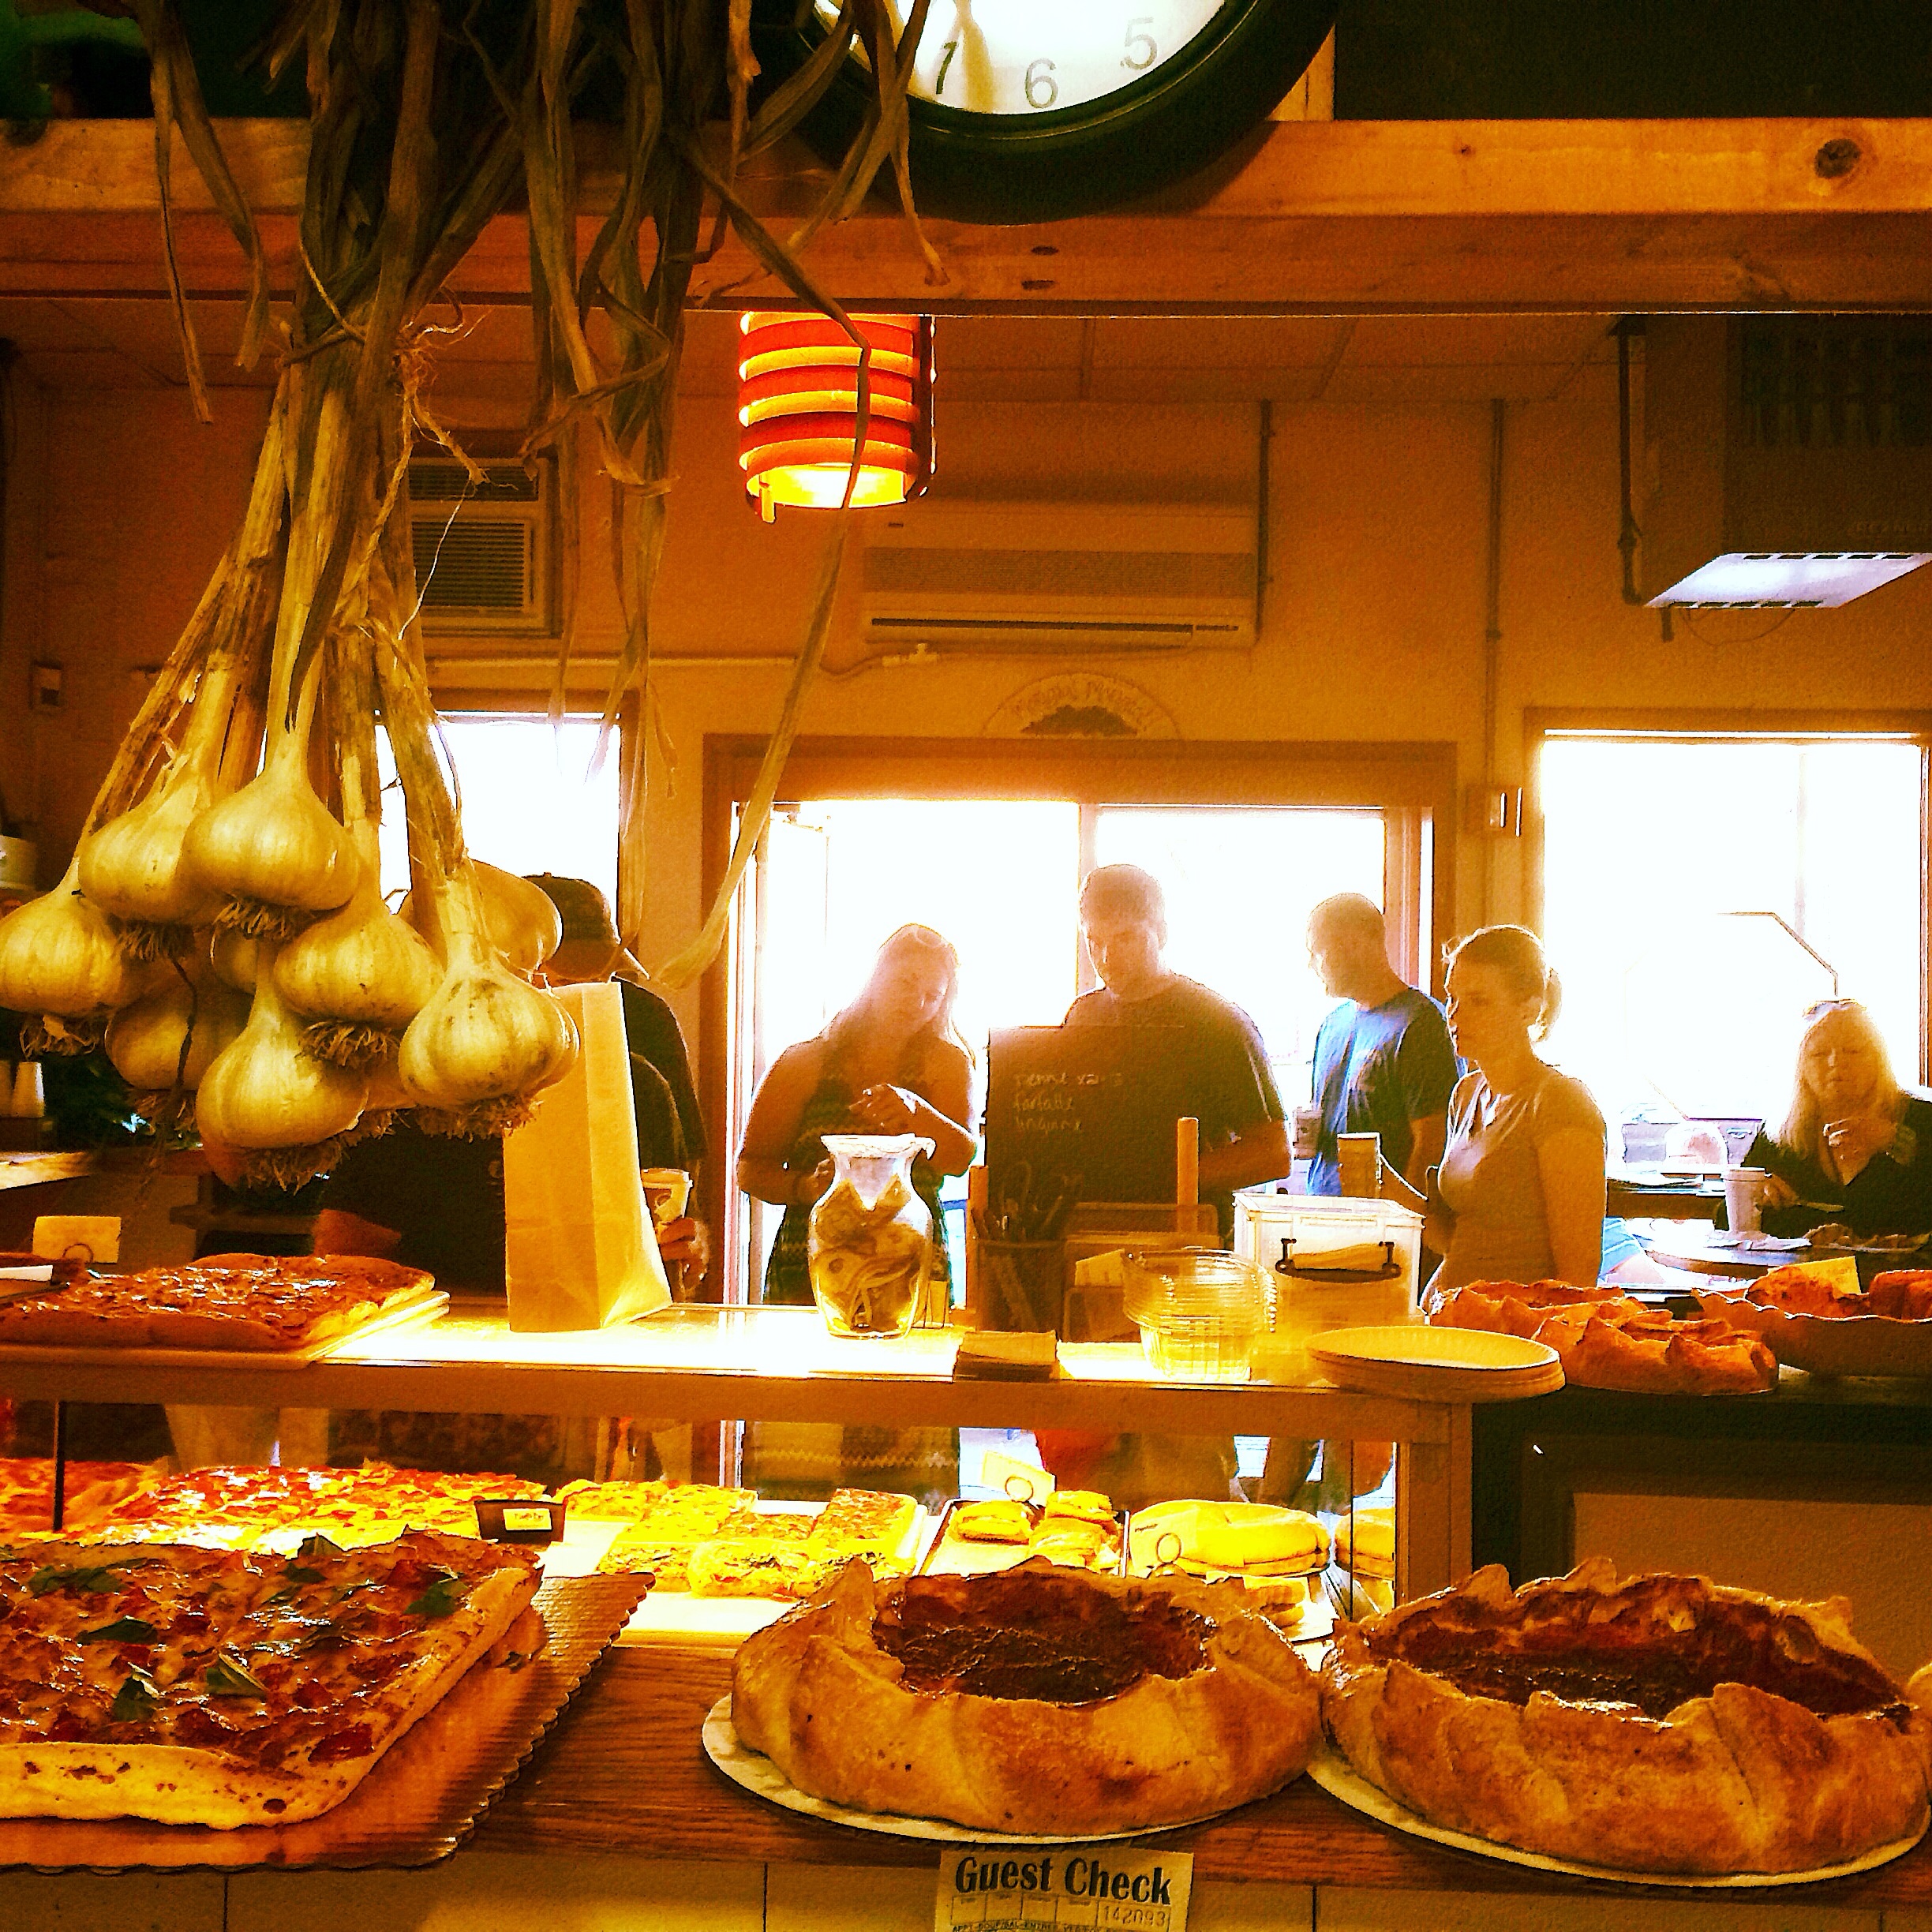
Located adjacent to La Prima Espresso Company and sharing a common walkway, Colangelo’s Bakery is a natural spot to grab a pastry or a slice. I found Colangelo’s Bakery with my kids, ages 5 and 3. They are the perfect height to spot the square pizza with the tiny pepperoni in the case. We all fell in love with this pizza.
“Mommy, Can we go to Cowangewo’s??” Would you say no to that face? This was Bella’s 3rd birthday and her birthday lunch request!
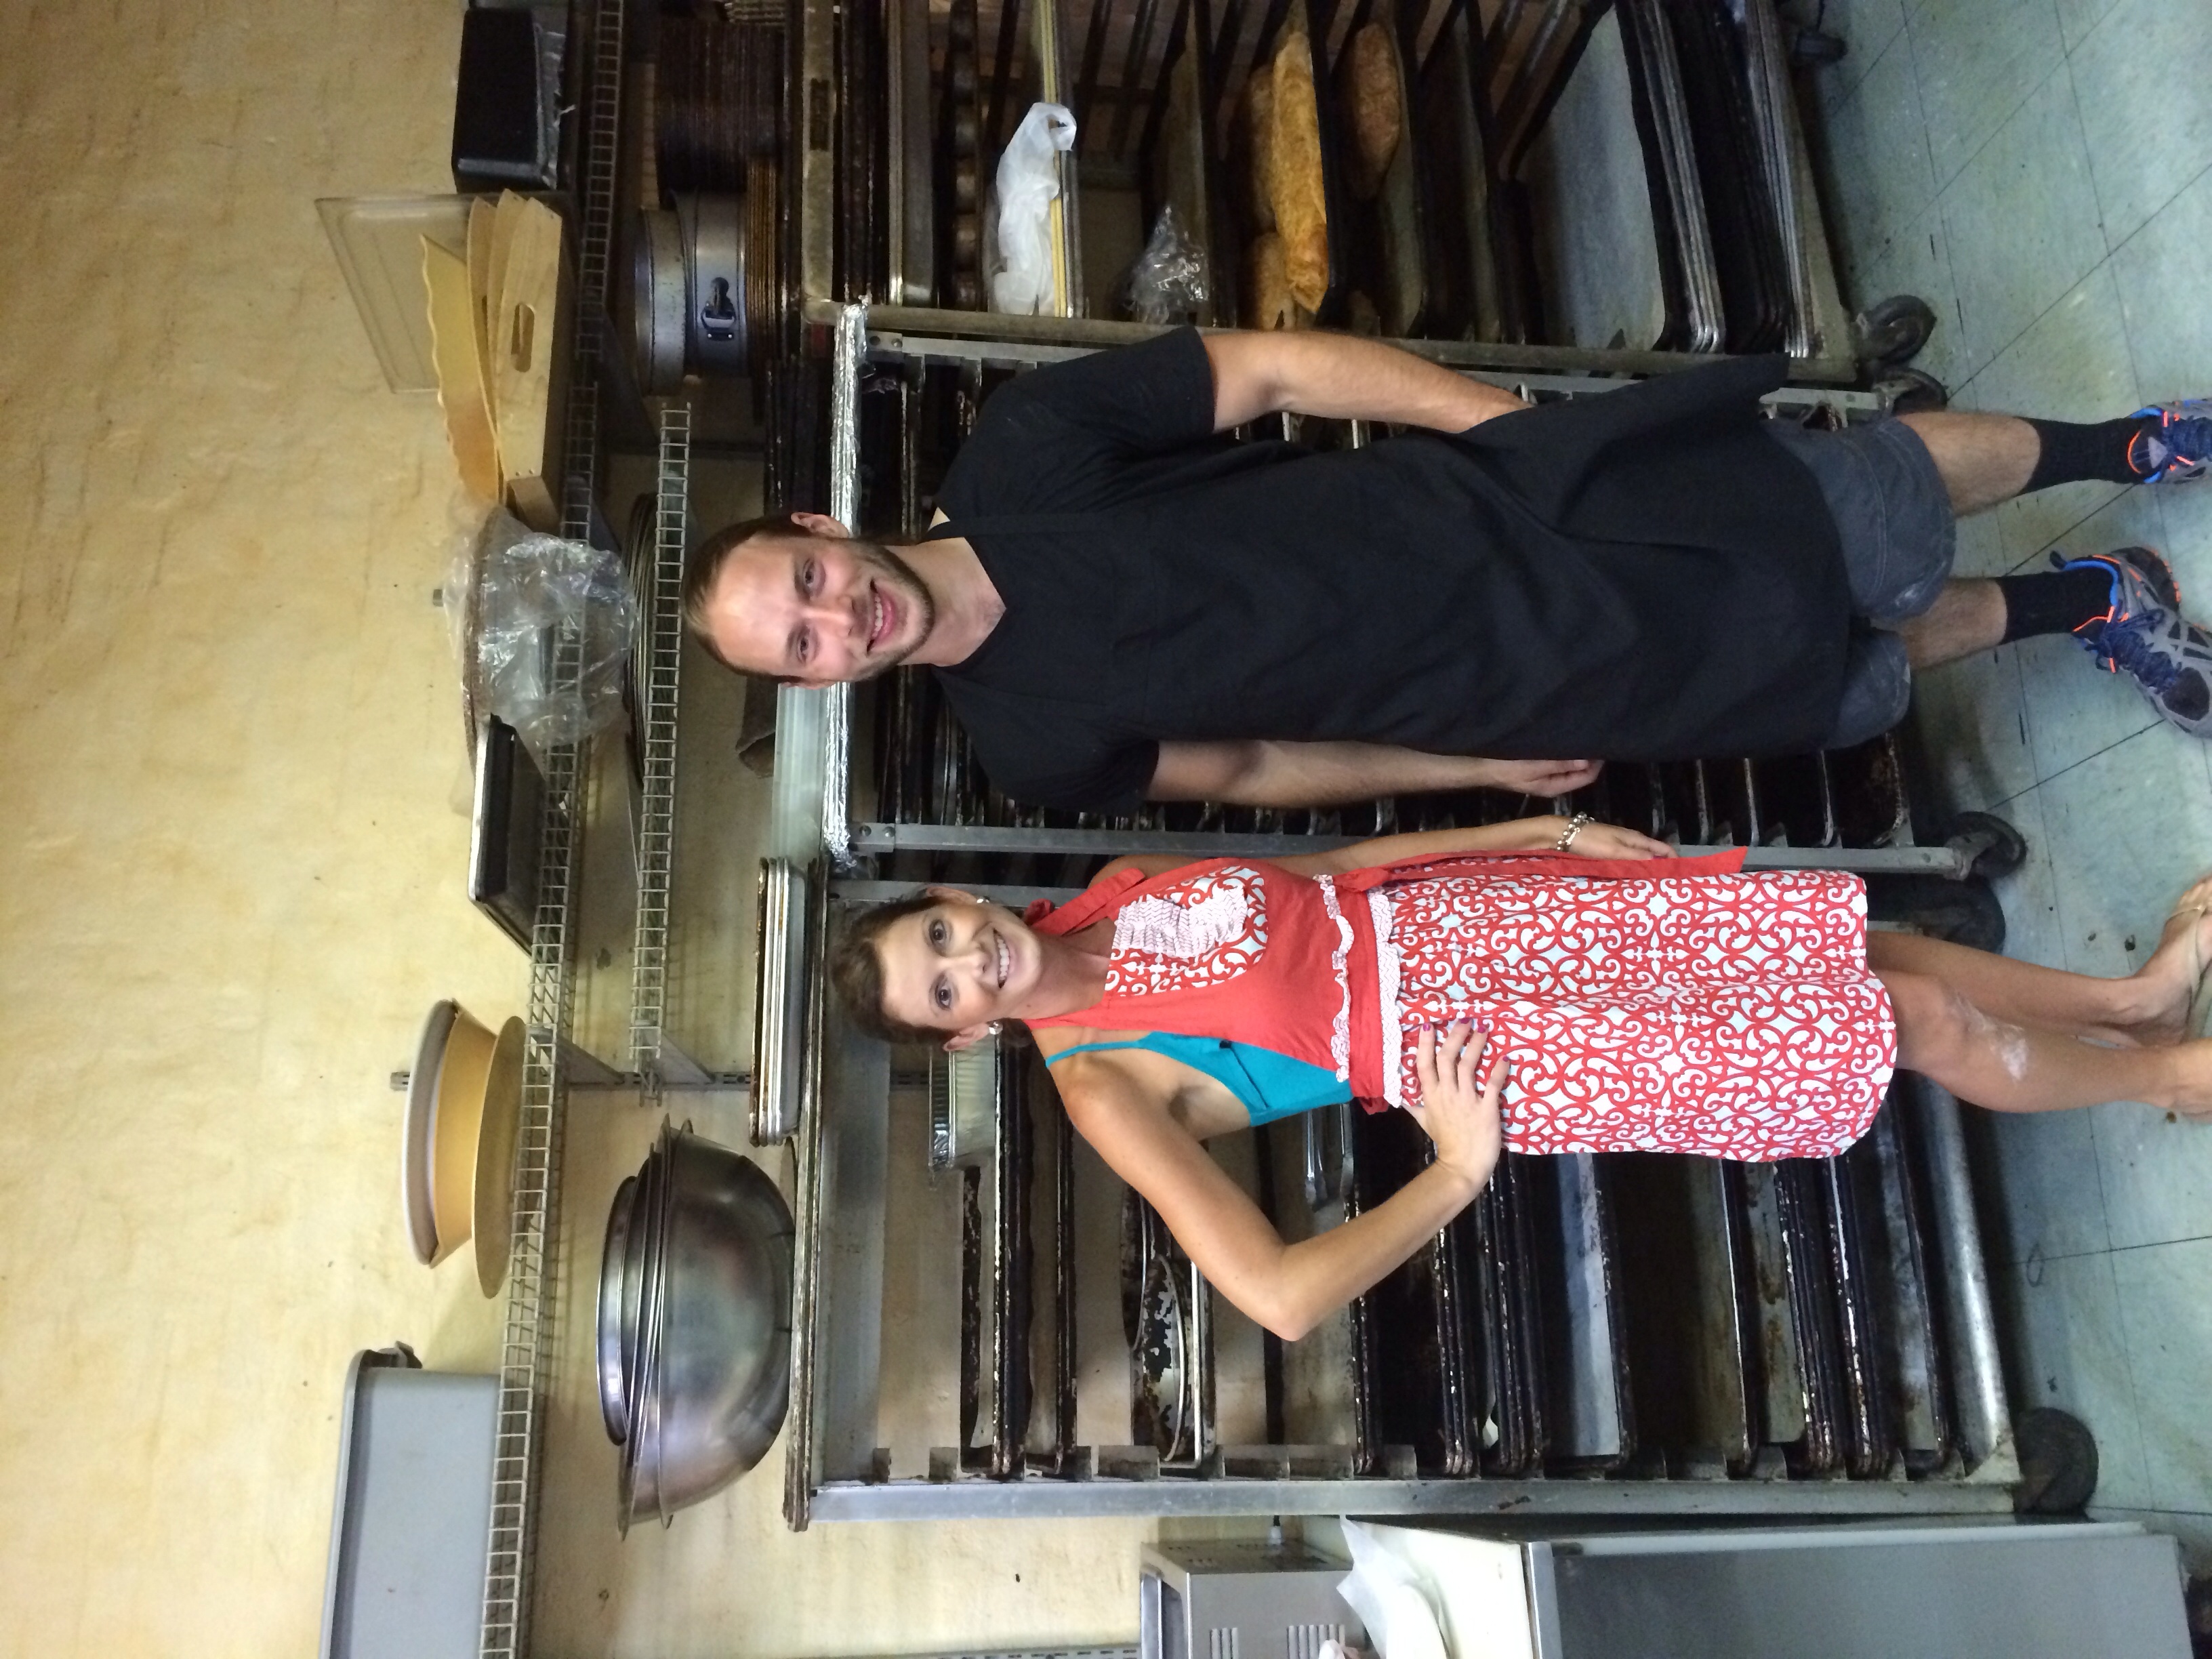
After meeting Denese Colangelo and her son Nicholas, I knew I had to make my kids’ favorite pizza and spend some time here- yeah, I already somehow felt like part of the family.
Customers are family in the quaint bakery on 21st street in Pittsburgh’s Strip District. I was introduced to many people and saw so many faces light up while ordering their “usuals.”
Located on 21st between Penn Ave. and Liberty Ave.
The vibe?
Sit outside at the tables, hover at the pub tables inside, or take it to go!
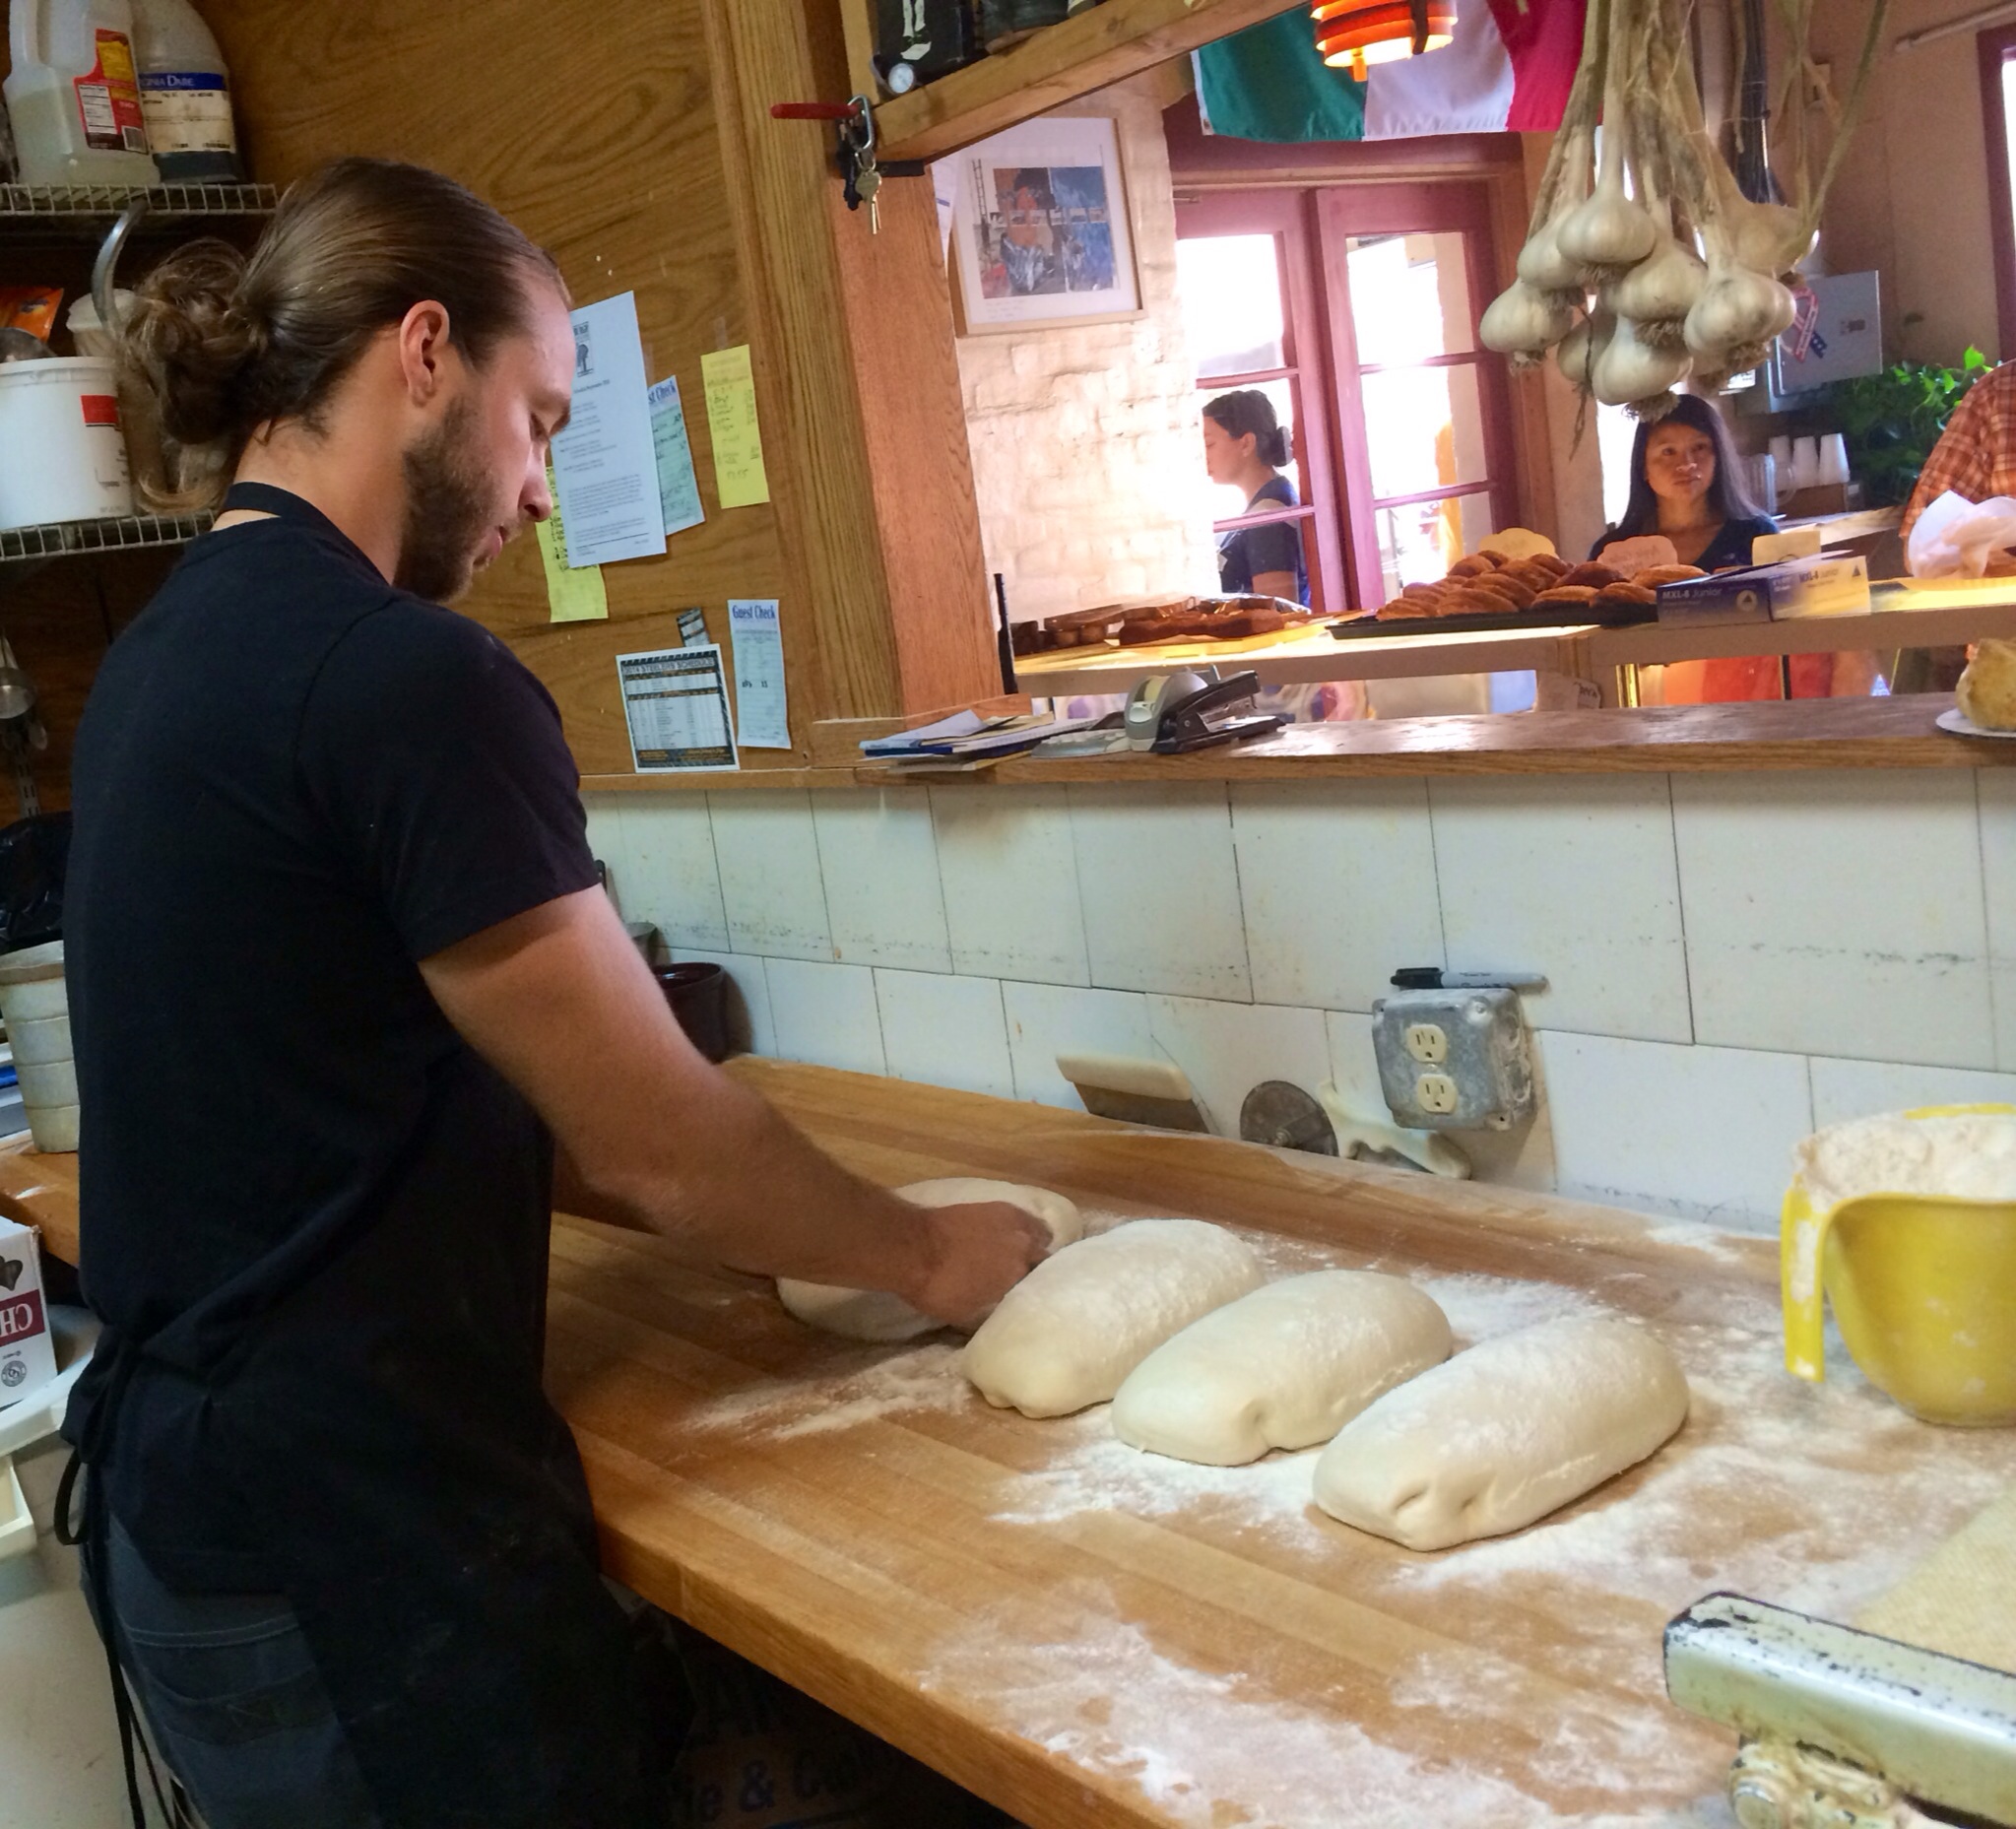
It was a busy Saturday morning and the fresh pastries lined the sill between the case and the kitchen. My eyes were bugging out of my head when Nicholas Colangelo greeted me and mentioned the pizza we would be making. As I was surrounded by frittata, mele, ricotta pie, Danish, cinnamon sticks…I thought “What?”
View from the kitchen – Colangelo’s Bakery
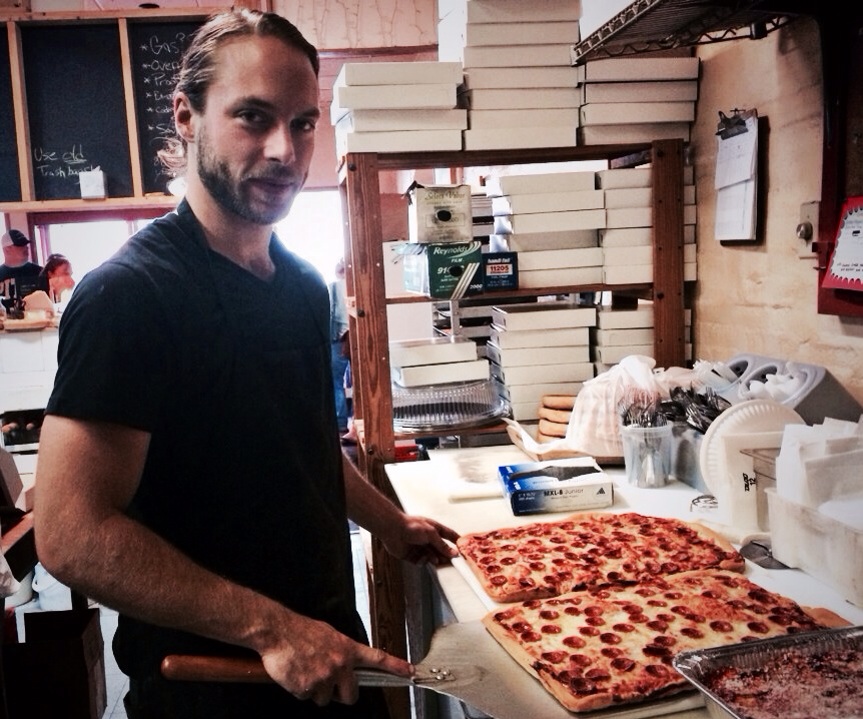
Oh yes! I nearly forgot about the square pizza with the tiny pepperoni.
Nicholas mixed the dough in his super mixer, flattened it in the sheeter, shaped it in the rectangular pan, passed over it with the docker, proofed it…
Nicholas is so passionate and motivated. A skilled baker, working many nights with his father, Nicholas is learning the biz by having side jobs at other restaurants and pizzerias. His dream? To share his love of fishing with children by co-founding the area’s first fishing school with fellow fisherman Luke Wholey. While running the family’s successful bakery/restaurant, of course.
The pizza is then topped with the finest, freshest, local ingredients and baked. Ezzo pepperoni, an old fashioned made pepperoni from Columbus, OH, to Grande mozzarella, Colangelo’s Bakery does not cut any corners.
Nicholas Colangelo and the famous square pizza with the tiny pepperoni!
A secret garlic olive oil sauce here, a sprinkle of a secret herb blend dashed there, I knew I would never be able to replicate this one! Oh well, we know where to get it!
Nicholas says the significance of the secret toppings lie in the Colangelo’s philosophy, “Add flavor after the best ingredients are used. That is what makes our food so classic and naturally delicious.”
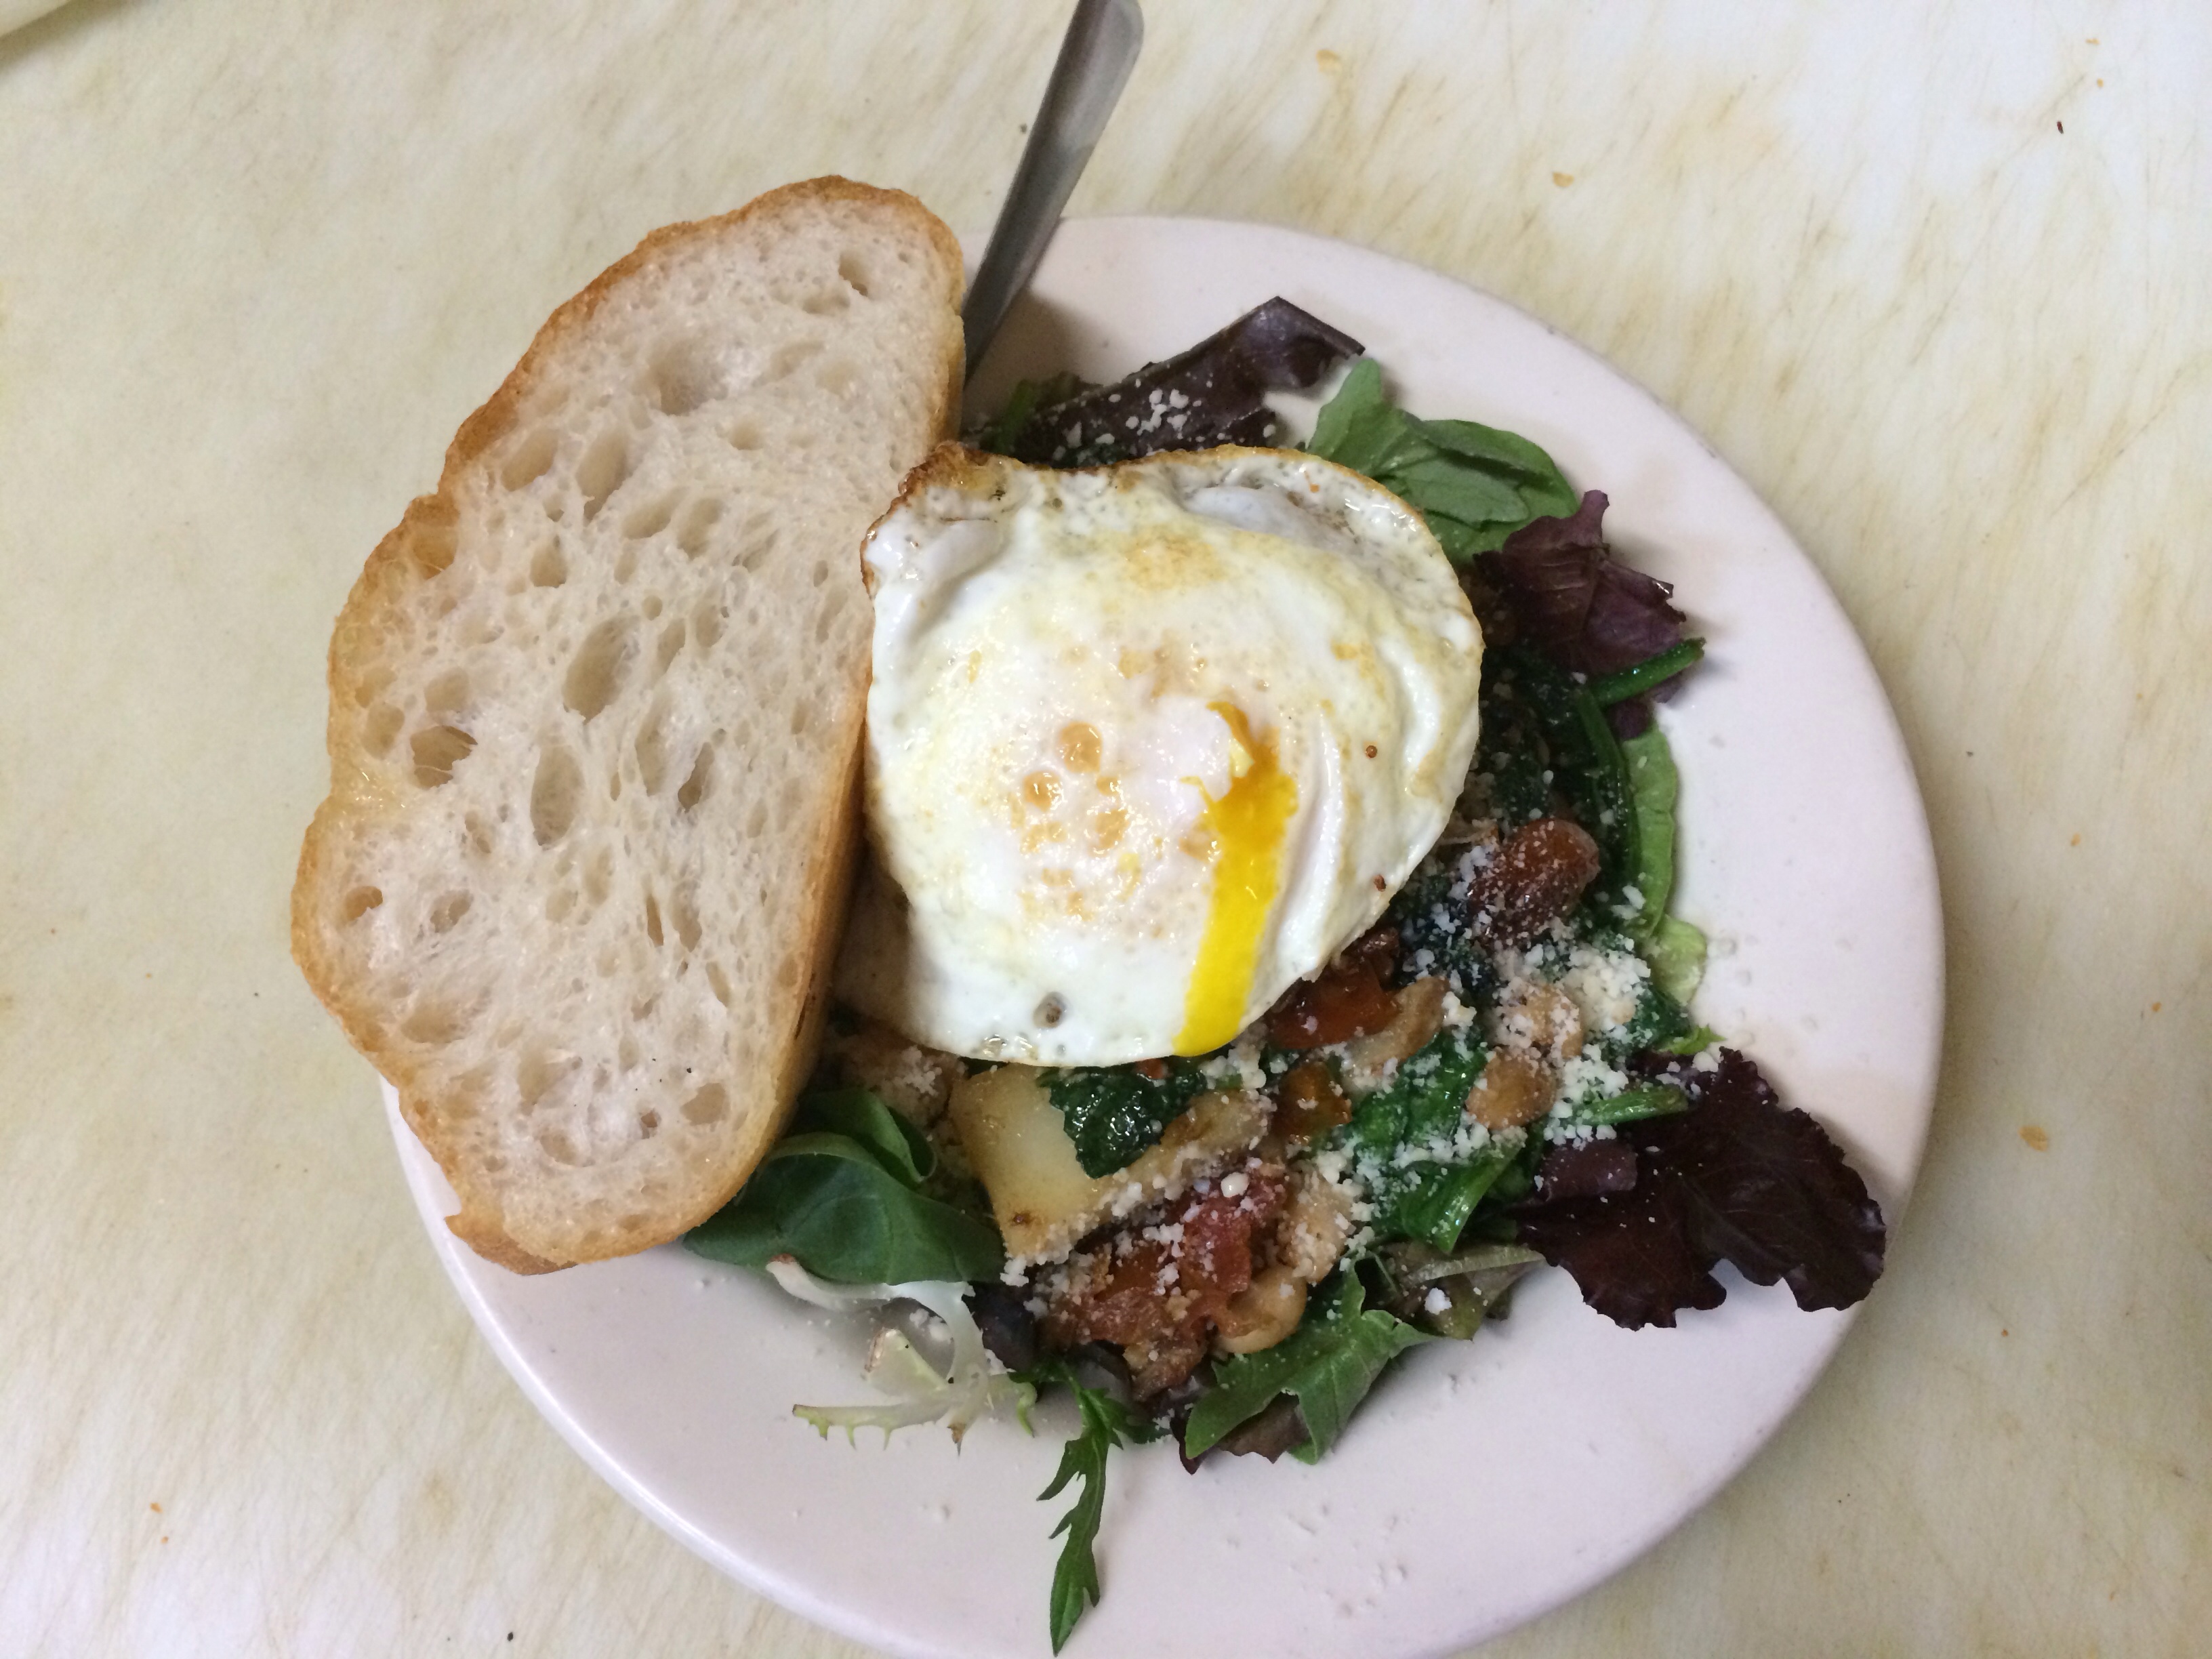
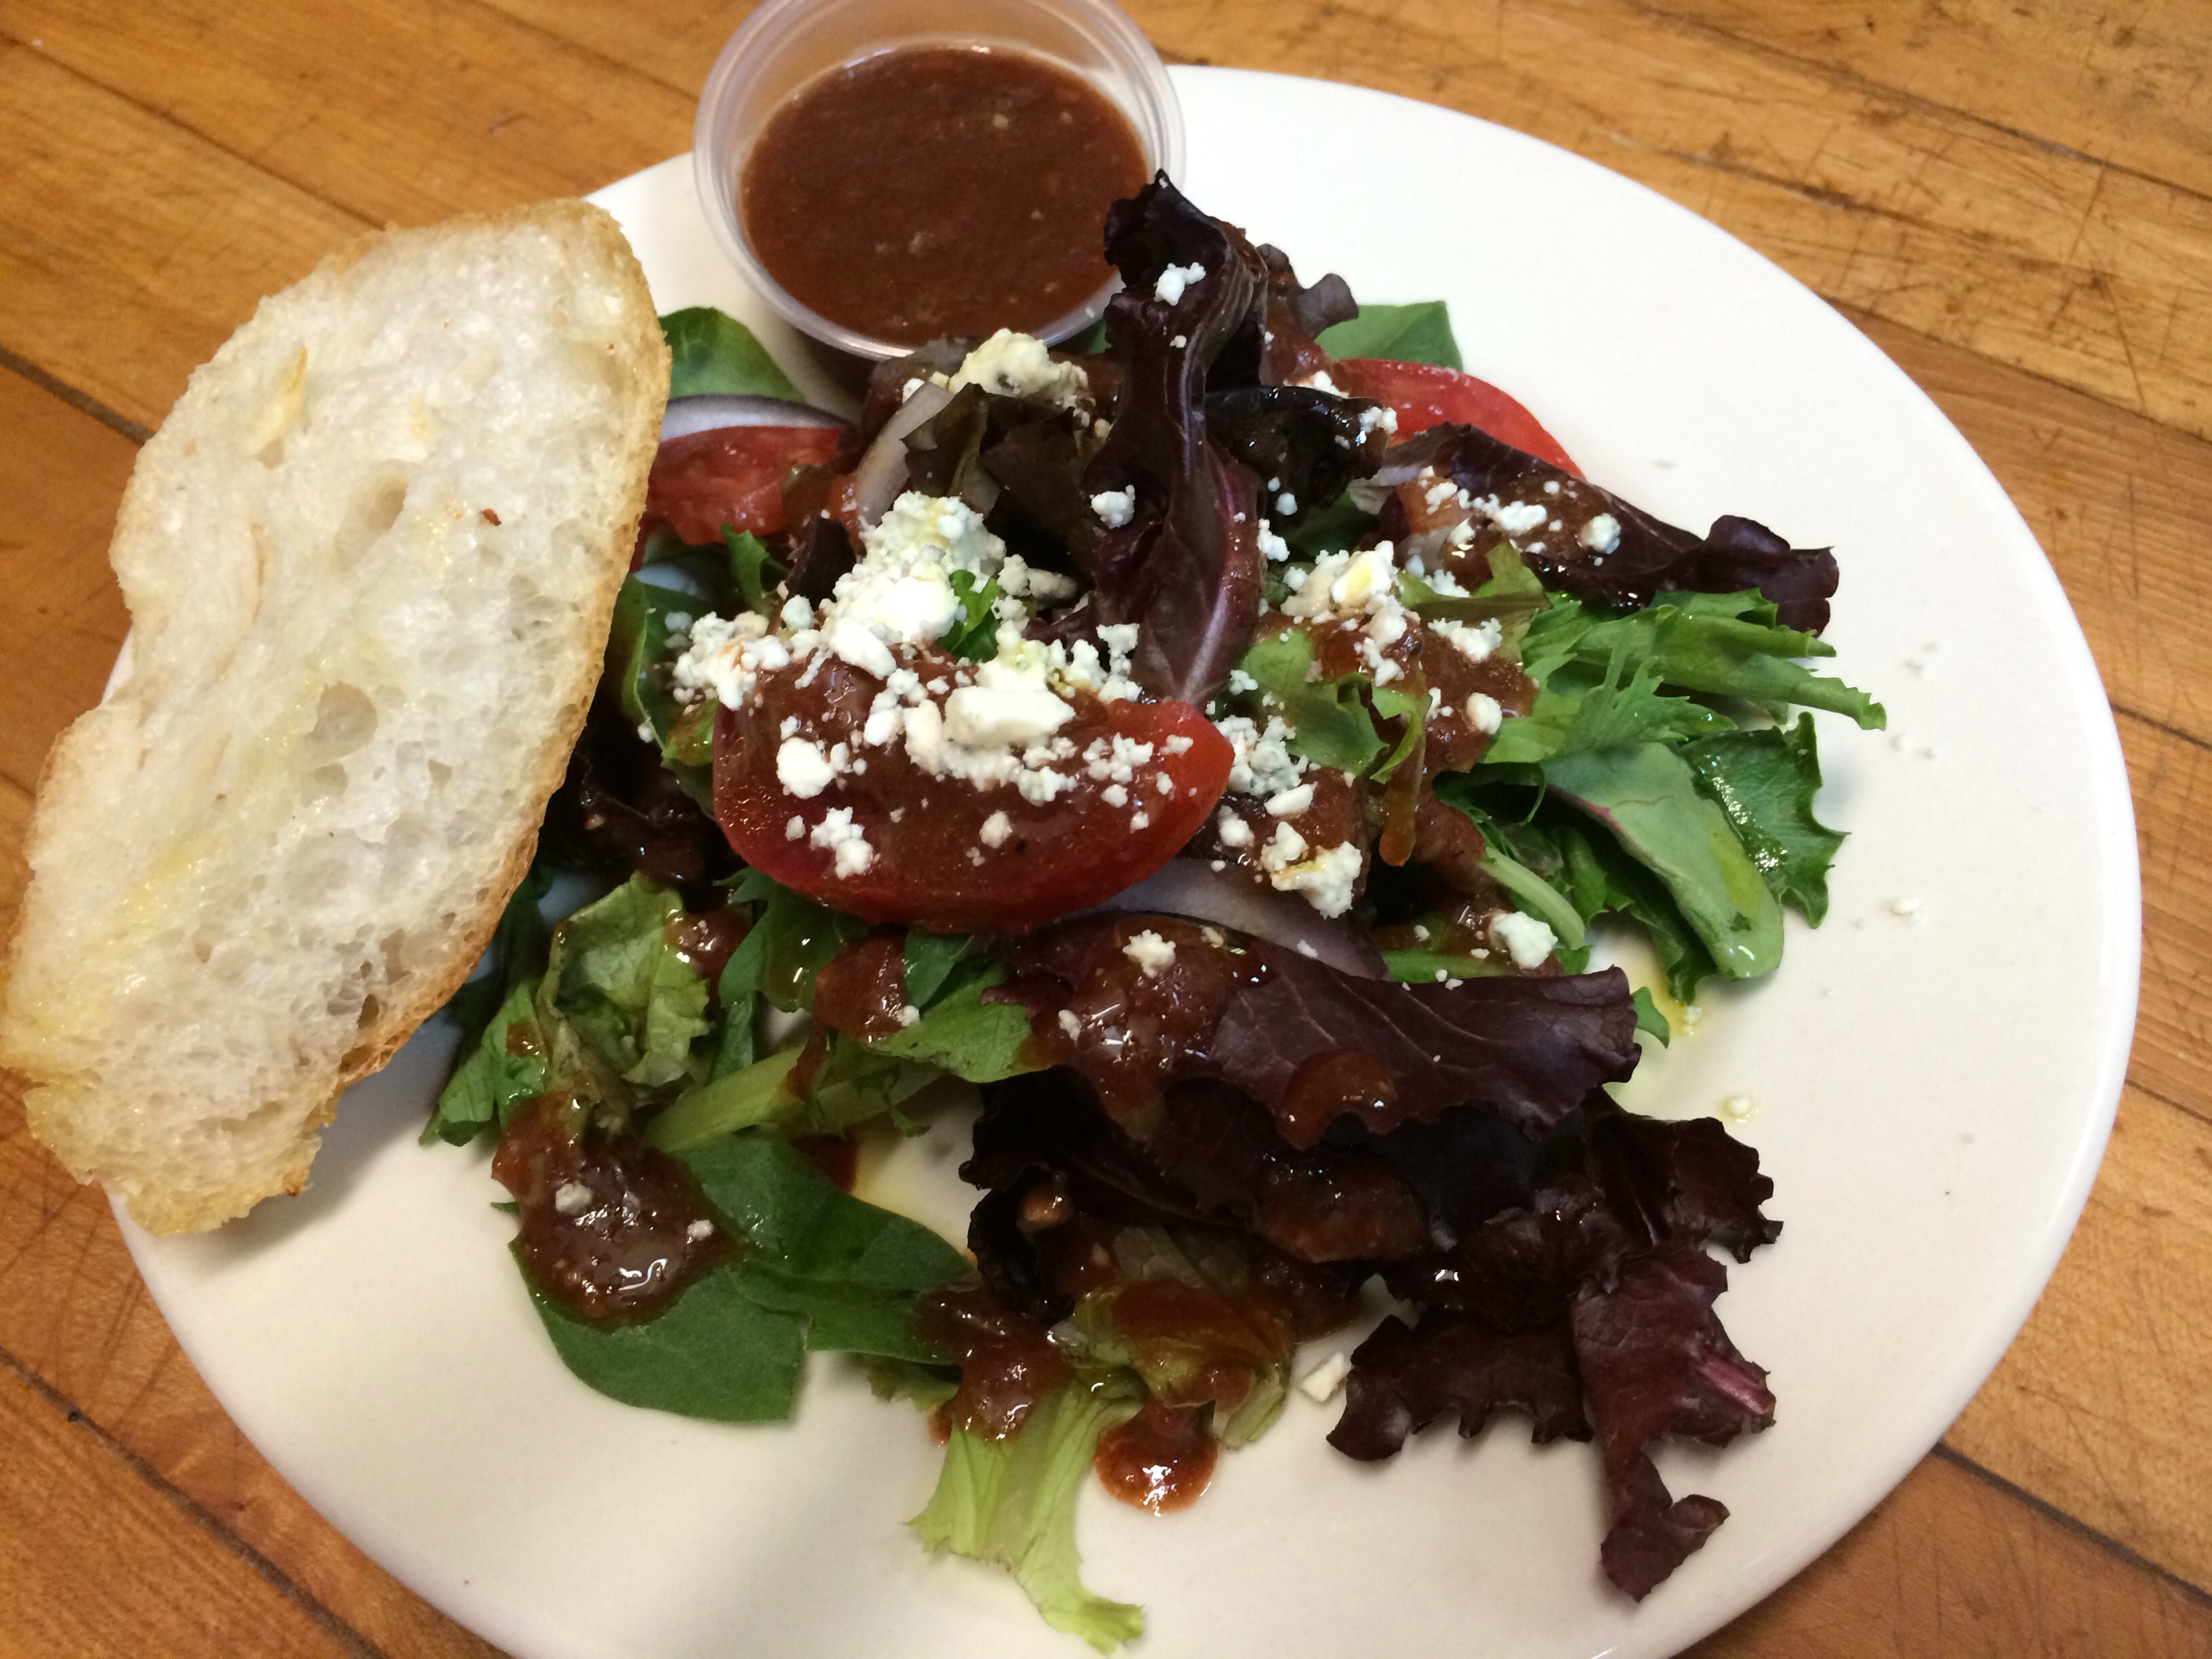
As lunch time approached, I was surprised to see the menu items being ordered. Salads, focaccia, Beans and greens? One of my favorites!
Since it was brunch-ish, Nicholas topped my beans and greens with an egg. Yummy!
While taste testing…
Denese told me the story of Antonio Branduzzi and his Mele, one of the many original recipes the bakery serves in the great baker’s honor. Once the health department questioned the refrigeration of his egg custard Mele, Branduzzi told them, it would be ruined. He made many other delicious Mele fillings after this. They sell so fast it makes no difference. One night in the refrigerator is ok, says Denese.
So since that Saturday morning, I have visited Colangelo’s Bakery and had the beans and greens with sausage, the cannoli, the avocado salad, the ricotta pie and much more. The place that was once only the square pizza with the tiny pepperoni is now Colangelo’s Bakery. Everything is Delicious. Perfect. Amazing.
Denese makes the house salad dressing. A tomato vinaigrette! Delicious and refreshing! The bread??? Warm, fresh…amazing!
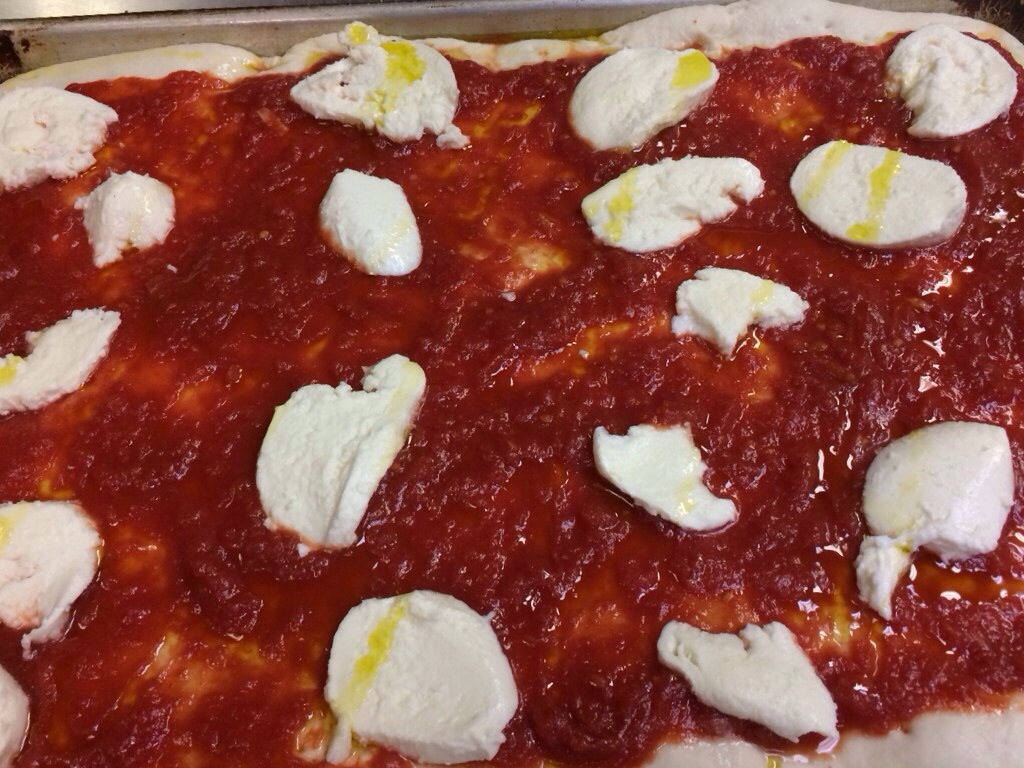
Margherita Pizza
(Inspired by Nicholas at Colangelo’s Bakery)
One of the most basic and most delicious pizzas.
To make traditional Margherita pizza,
Cover dough’s surface in your favorite sauce, or chunky tomatoes drained,leaving a 1/2 inch border.
Add sliced buffalo mozzarella.
Drizzle olive oil.
Salt and pepper.
Bake at 400 degrees until cheese is melted and bottom is golden brown.
Remove from oven and top with fresh basil.
Enjoy!
Traditional Margherita Pizza prepped!I learned so much! And had a blast! Thank you! XOXO
Thank you Colangelo’s for having me, allowing me to cook with you, and becoming part of your “family.” It is an honor to know and to be able to share Antonio Branduzzi’s legacy with others.
Another quick back to school meal is a 20 minute pan sauce! Throw in some veggies and superfoods and you have a healthy, easy dinner!
We enjoy superfood kale in a pan sauce, on our pizza, and even baked into kale chips!
Kale chip recipe:
http://www.parmesanprincess.com/2014/04/10/super-chips-garlic-parmesan-baked-kale-chips/
My kids love to pick out pastas when we are at the store. One of their favorites is orecchiette, Italian meaning ears, or spaceships, or planets, so they say.
The names the kids come up with are so funny! Big springs, little springs, little seashells, tubes, strings!
When kids get involved in the dinner process, they are more likely to eat the meal, even if it is full of healthy vegetables!
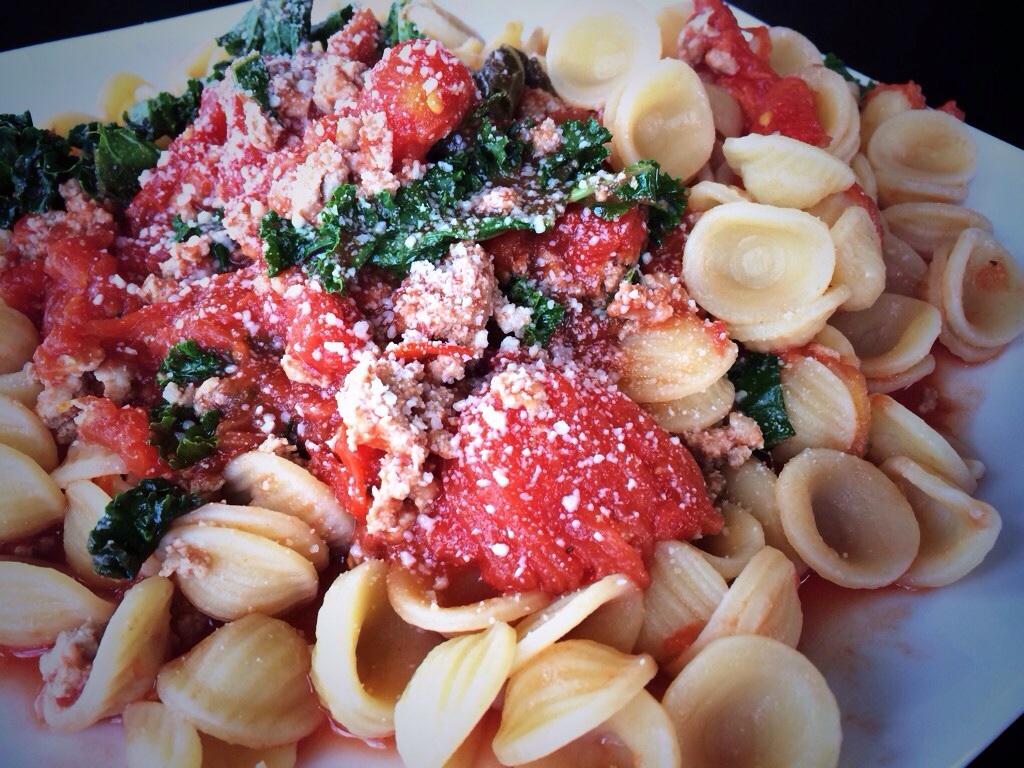
Tomato Kale Orecchiette!
Turkey Kale Orecchiette
Ingredients:
2 tbsp. Olive oil
2 cloves garlic, pressed
1 small onion, chopped
1 lb. lean white meat ground turkey
1 35oz. can San Marzano tomatoes
1 -1/2 cup kale, washed and chopped
1 tbsp. Chopped basil
1 tbsp. Chopped rosemary
1 tbsp. Chopped thyme
Salt/pepper
1 lb. orecchiette pasta
Fresh grated Parmesan cheese
Directions:
Heat oil on medium heat in a your deepest frying pan.
Press garlic and cook until softened, 5 minutes.
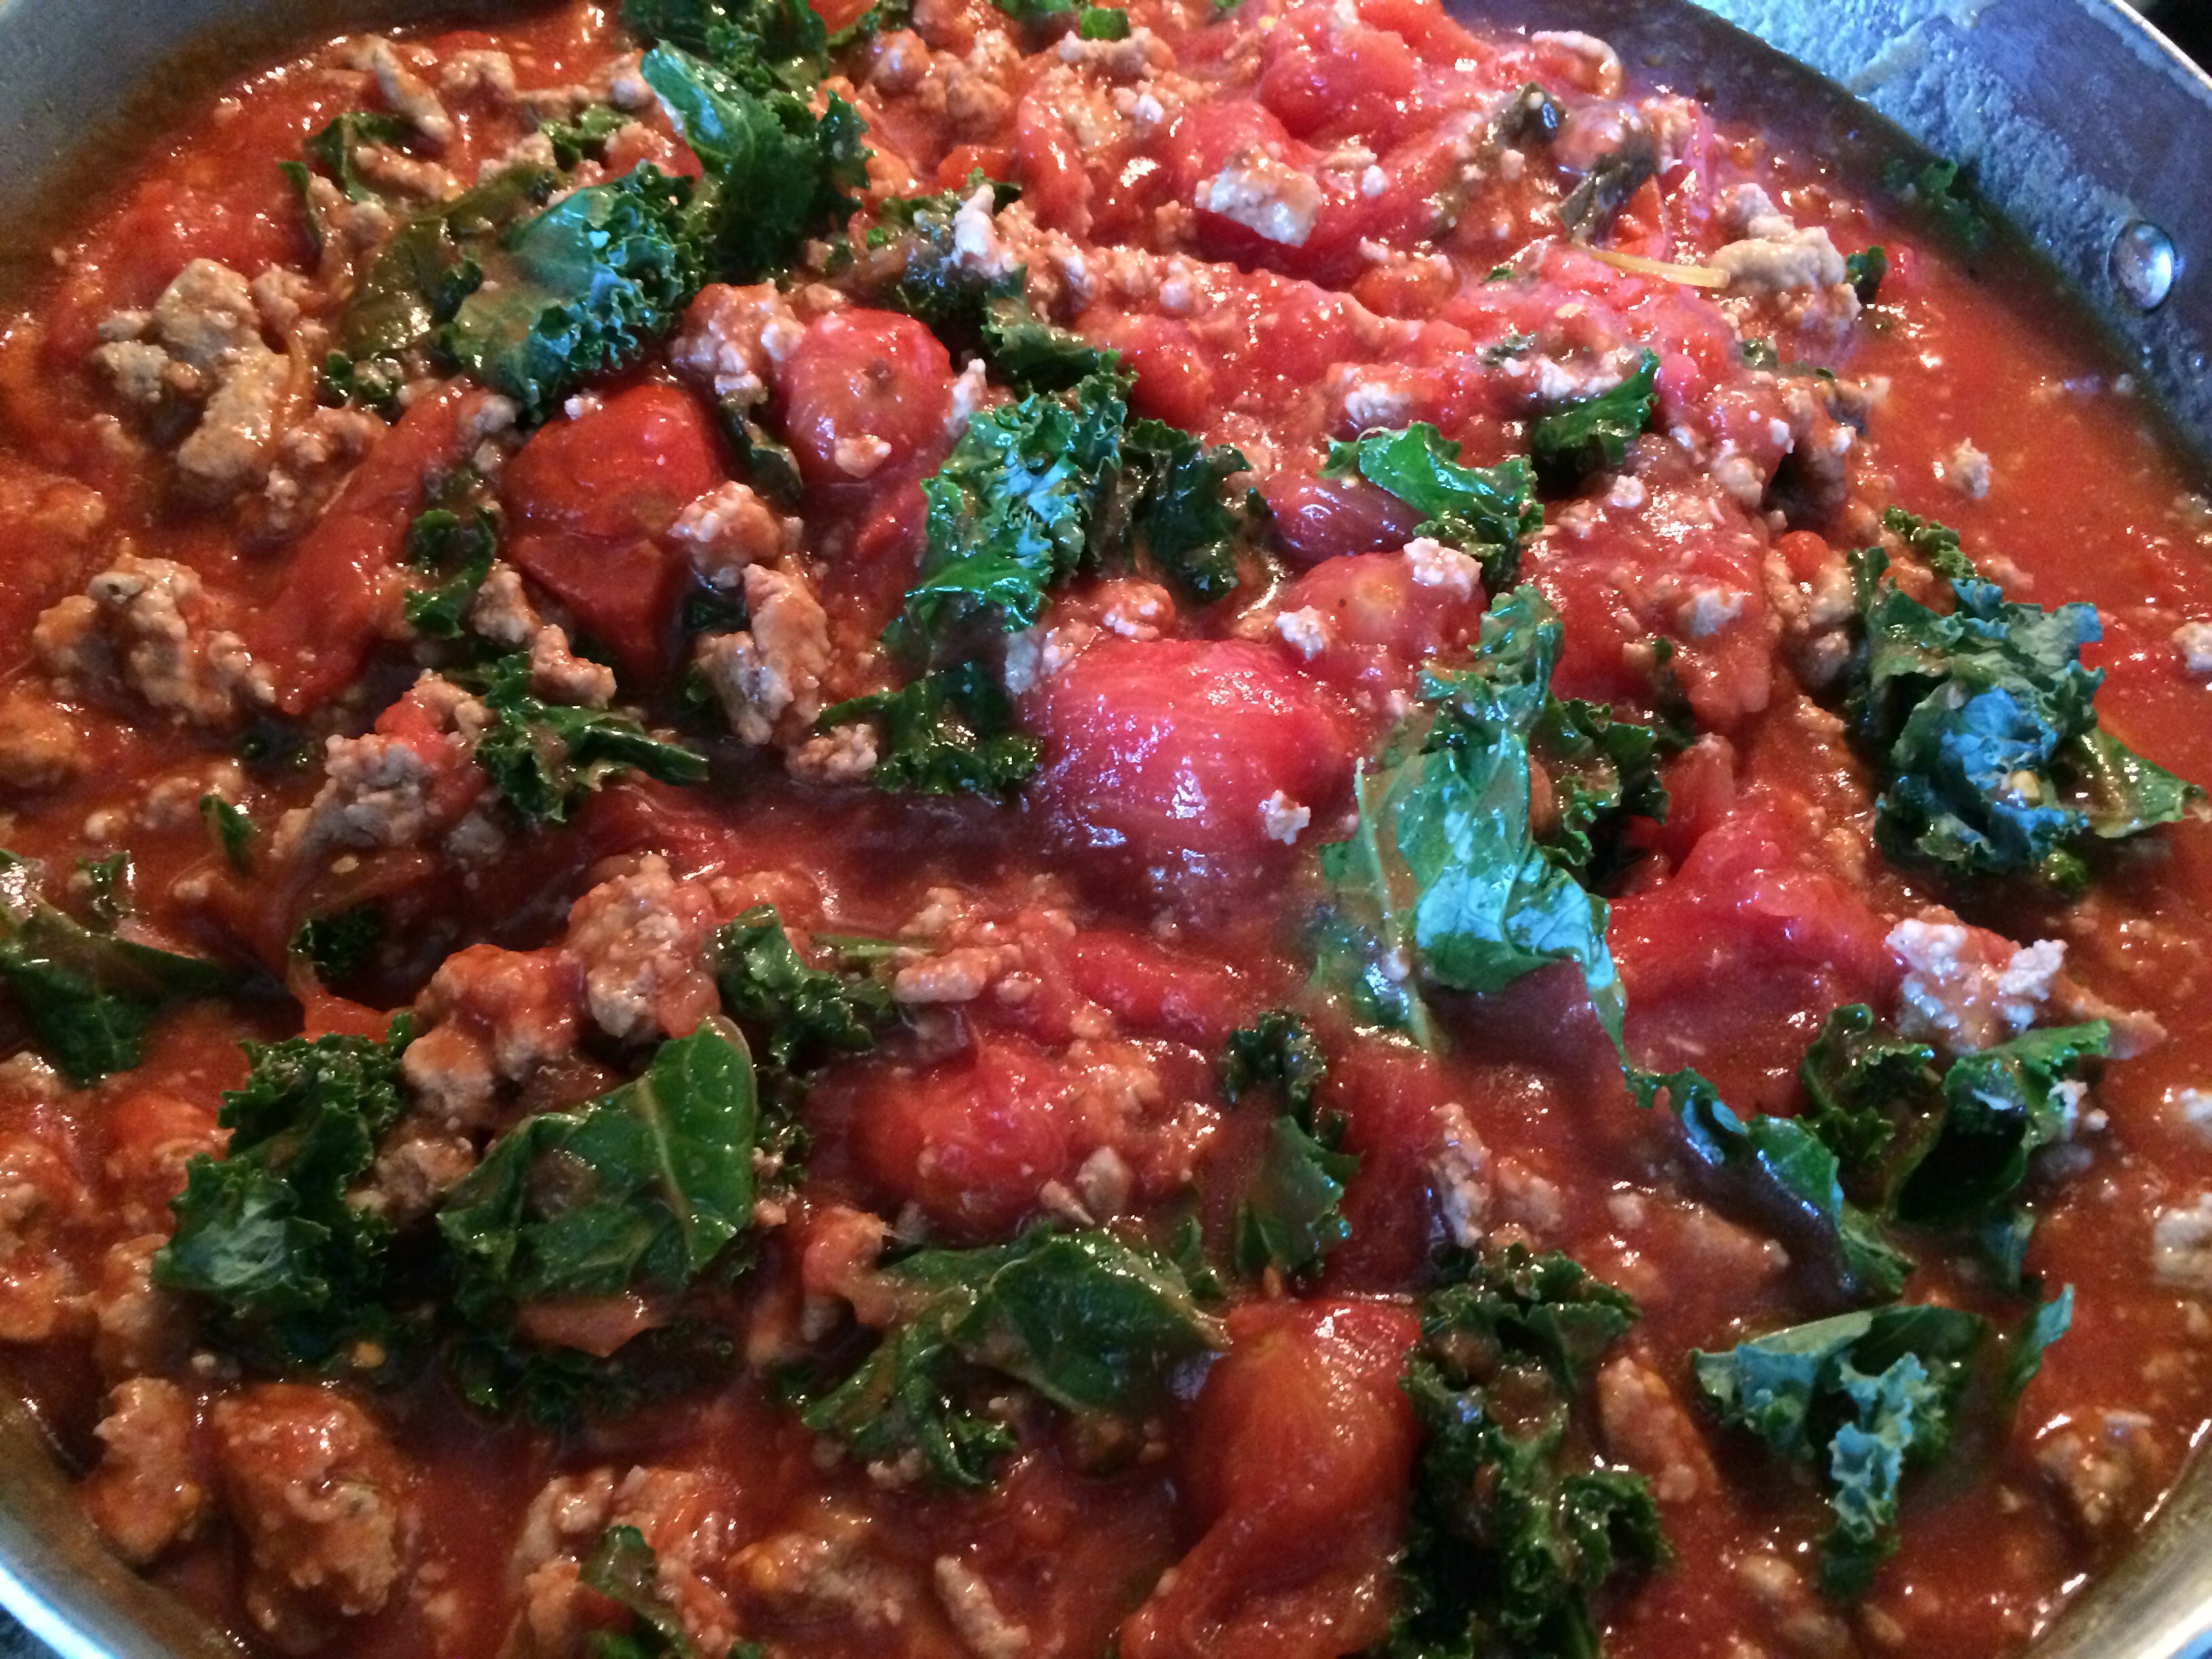
Add the turkey and cook until no longer pink. Drain any fat.
Add onion, tomatoes, basil, rosemary, thyme, salt and pepper and cook for 10 minutes until
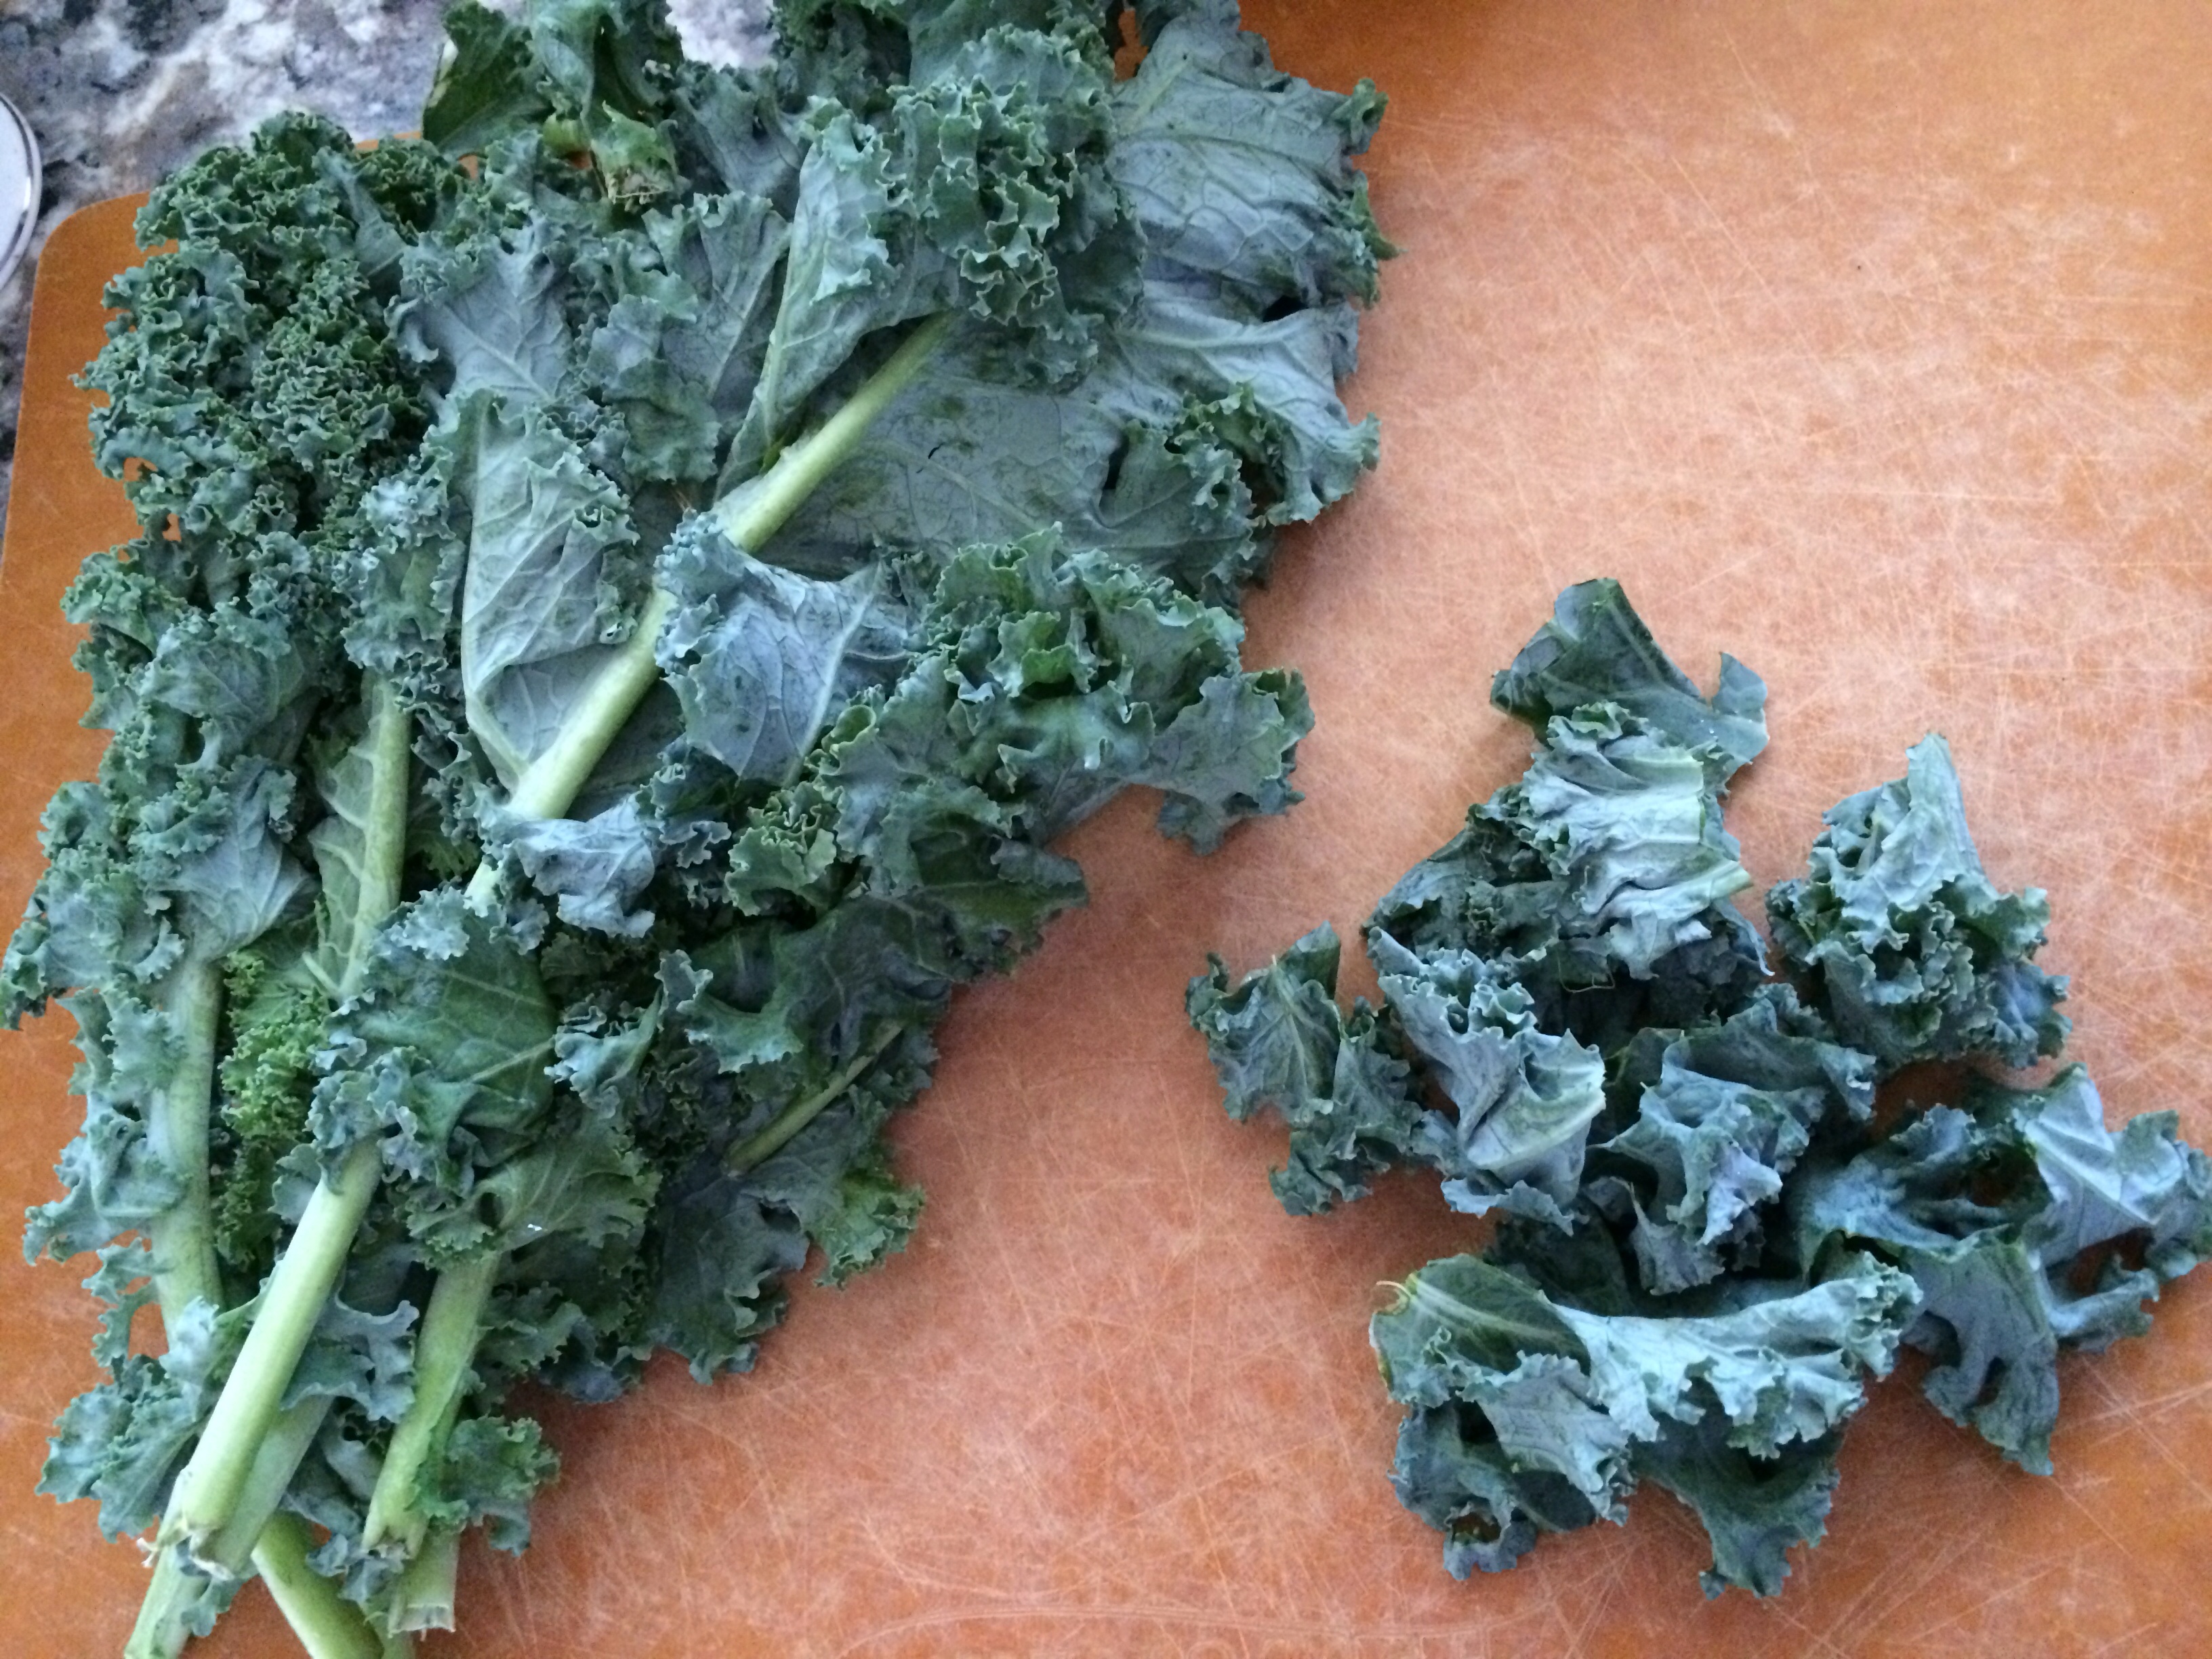
Separate the curly kale leaves from the middle stem and chop.
heated trough.
Add the kale last and mix well.
Chop up the tomatoes while stirring.
Meanwhile, boil a pot of water to cook the pasta according to the package instructions and drain.
Add the orecchiette to the pan and mix.
Always top with fresh grated Parmesan cheese! Enjoy!
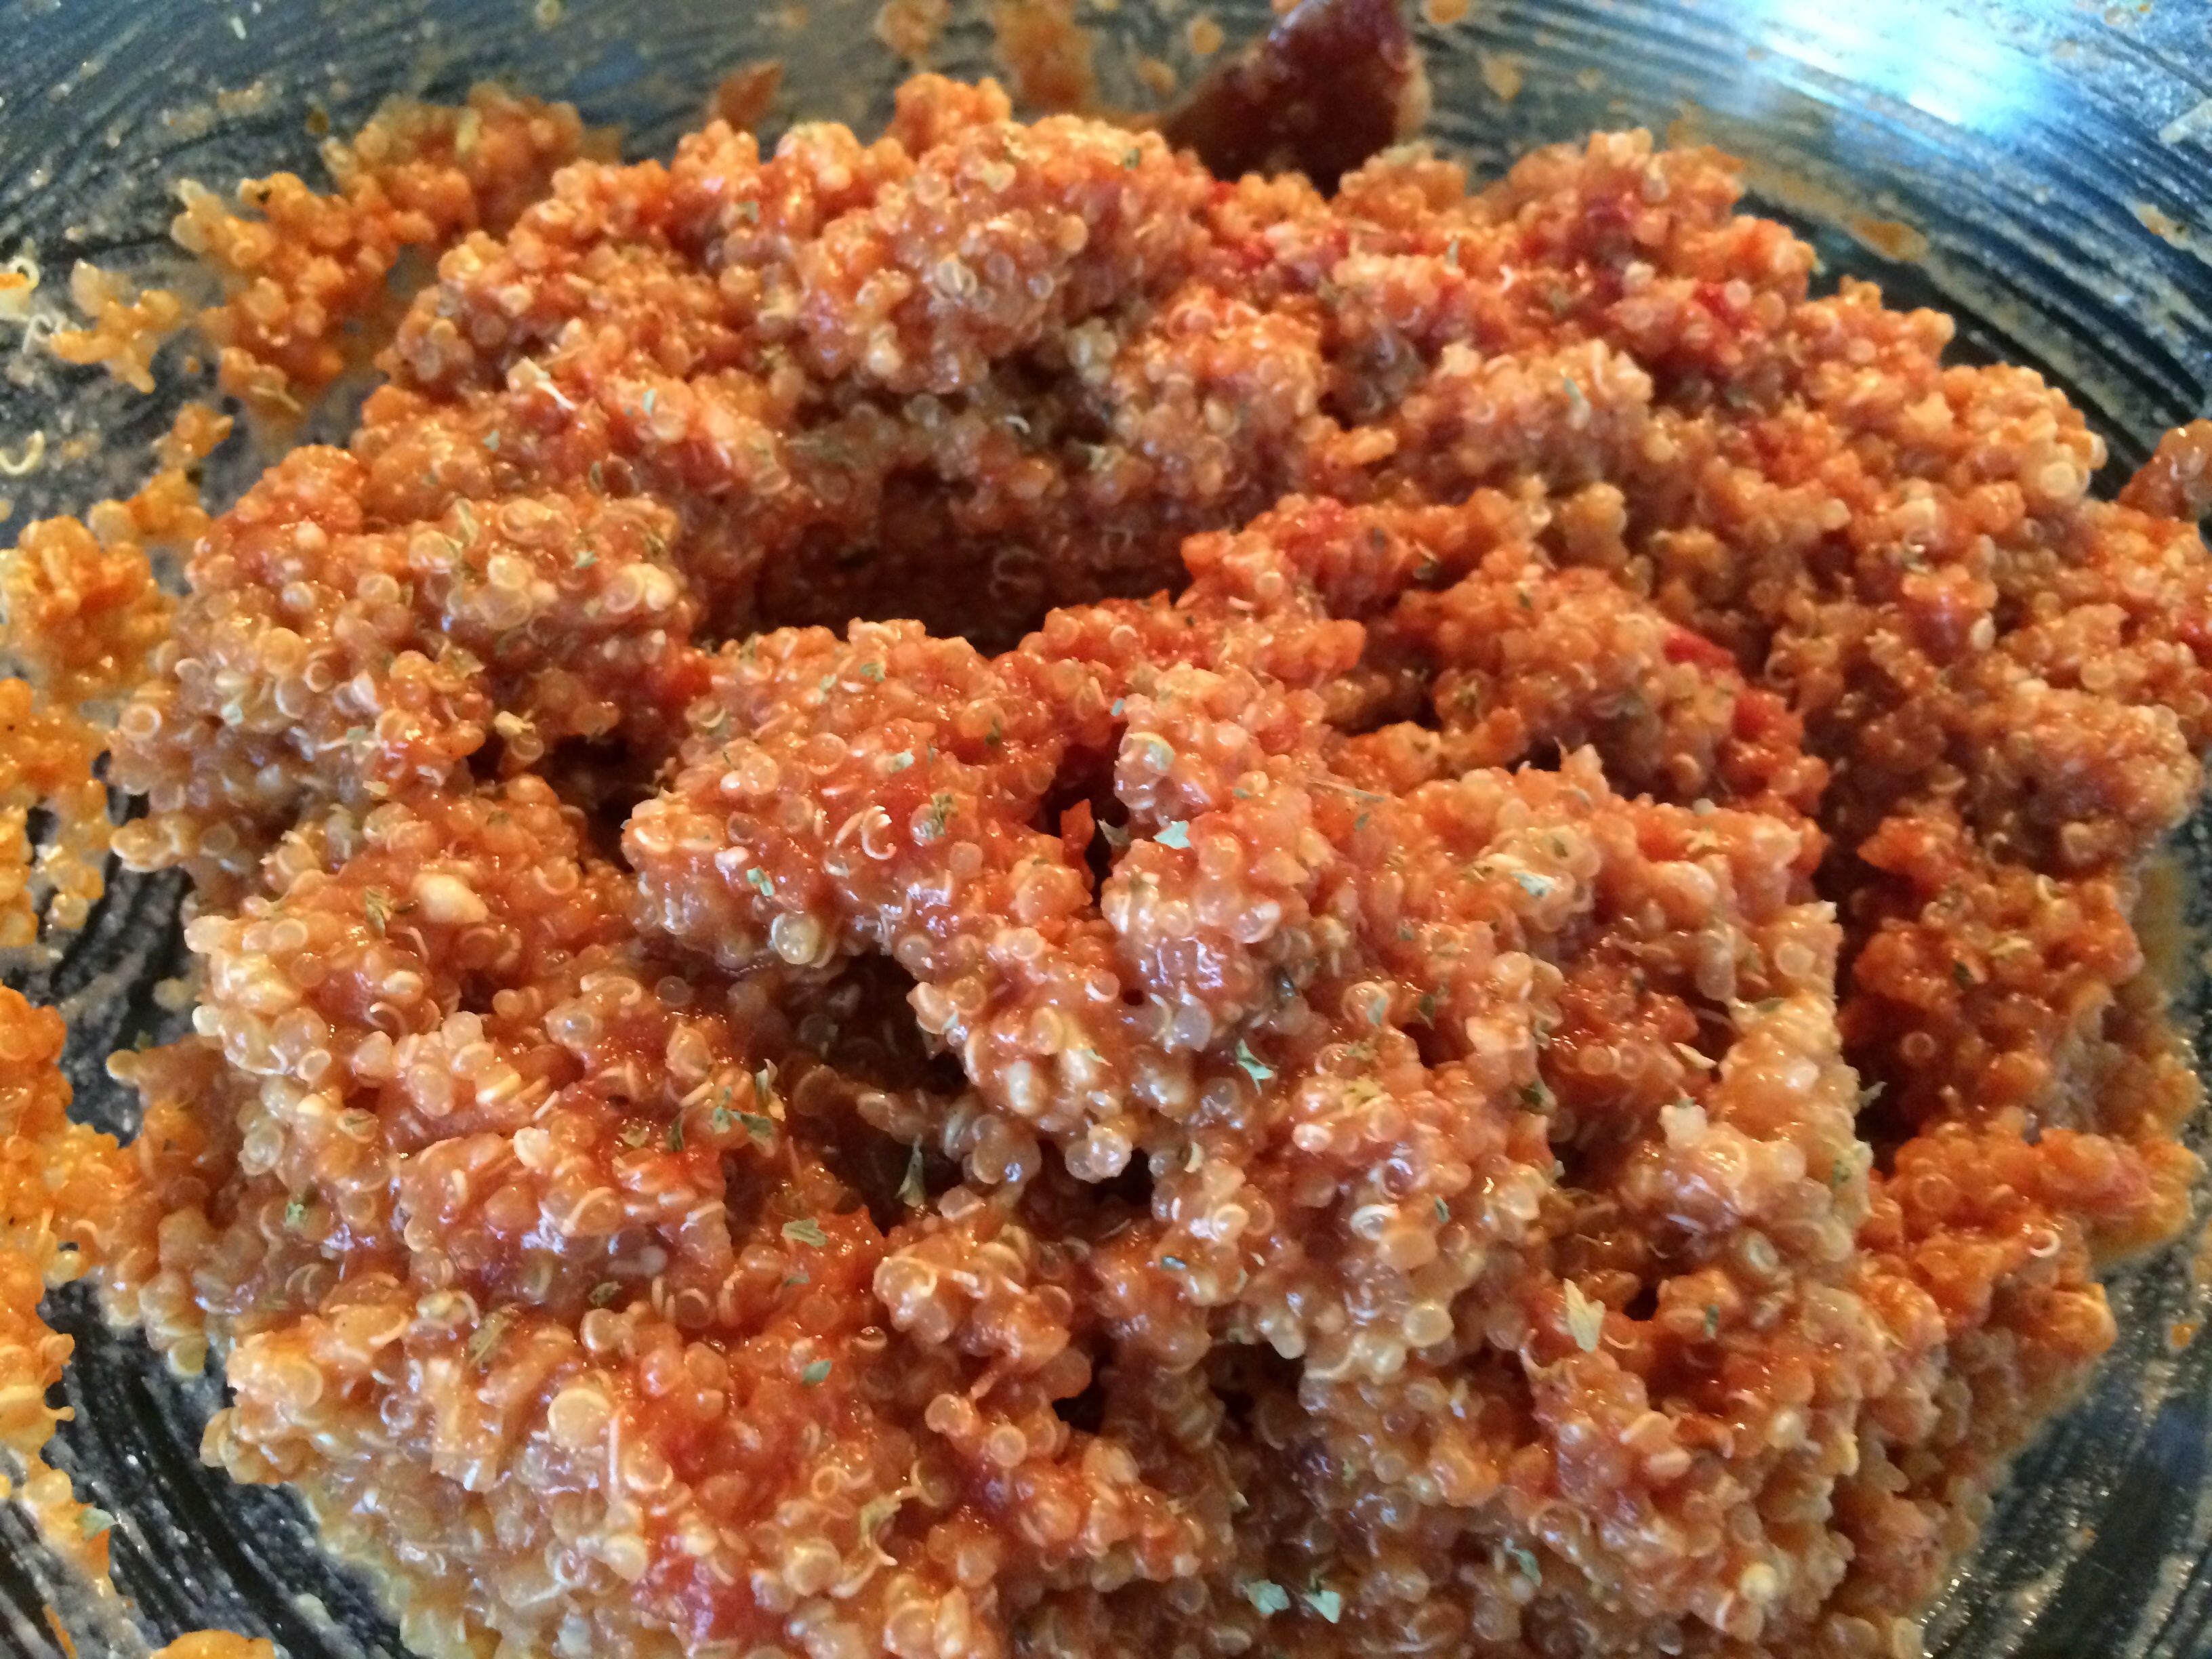
Quinoa is a superfood packed with nine amino acids making it a complete protein. Although this is common in meats, plants do not typically contain complete proteins. Quinoa comes most commonly in red, black and white. Quinoa has a nutty taste and the white cooks the fluffiest with a more rice-like texture.
Quinoa needs rinsed before cooking. It absorbs the water and is ready to eat!
I frequently substitute quinoa for meat, as well as rice. Give your family a healthier alternative and more energy!!
Photo by Amy Wilson Photography Http://www.amywilsonphotography.com
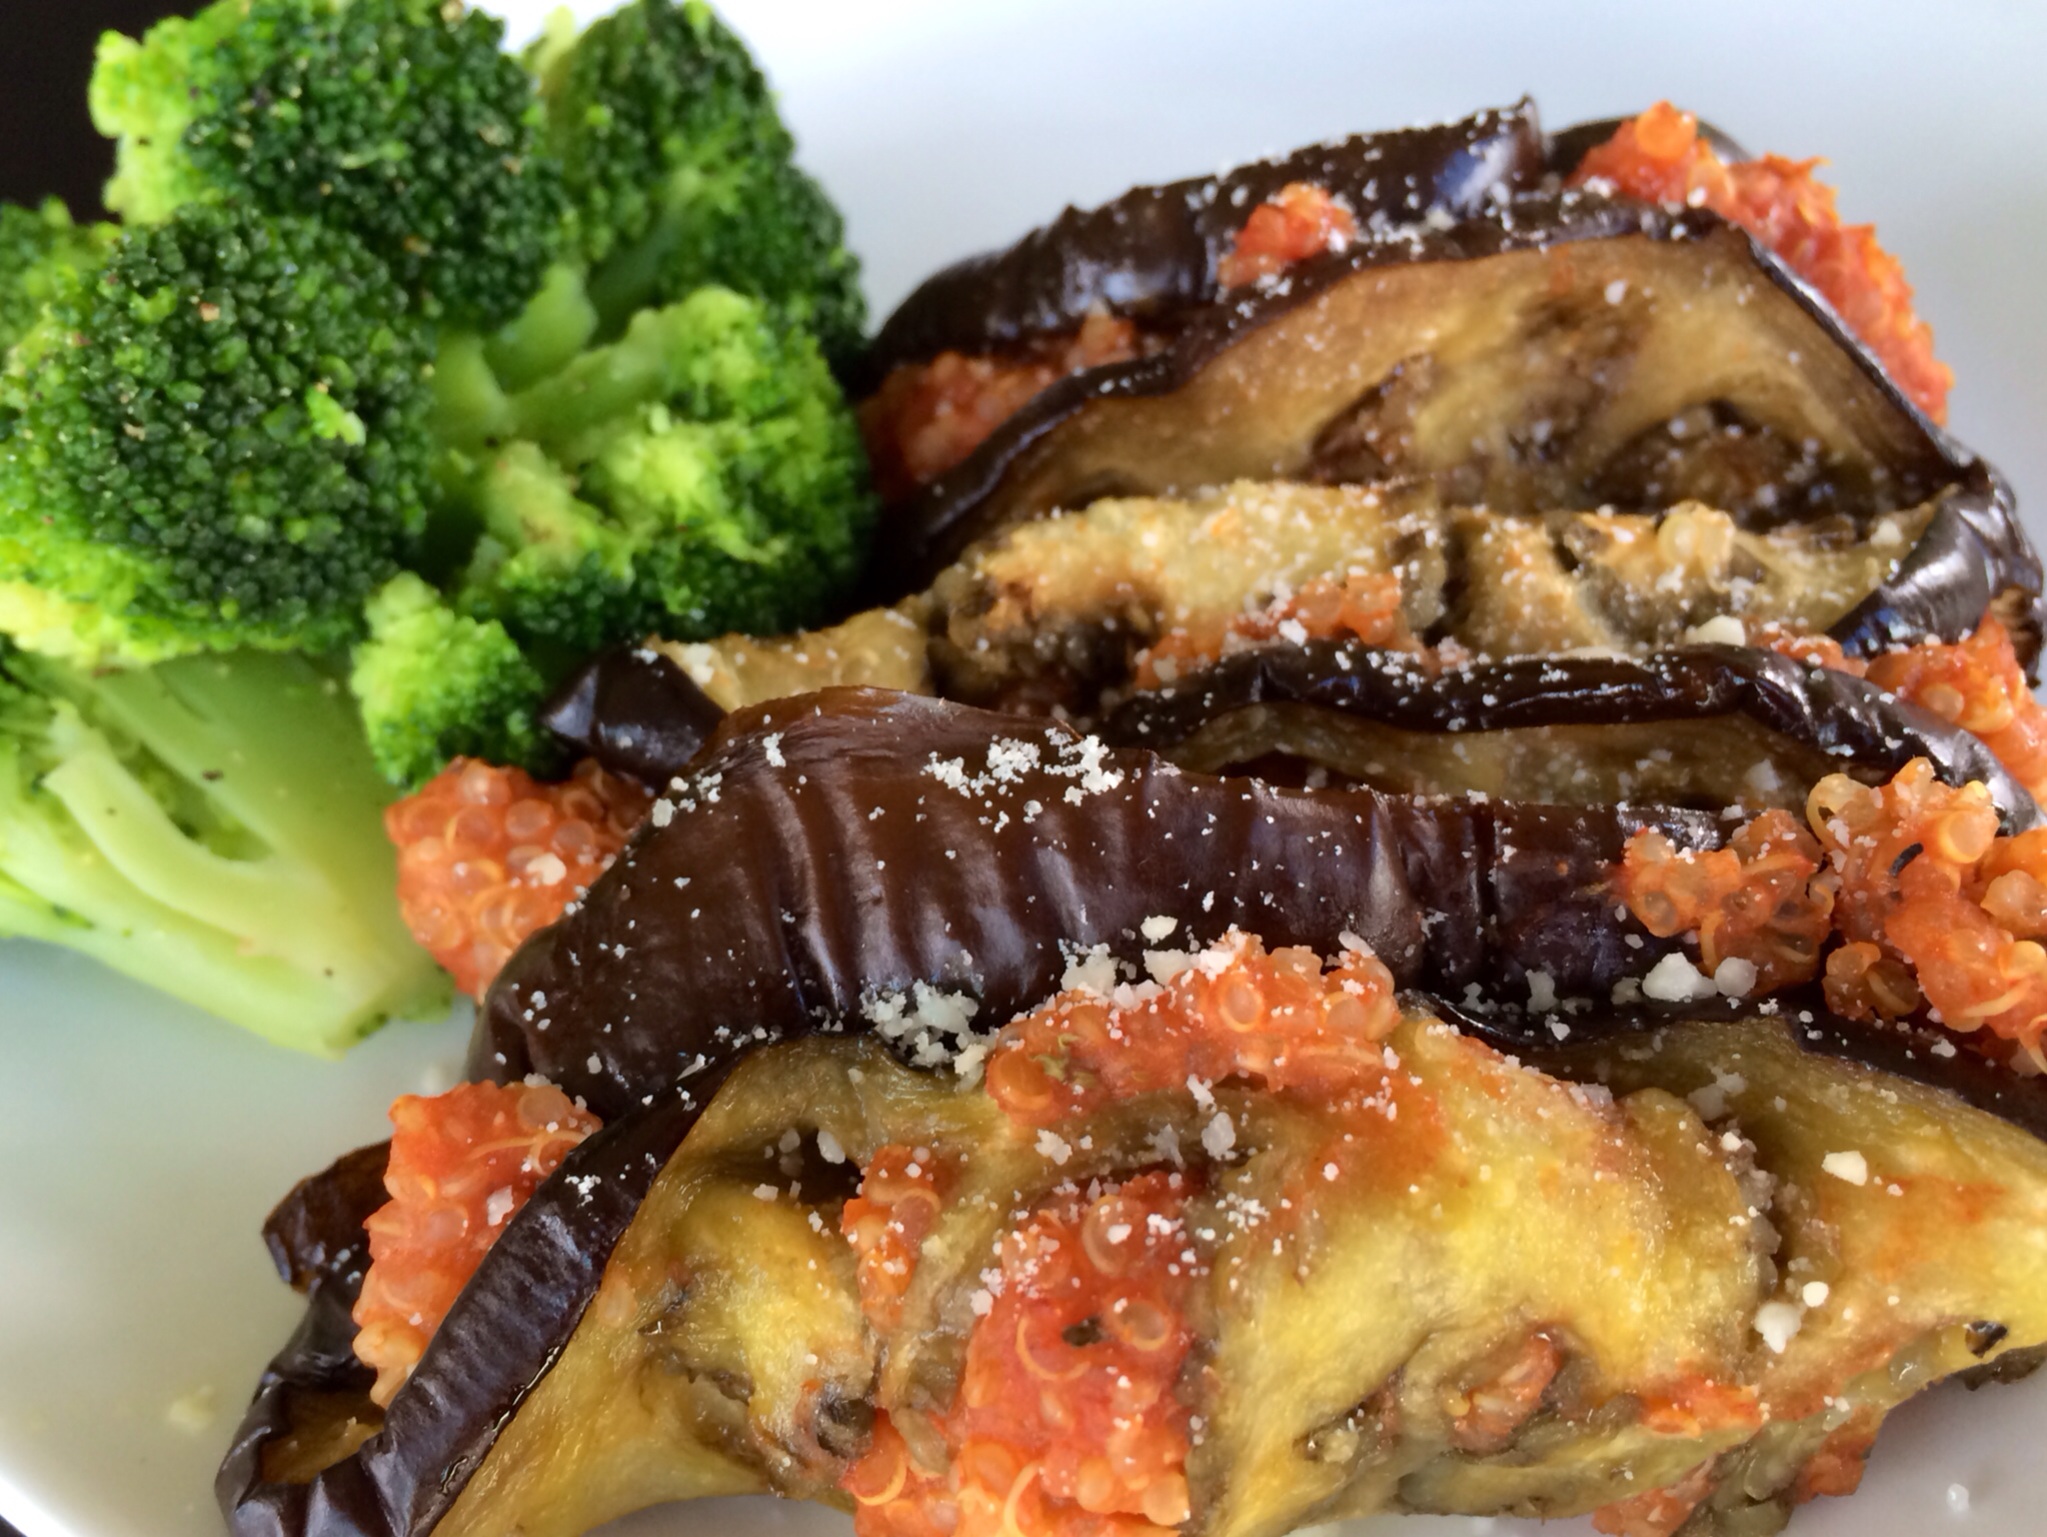
Superfood Quinoa Eggplant Involtini
(Inspired by Mary Ann Esposito of Ciao Italia)
Ingredients:
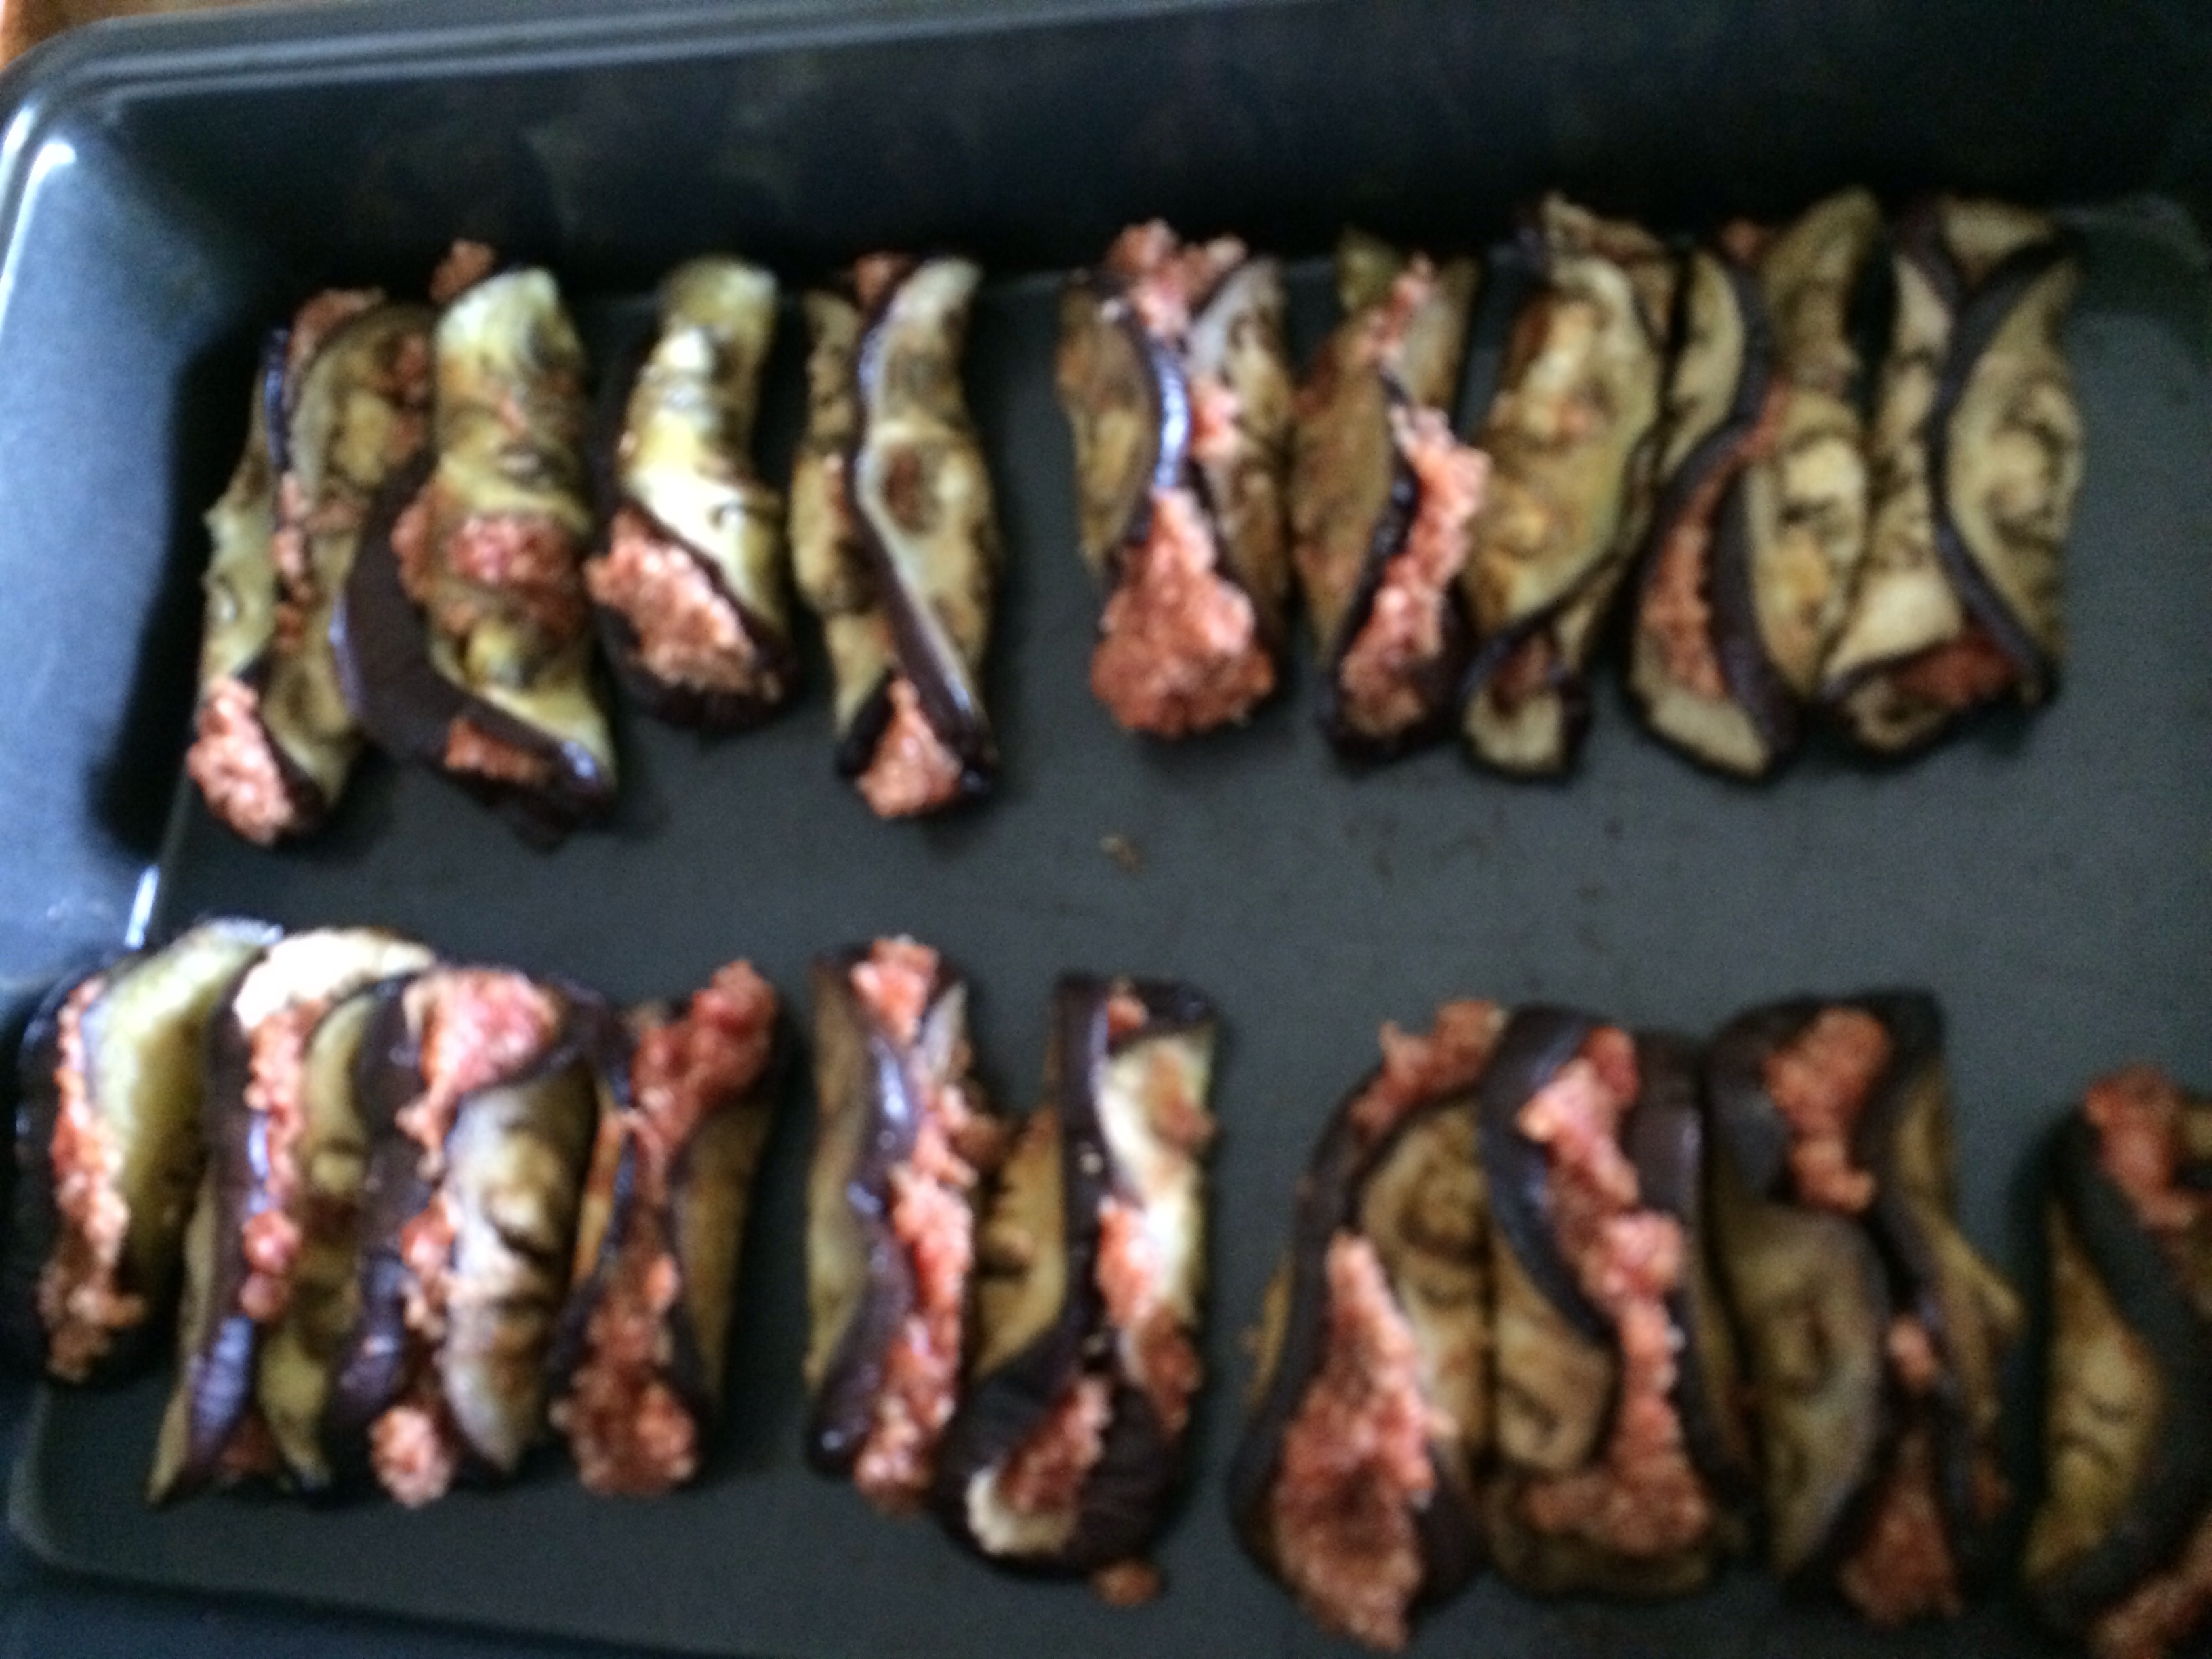
2 Medium eggplant, slices 1/4 inch thick
1/2 cup quinoa
1-1/2 cup water
2 cloves of garlic, pressed
2 tbsp. Aroma seasoning by Ciao Pittsburgh (OR 1 tsp. oregano, 1 tsp. basil, 1 tbsp.parsley)
Salt/pepper
2 tbsp. Olive oil
1 6 oz. can tomato paste
1/2 cup fresh grated parmesan cheese
Directions:
Preheat oven to 350 degrees.
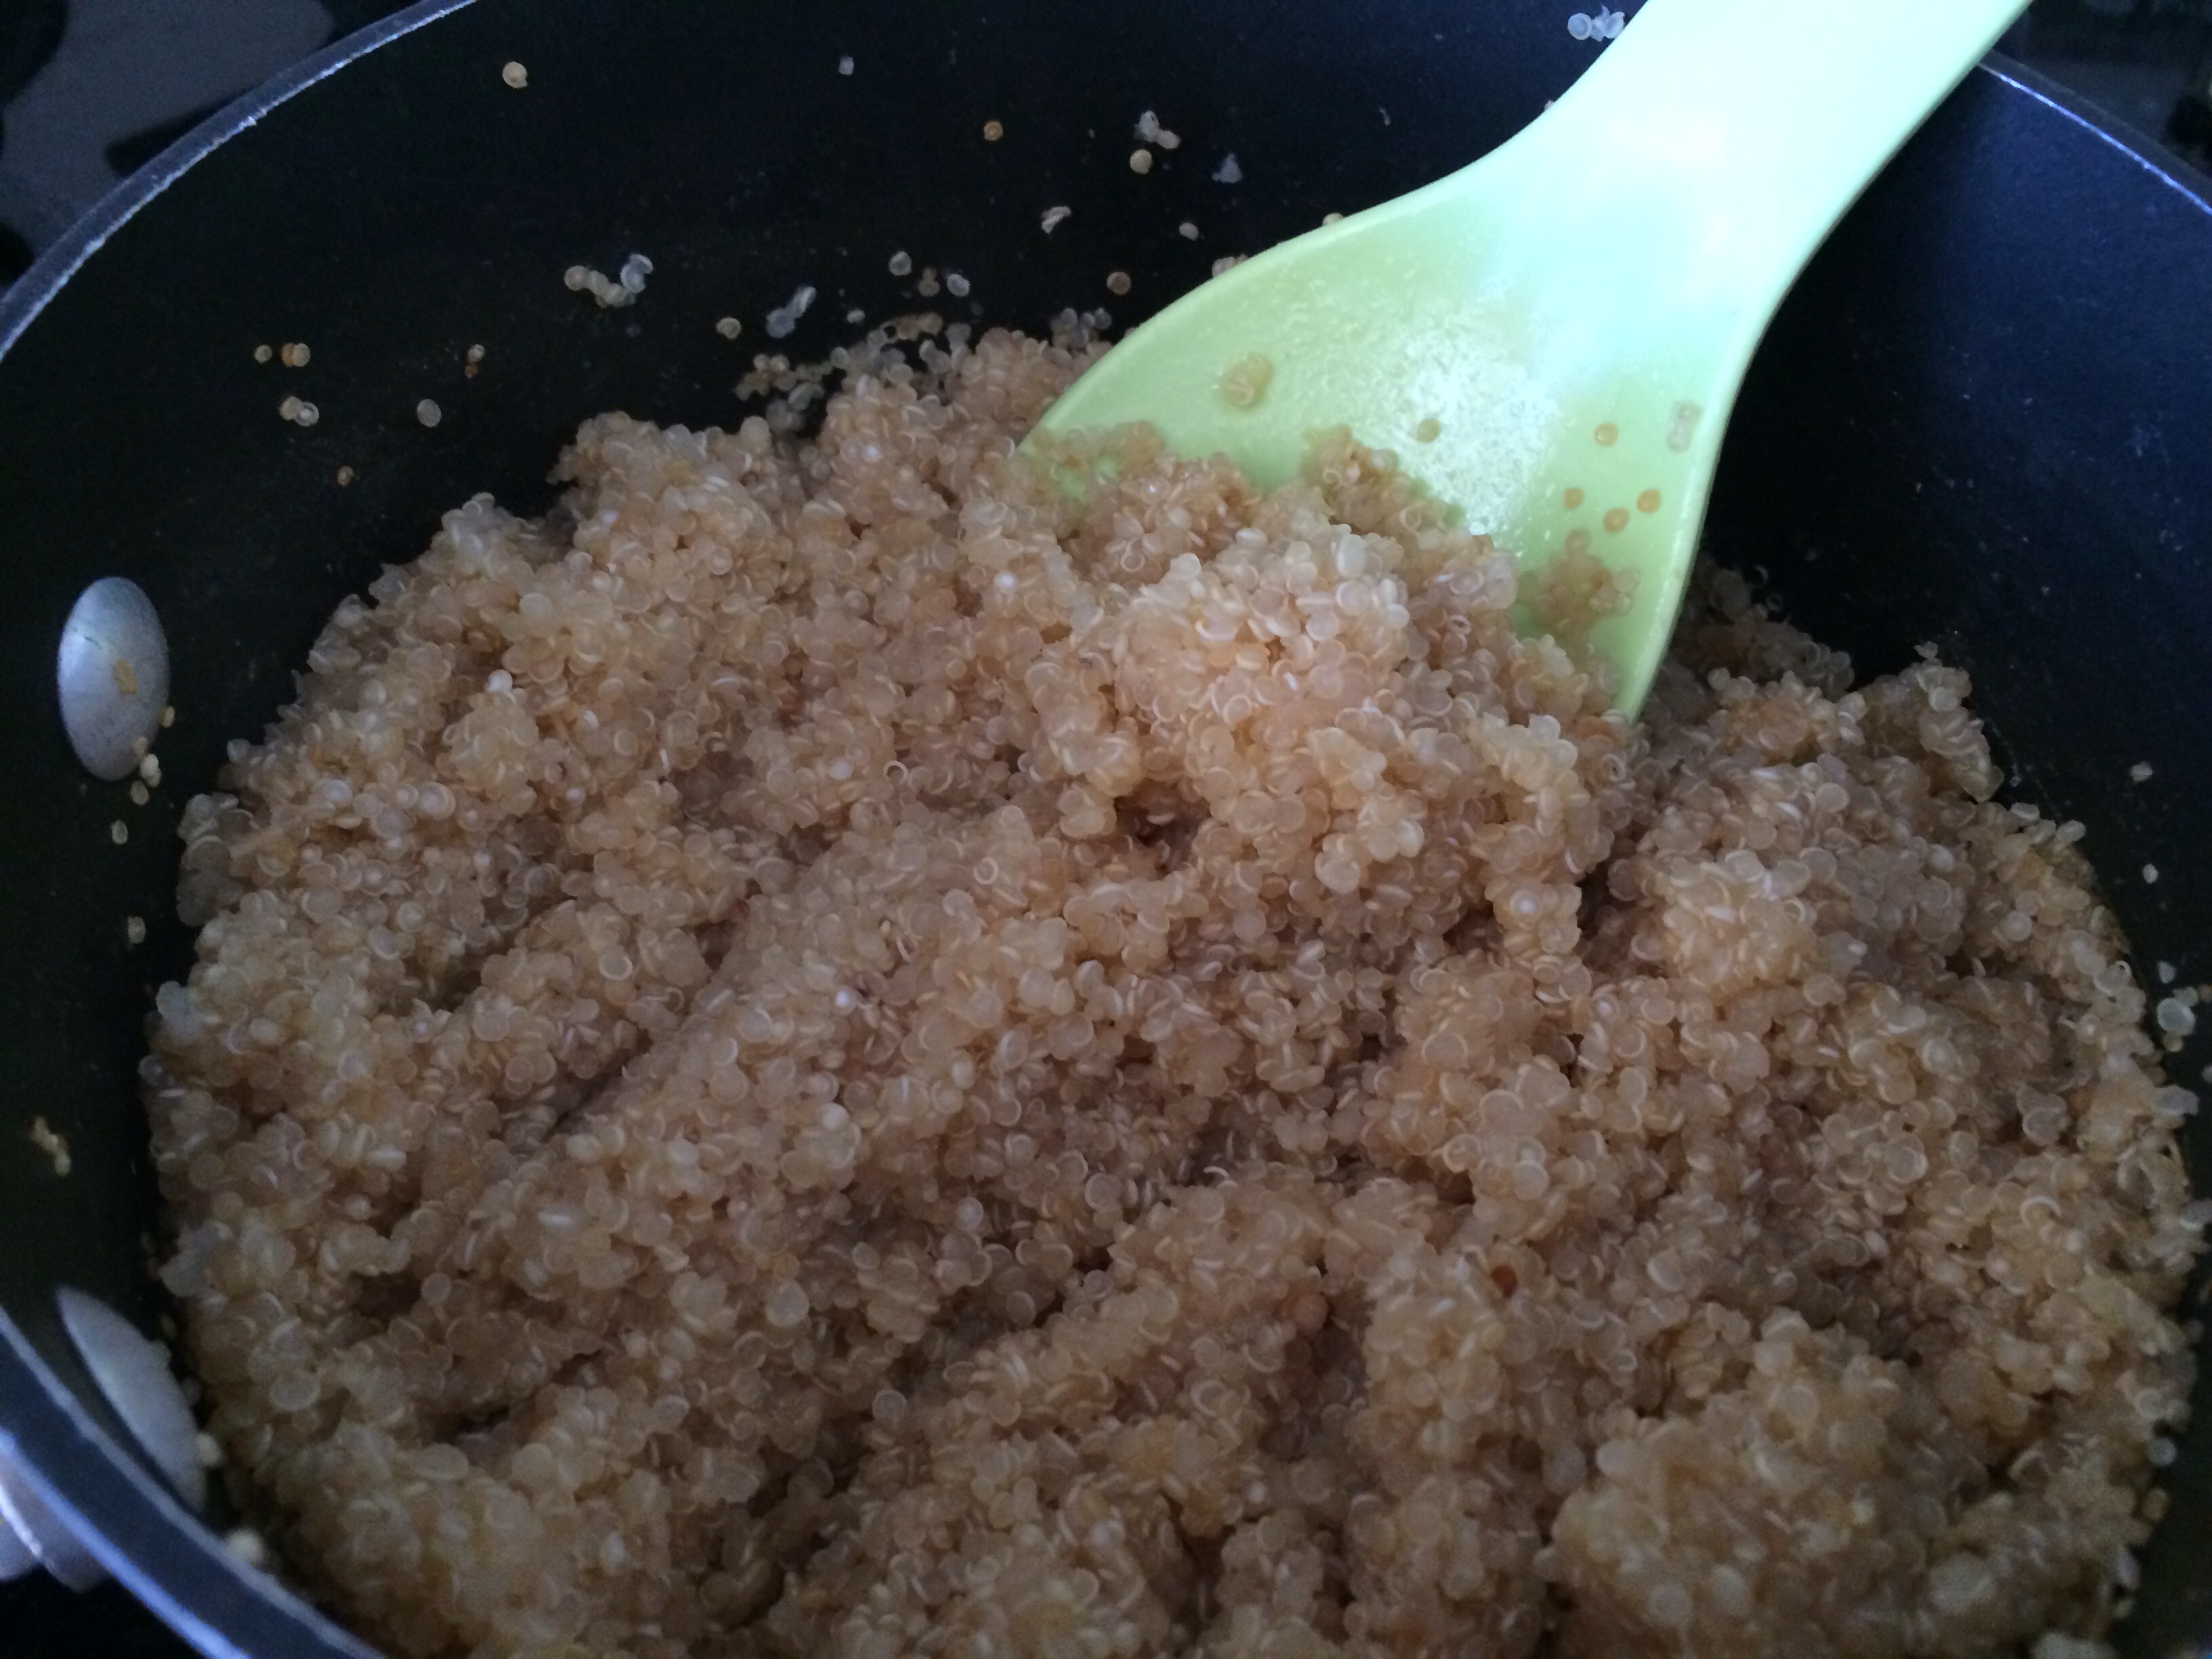
Bring water to a boil in a saucepan and add quinoa.
Cook on low heat until water is absorbed.
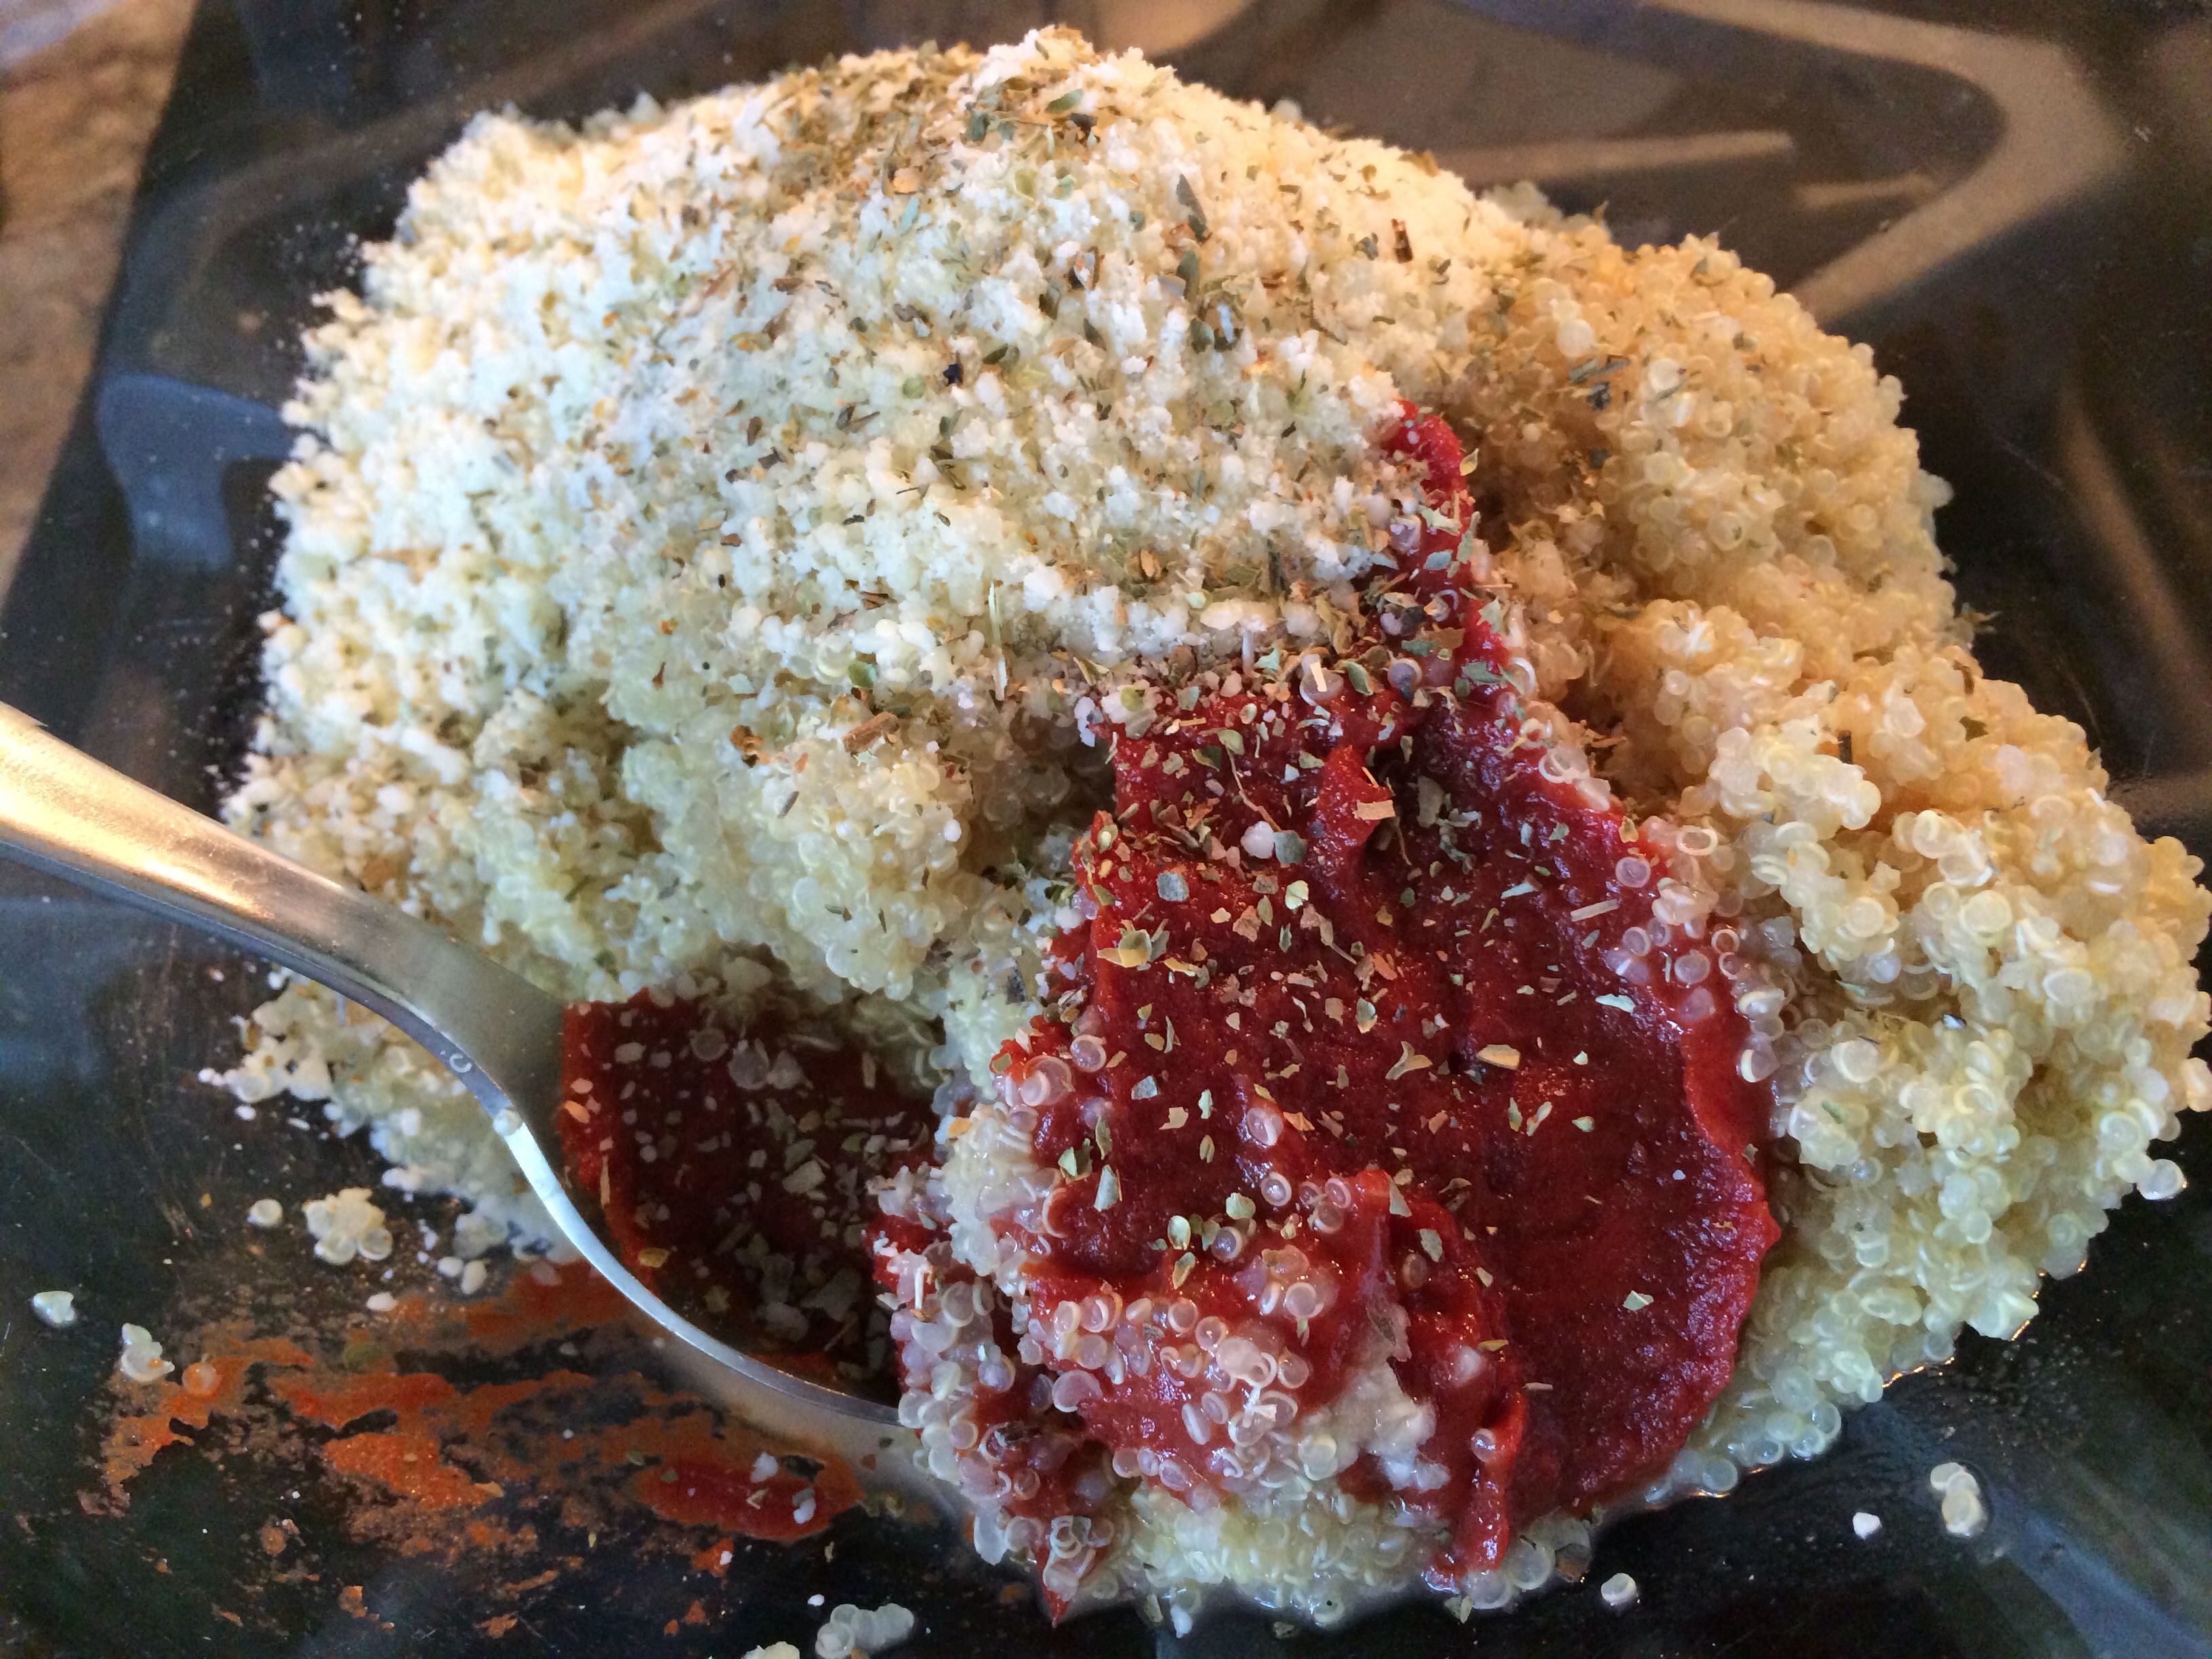
Add tomato paste, spices, Parmesan cheese, salt and pepper. Mix well.
This is the quick filling version. If you have a few extra minutes sauté the garlic with some finely chopped onions and peppers. (1 small onion 1 small pepper)
Coat a baking sheet with olive oil, place eggplant slices on sheet and brush tops with olive oil.
Bake the eggplant slices until they are bendable, perfectly rollable.
Bake 15 mins. or until eggplant is softened.
Let cool and stuff with quinoa mixture. (Place mixture in the middle and roll.) You will be surprised by the malleability of the eggplant after being baked.
Quinoa filling!
Coat a casserole dish with olive oil. Place rolls in a single layer, drizzle olive oil on the tops, and sprinkle with parmesan cheese.
This recipe fed our family of four as a Meatless Monday main course served with a side of broccoli.
Cover with foil and bake for 15 minutes. Take foil off for the last 5 minutes.
The flavors are incredible!
Serve as a side dish or with a salad or vegetable!
Don’t mess with my sauce! For those of us who make homemade pasta sauce, more than likely, we are in agreement about one thing: Our sauce is the best sauce. Whether it’s grandma’s recipe, Giada’s recipe, or from the internet ; ), we take possession and will defend our sauce anyday, anytime. Back up.
Ok, maybe too strong.
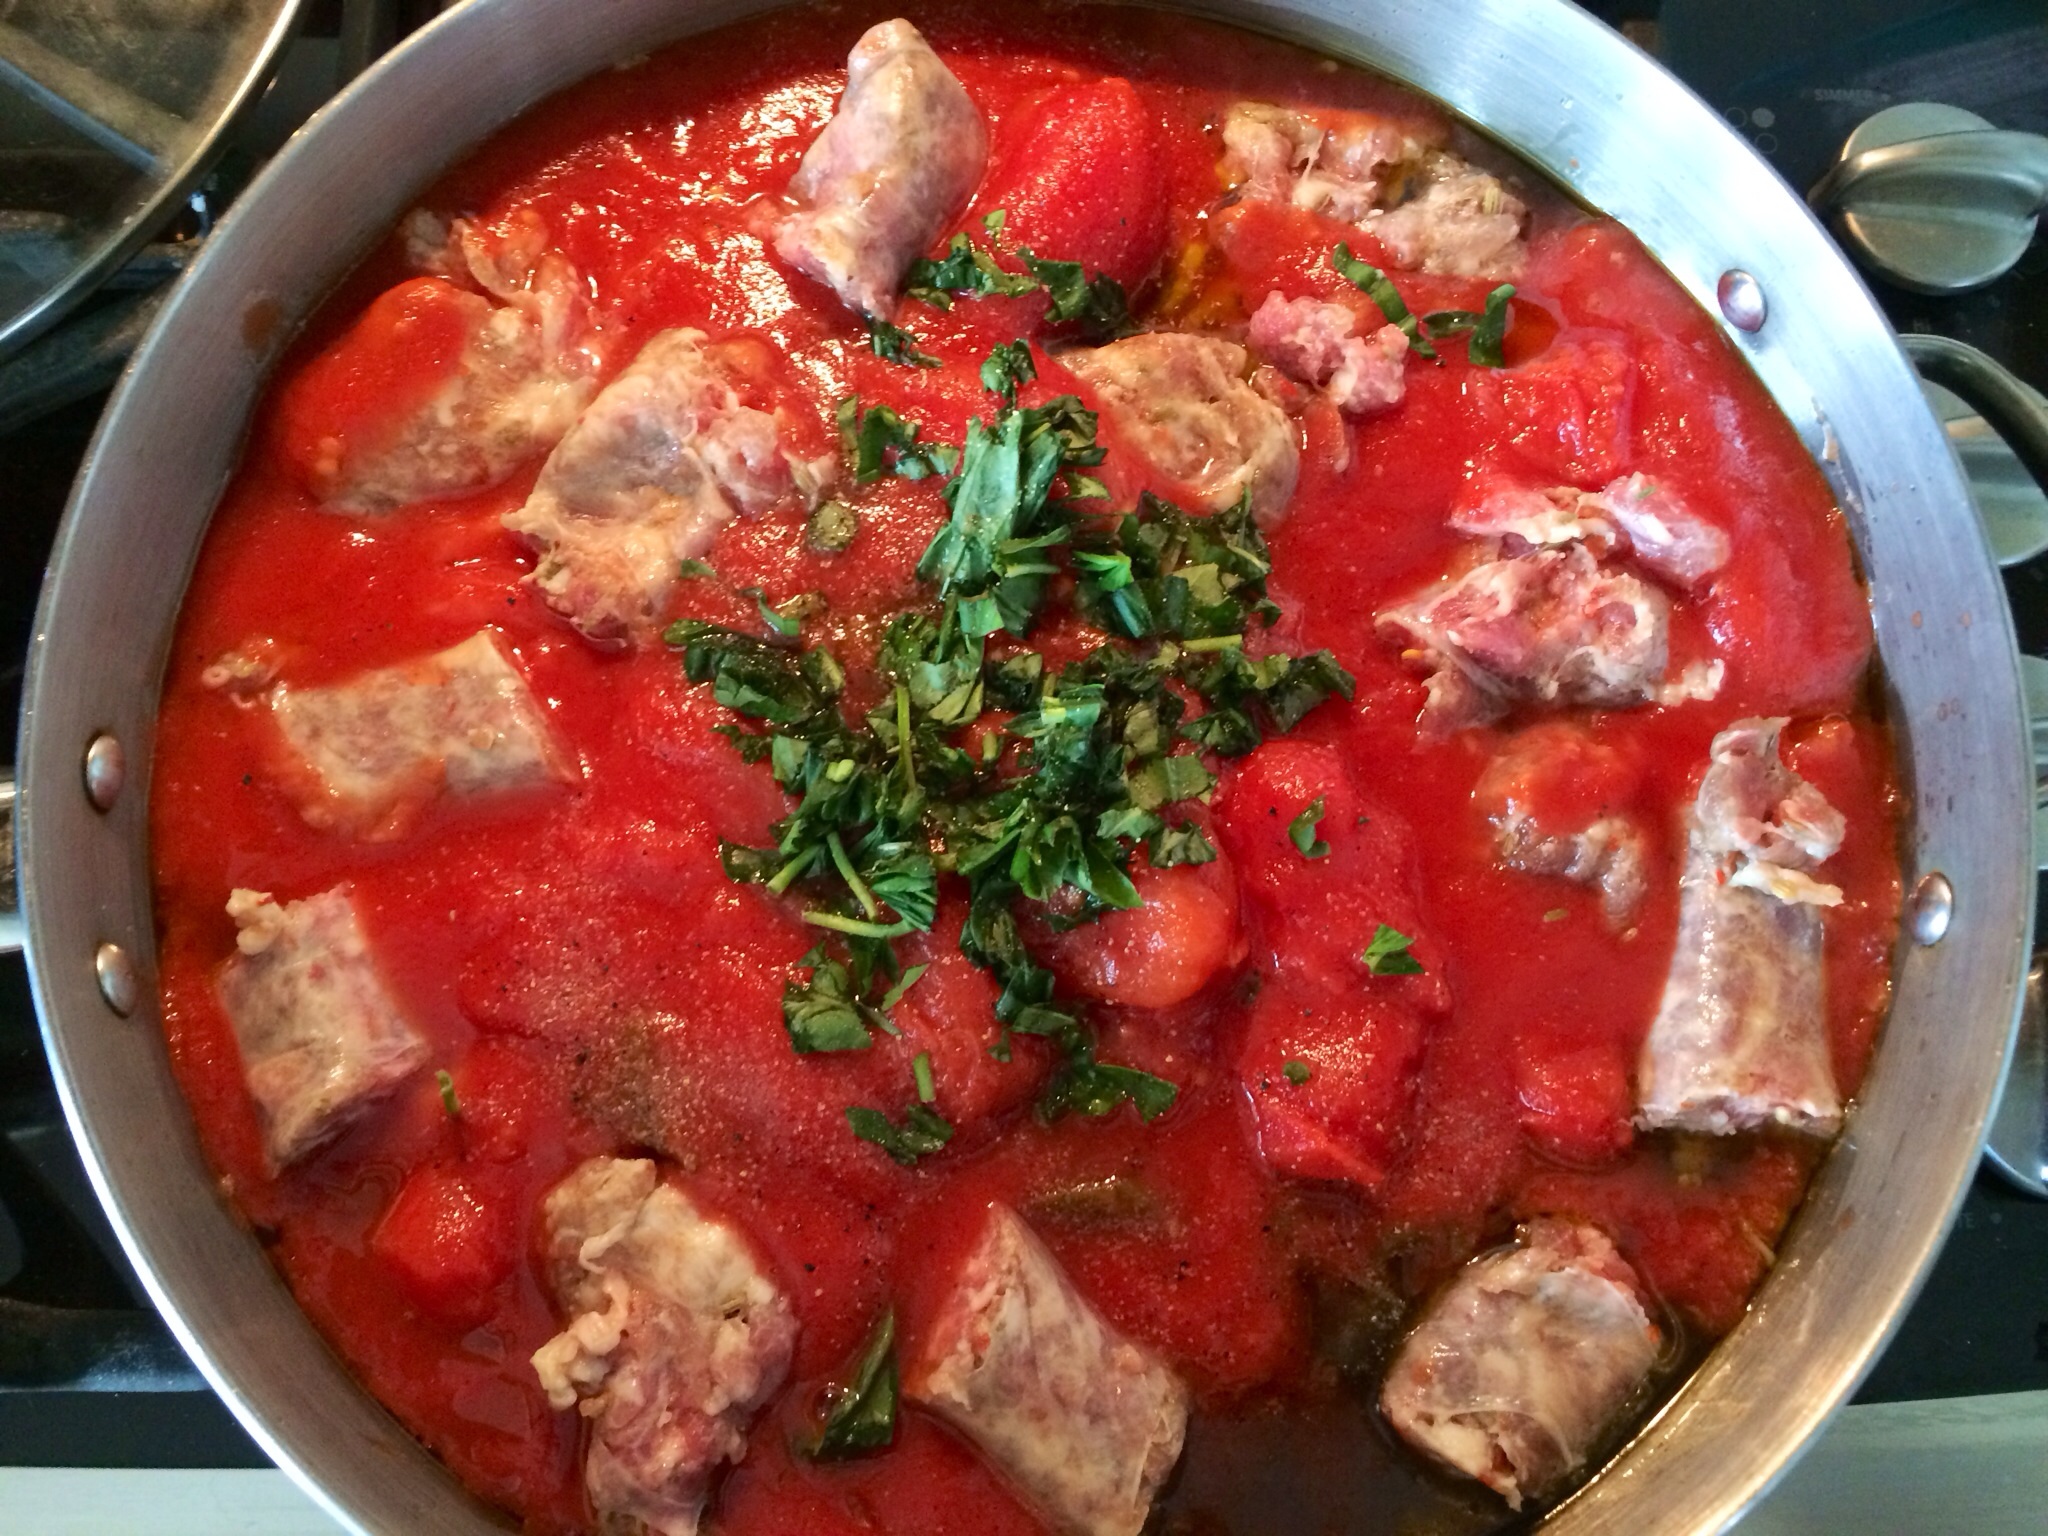
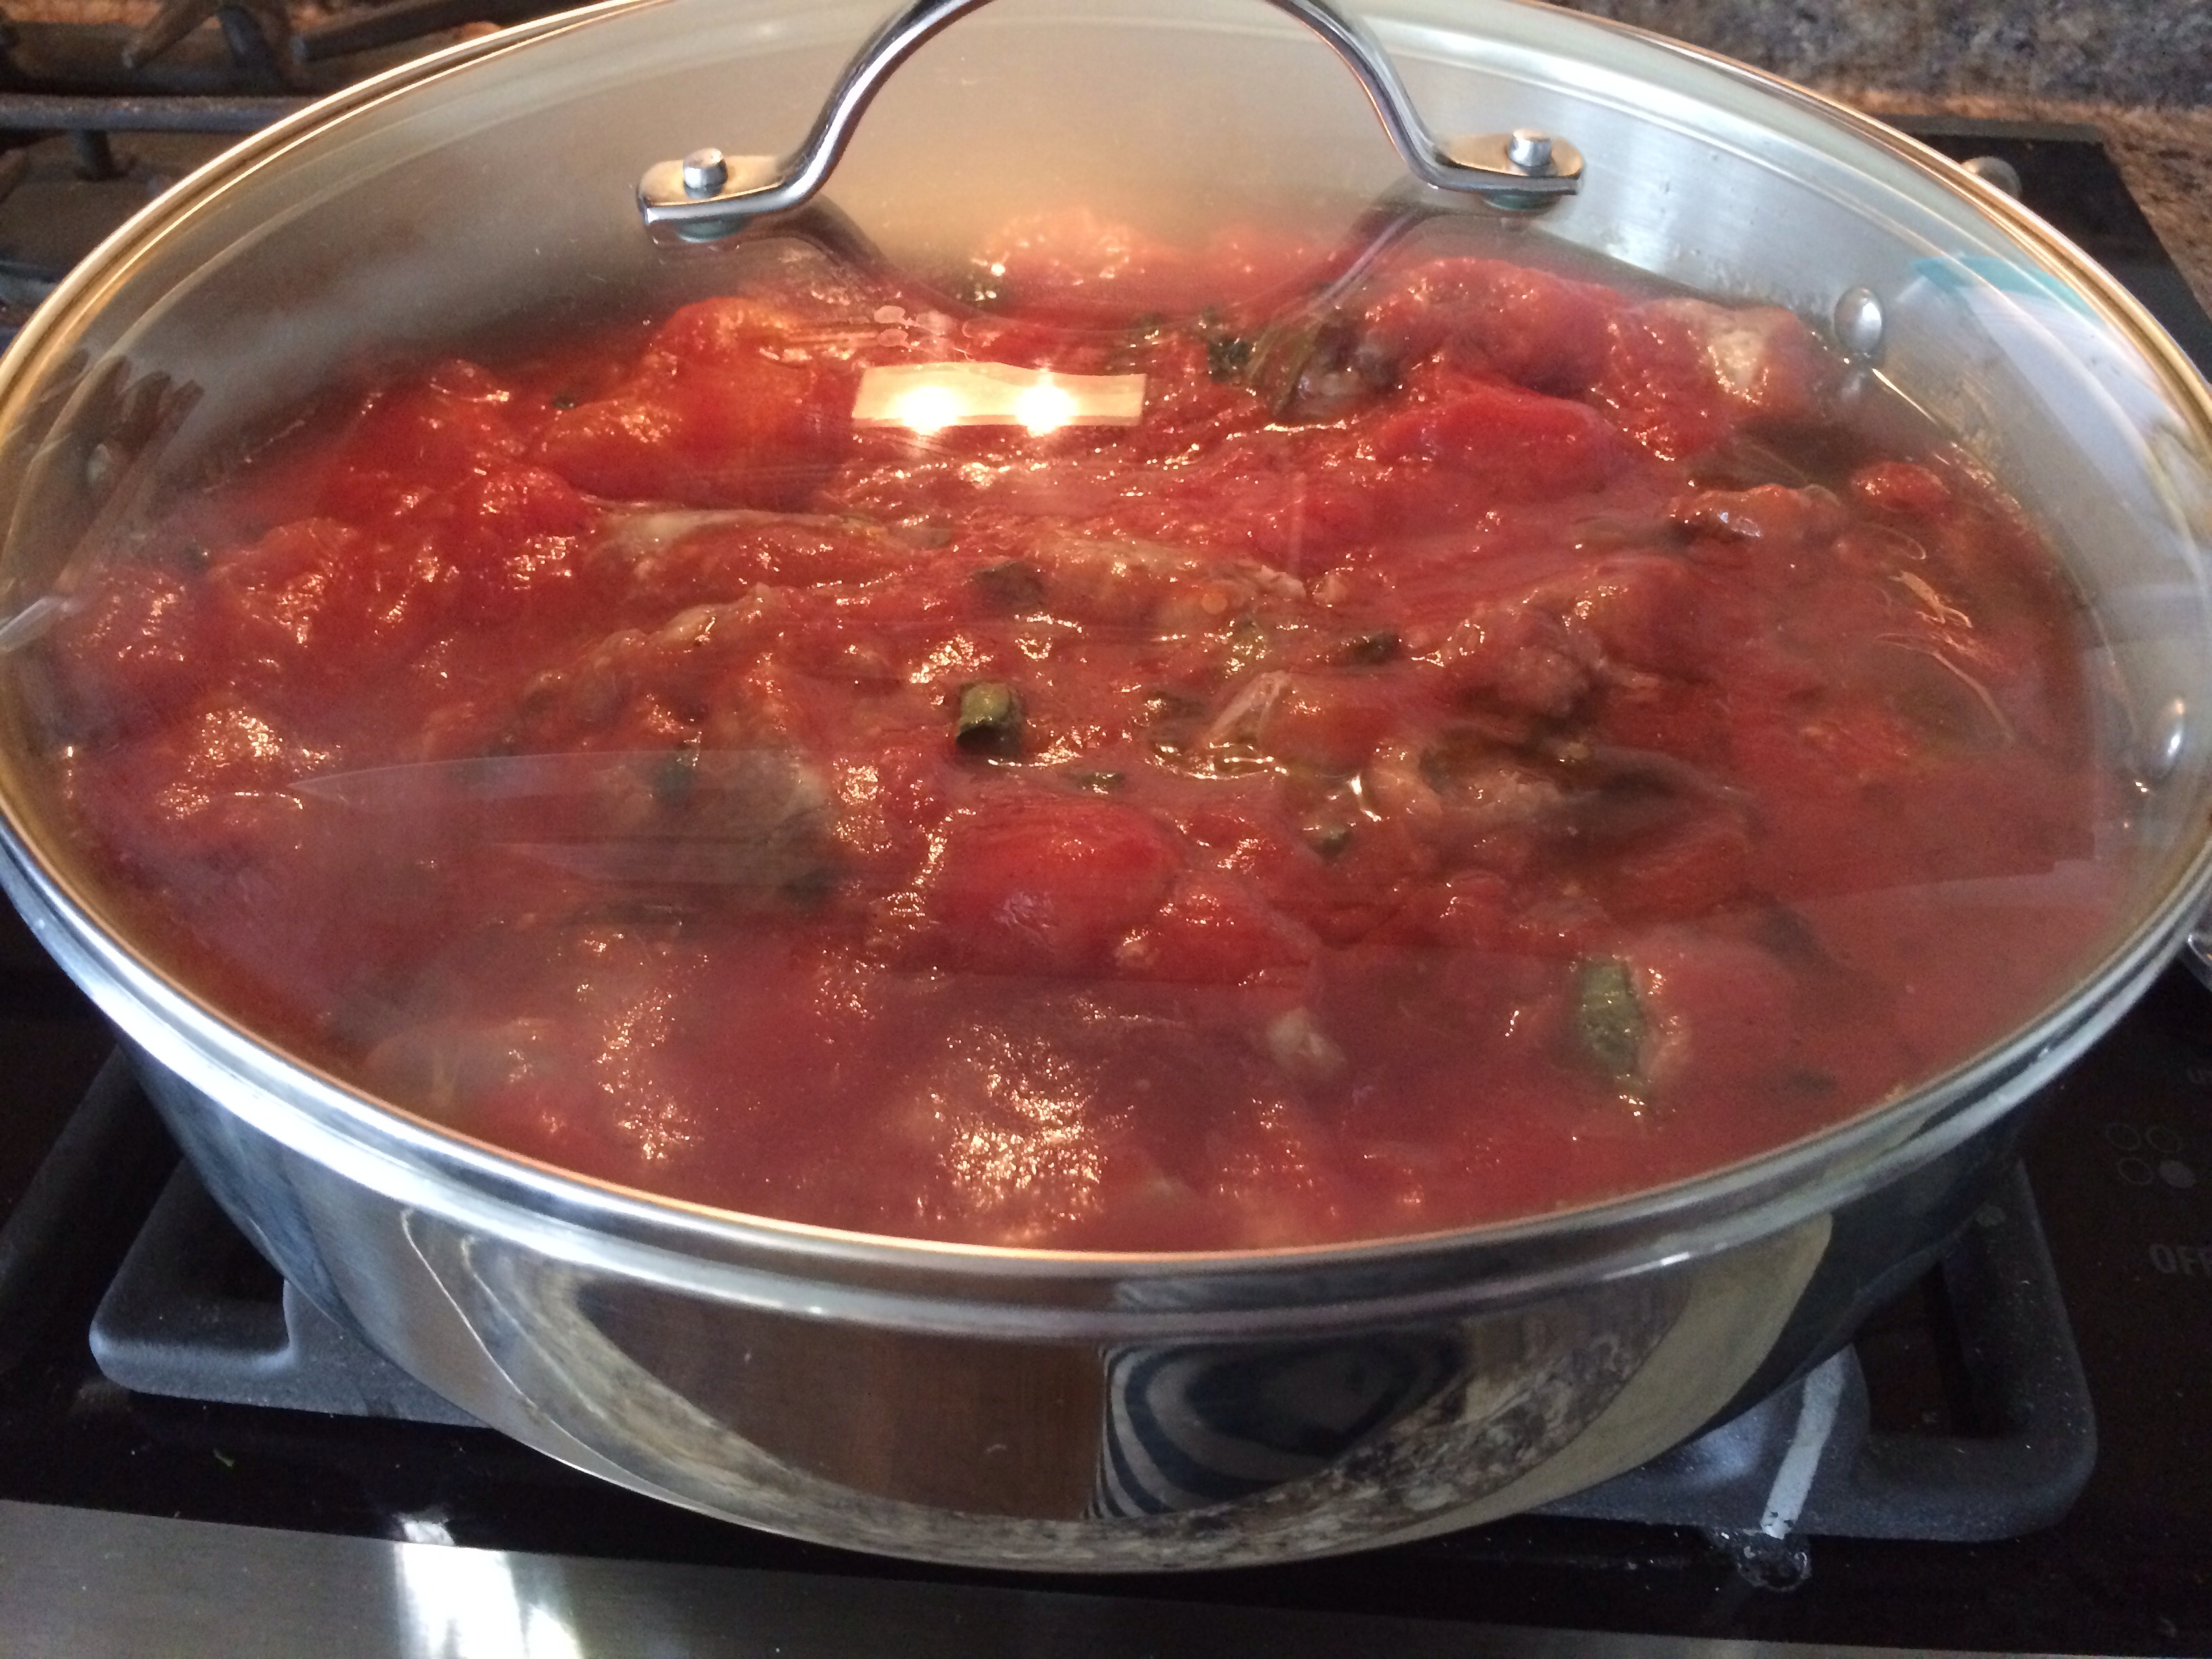
Sunday Sauce with Homemade Italian Sausage
So many different recipes and ingredients all yield a great sauce! From crushed tomatoes, whole tomatoes, and San Marzano tomatoes, to veggies, meat, and spices, there are many different types of sauce and cooking variations.
I get many questions and comments regarding sauce do’s and dont’s. The latest question is “Should I brown my meat before putting it in the sauce?” Great question!
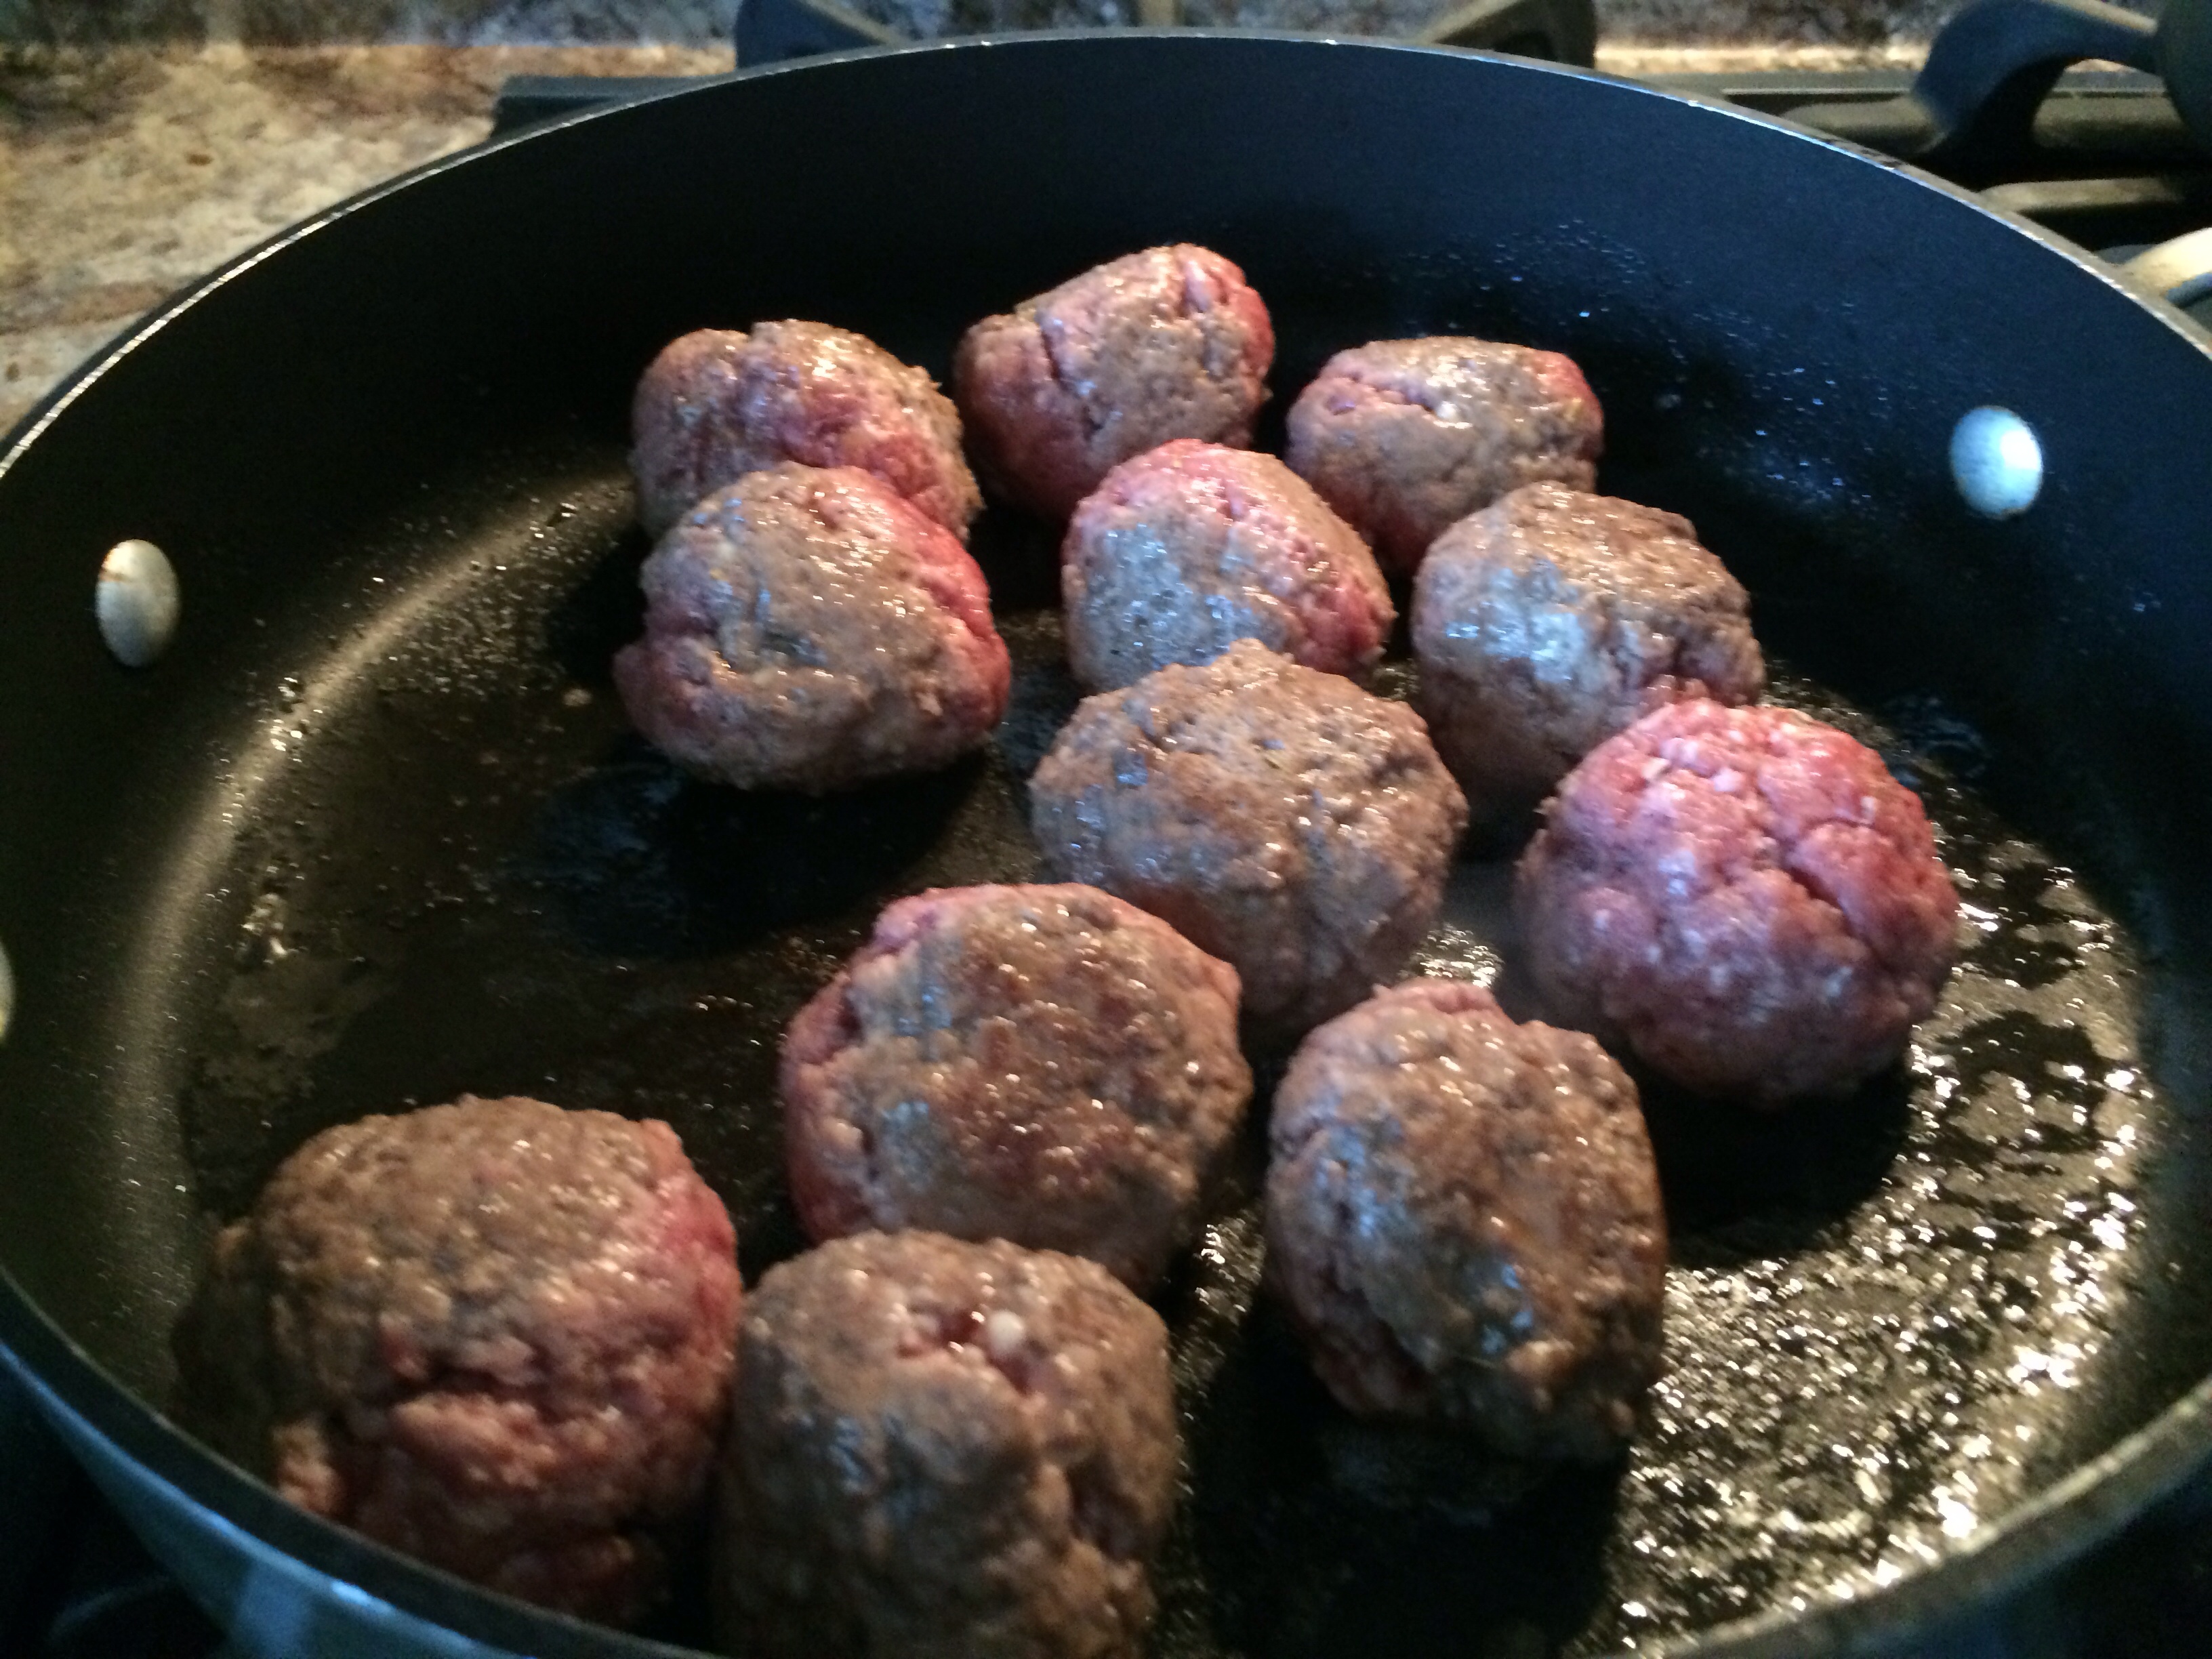
I don’t brown…but there are great reasons for both methods! Ground meatballs, Italian sausage, pork, or ox tail, can all be put directly into the sauce raw as long as you are cooking the sauce until the meat is cooked. I cook my sauce for approximately 4-6 hours.
Here are 5 observations I have made after trying both methods:
1. I love putting my round meatballs into the sauce and having them come out round! I have tried browning meatballs and it caused some kind of cone head problem. My meatballs ended up like triangles.
I have browned when I didn’t have 4-6 hours to cook the sauce! If you don’t mind 3-sided meatballs!
2. Cooking raw meat in the sauce for 4-6 hours creates the yummy tender tiny bites throughout that surprise our palates.
Cover while cooking on low heat and stir every hour or so. Take lid off for the last 30 mins to thicken sauce.
3. The carmelaization during browning will help hold together the meat as it cooks in the sauce.
4. Browning adds flavor and texture to the meat.
5. The fat can be drained after browning. Shhhh! (The fat adds and irreplicable flavor!!)
Do you brown or sauce? I would love to hear from you! Please share!
Of course, both methods are great! I encourage you to try them, get creative, and don’t forget to add fresh grated Parm!
This is the last dish I will be cooking for fish week! It’s Luke Wholey’s tonight for the fish week grand finale. Cool, right?
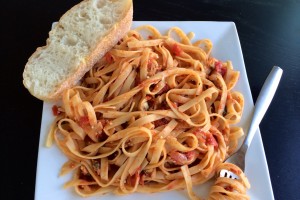
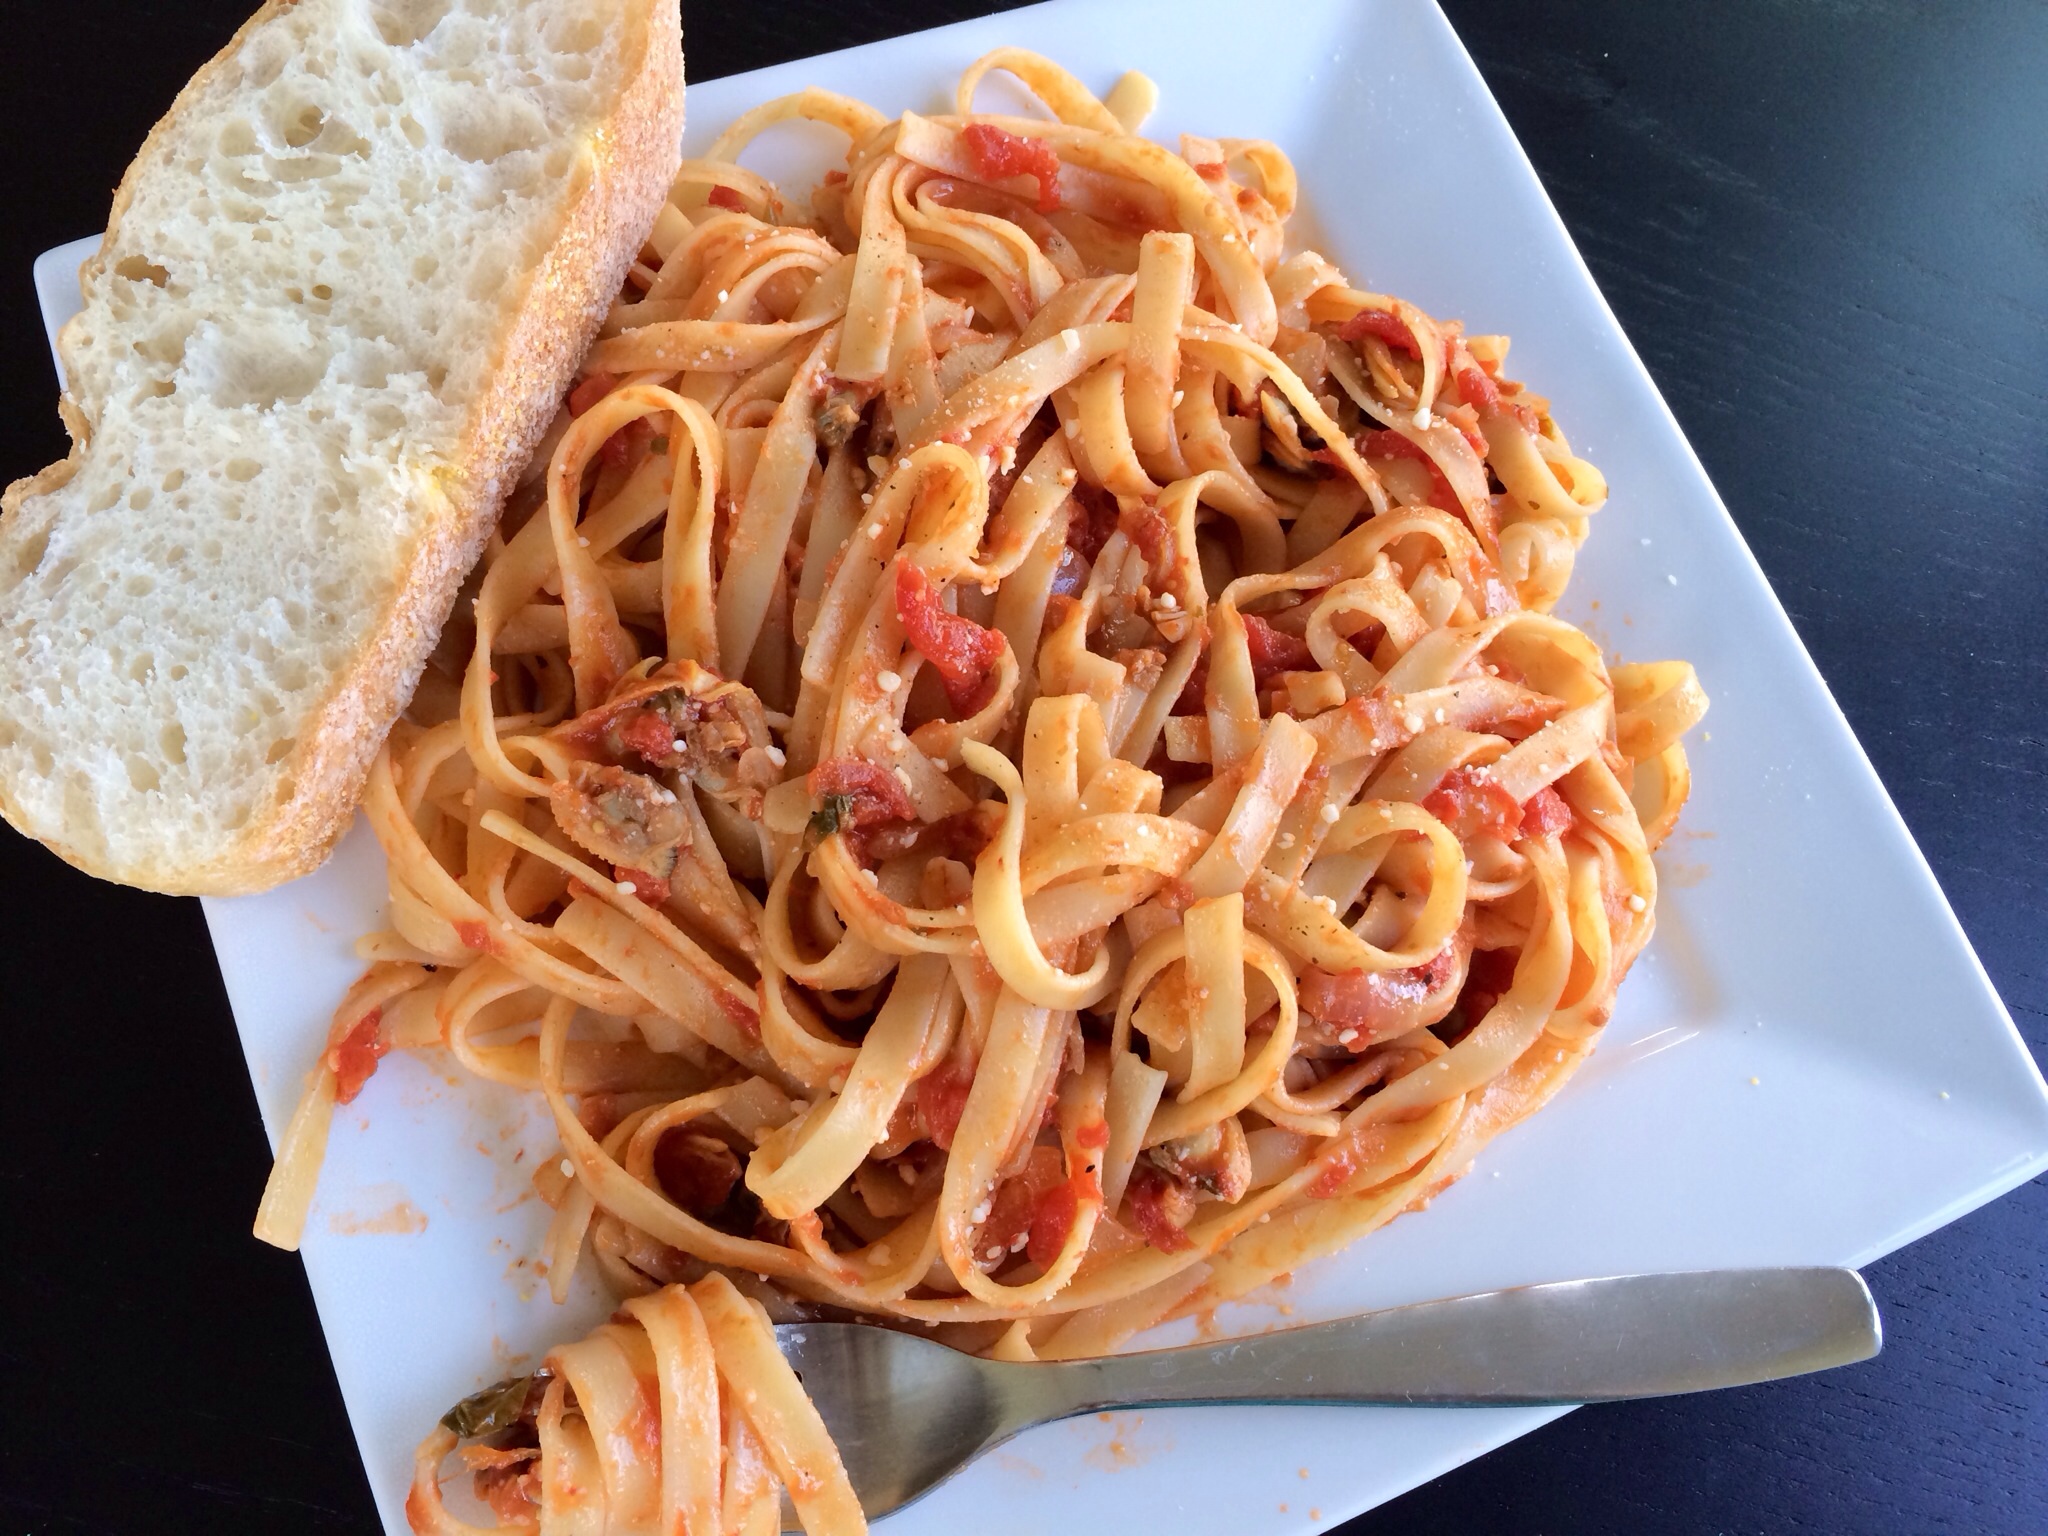
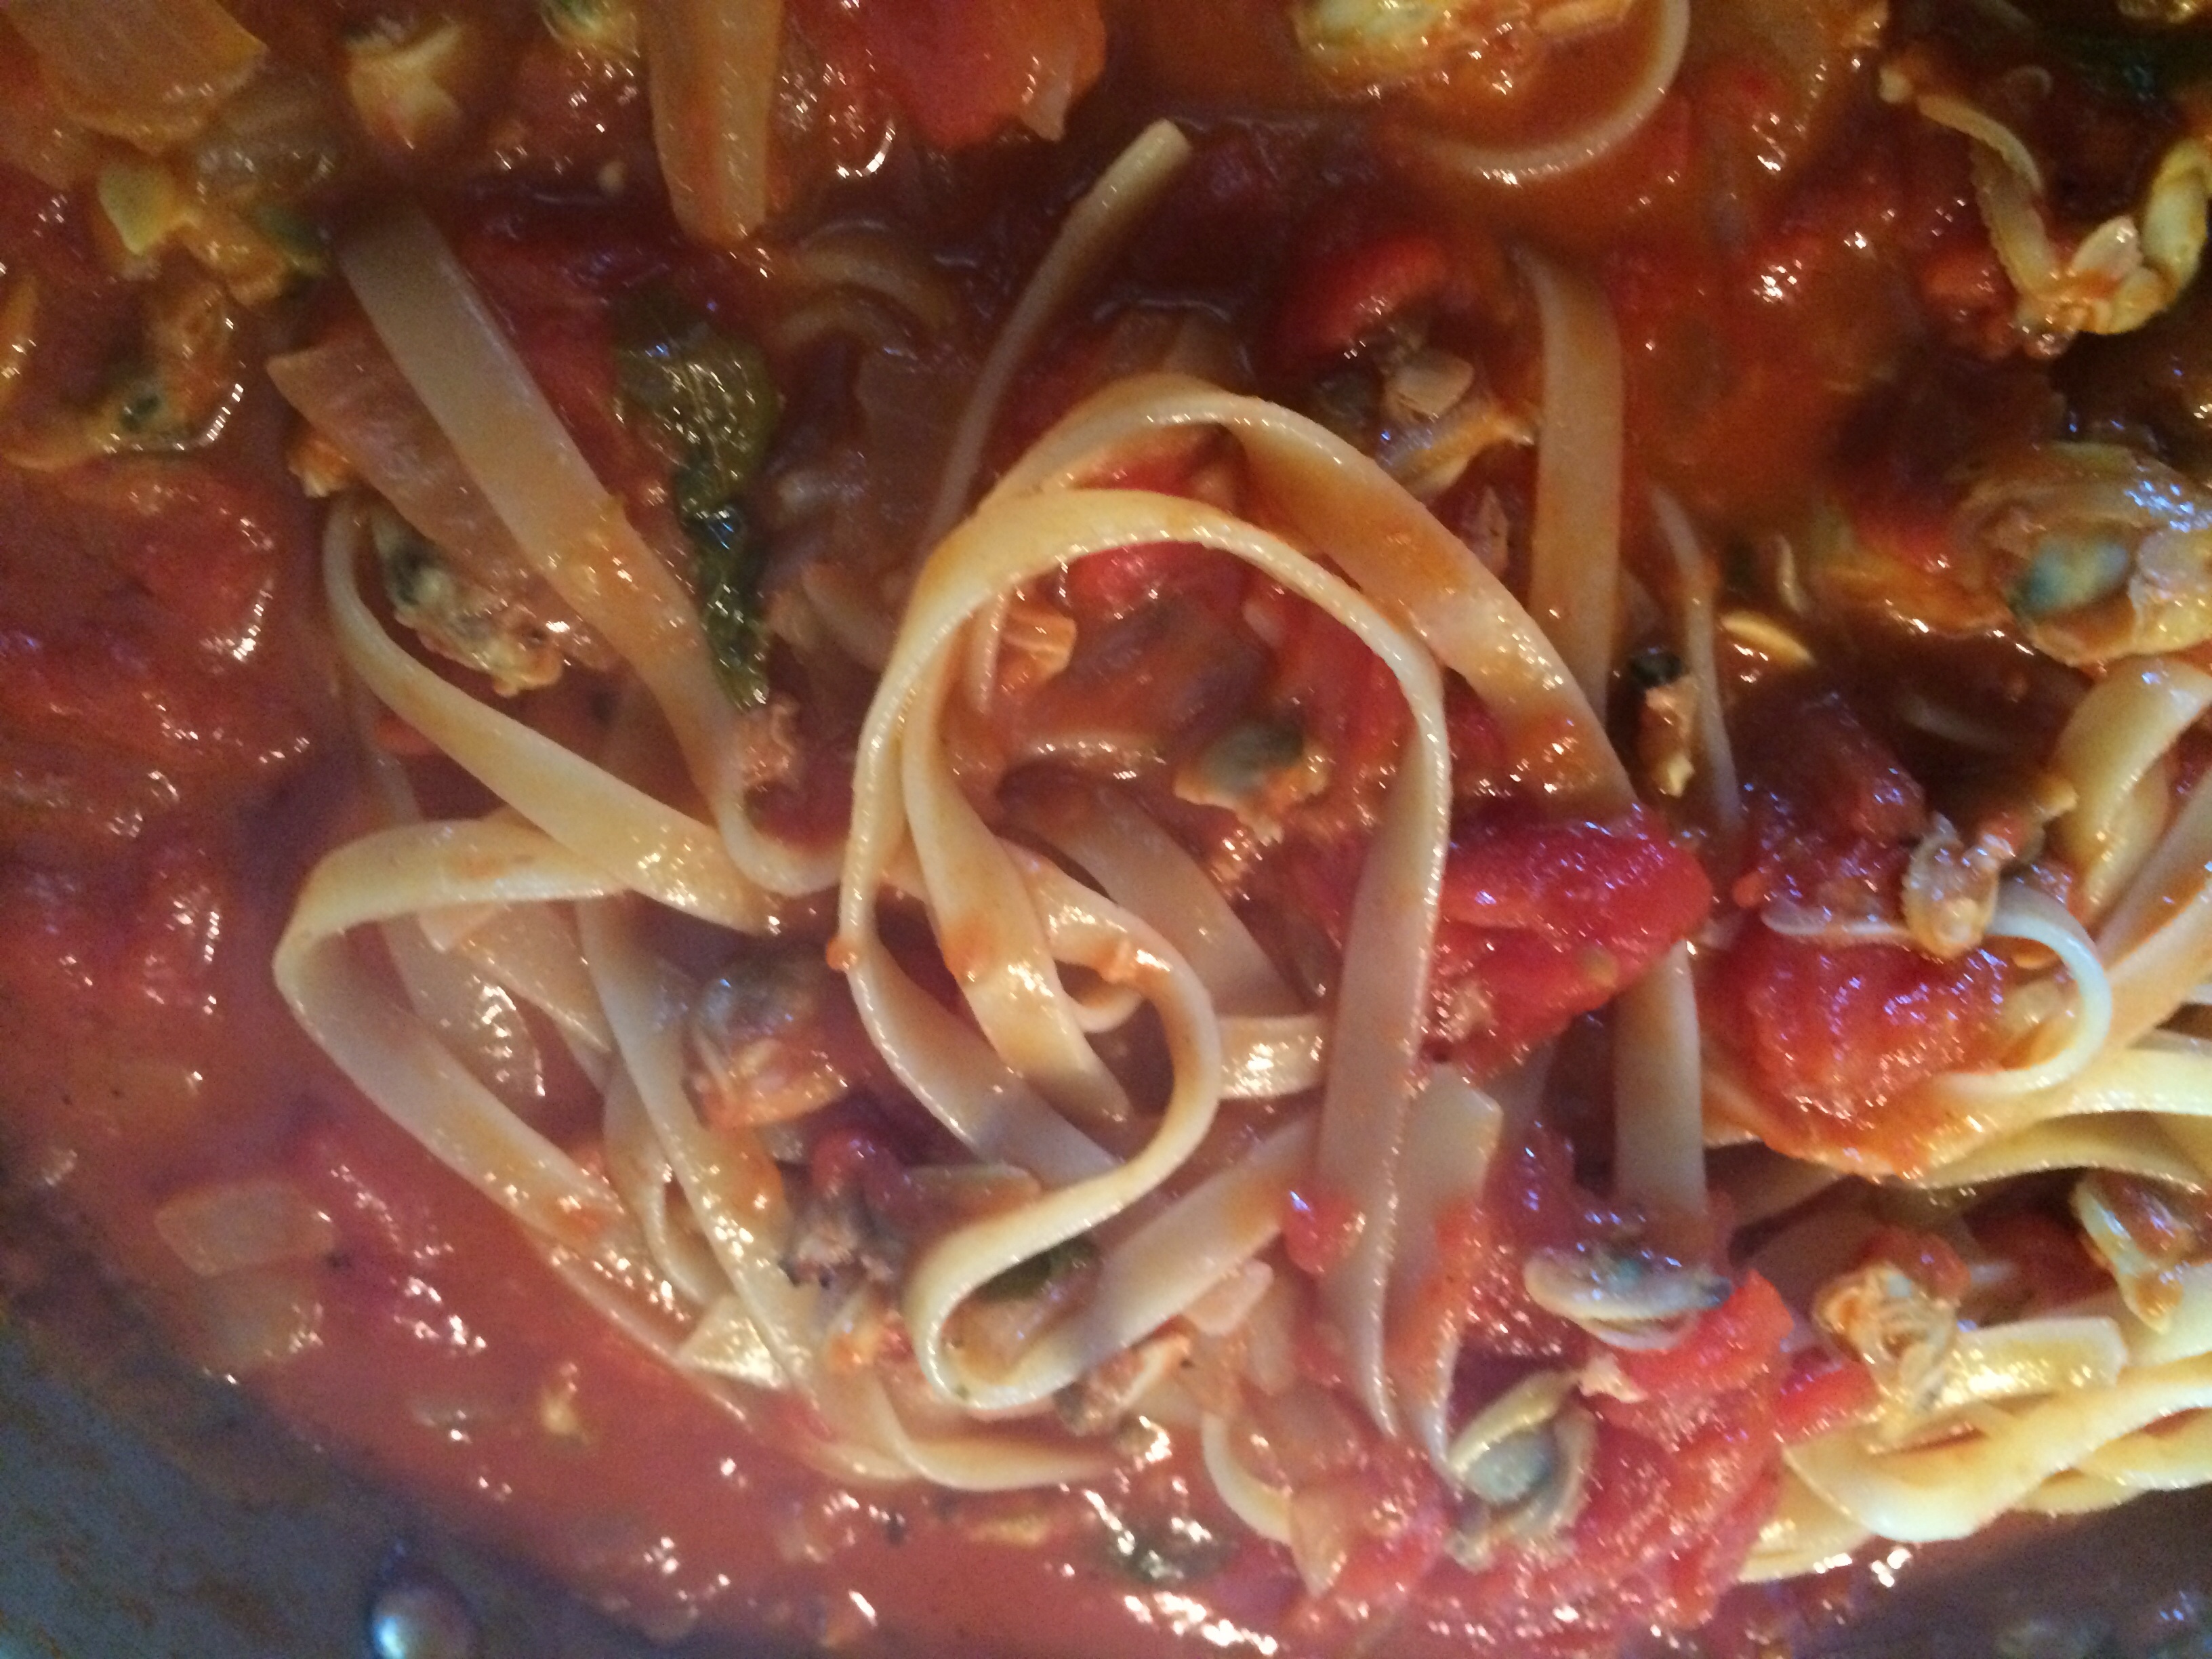
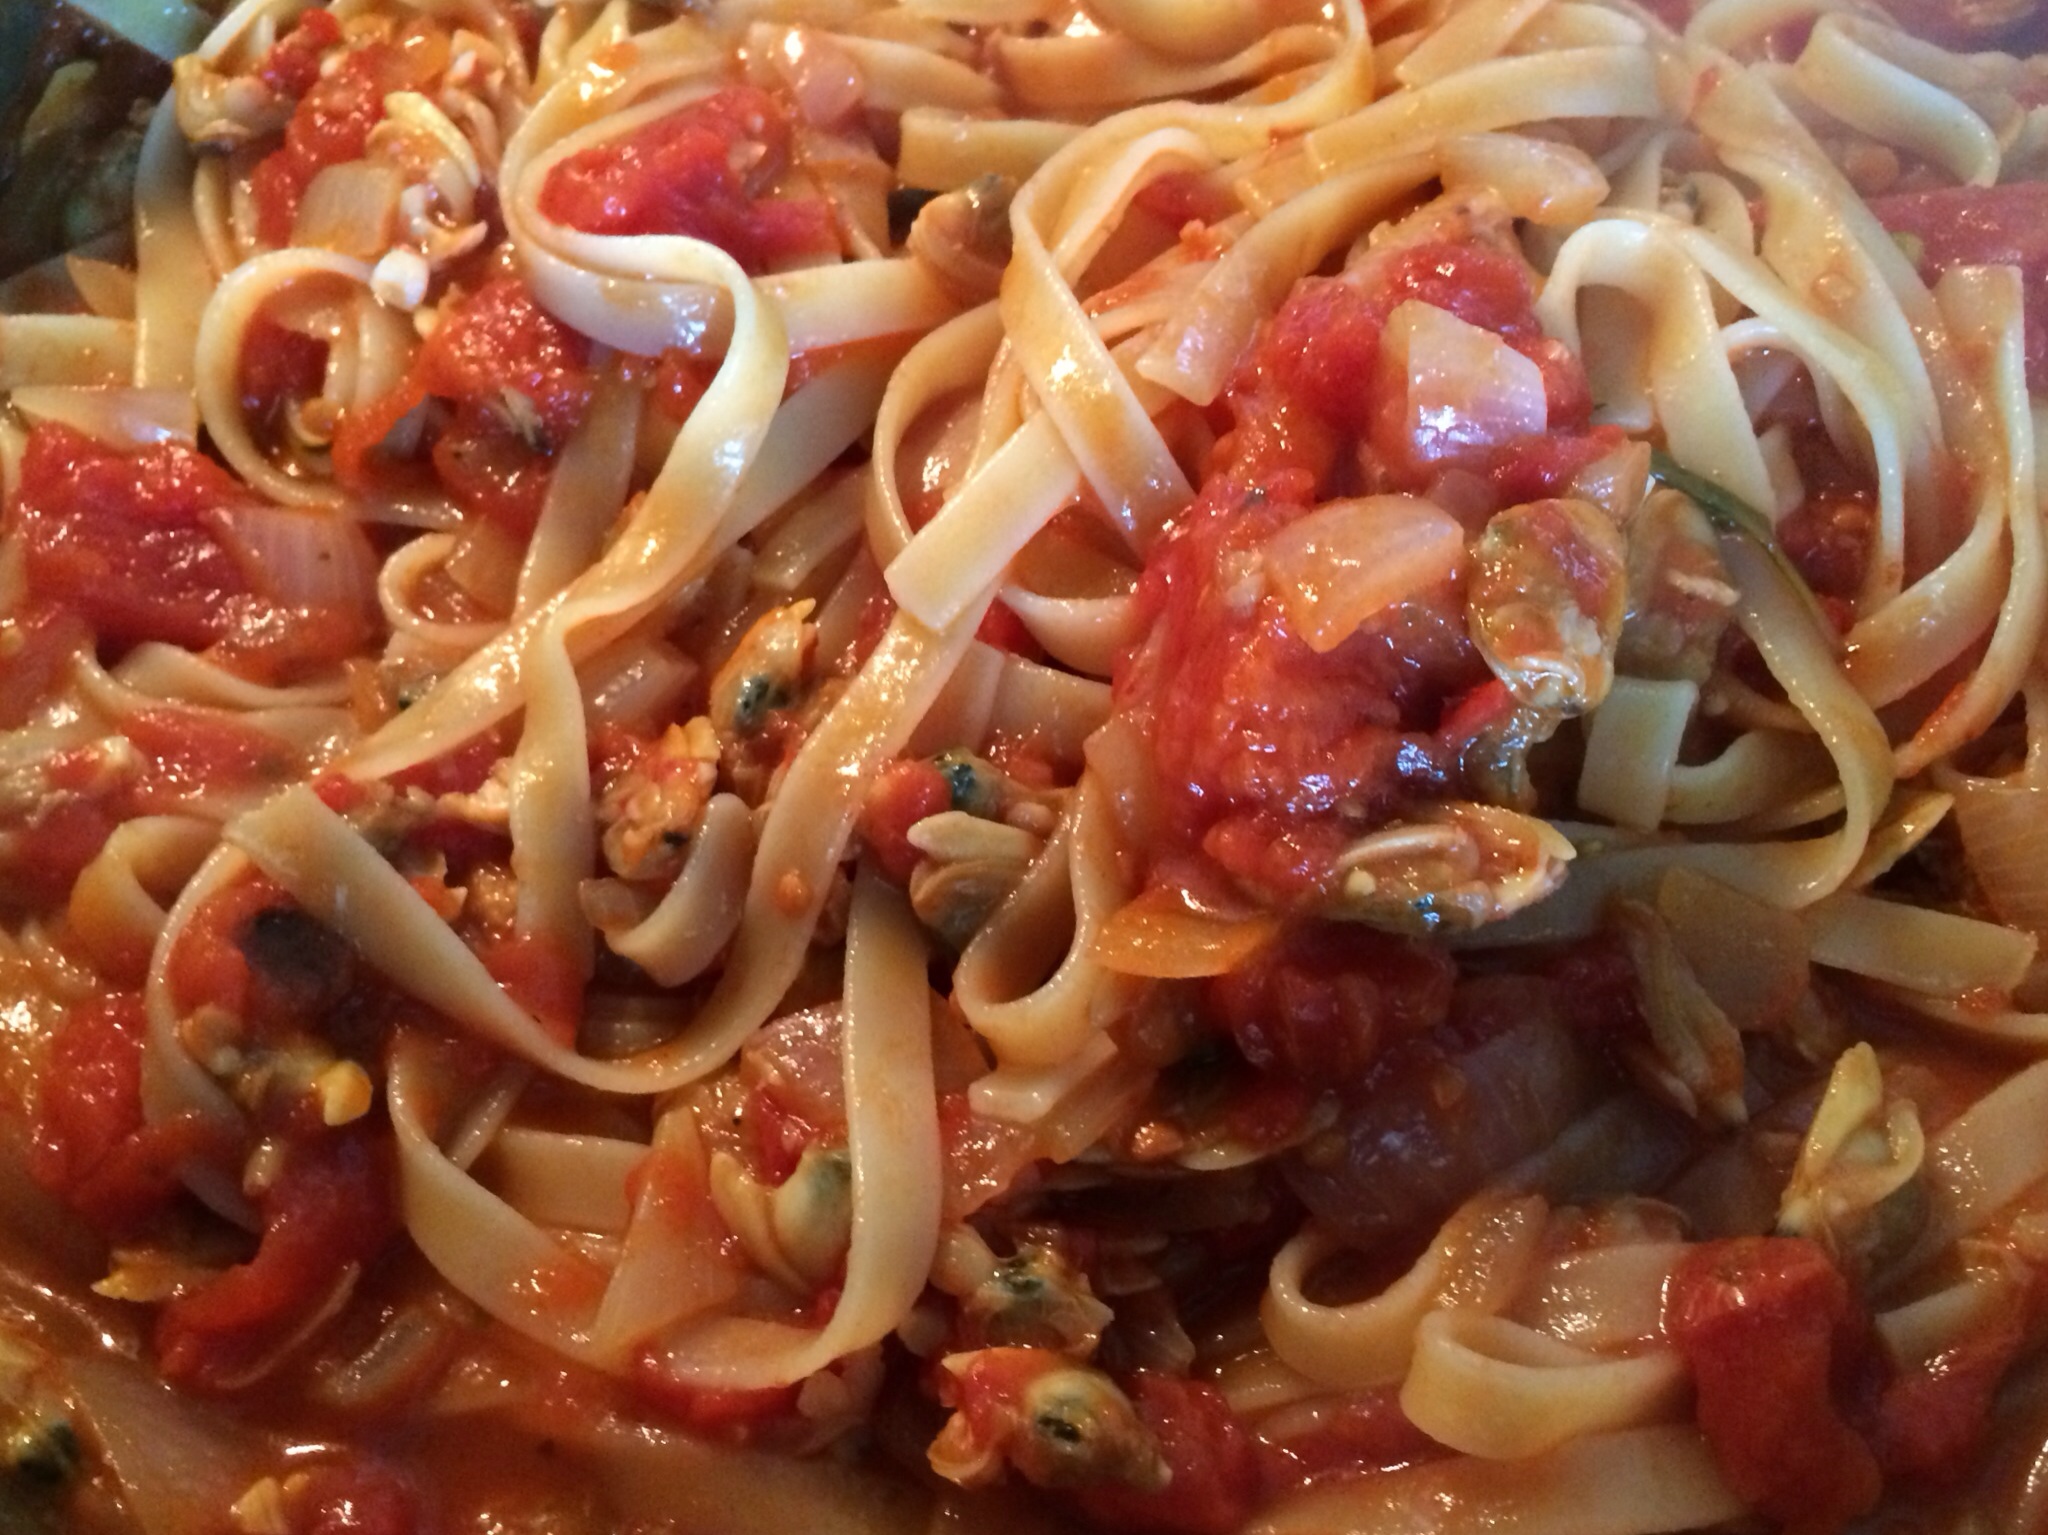
I call this dish linguini clams because there is no actual pasta sauce to scoop on top. The linguini soak up the liquid, and the clams, chunks of tomato, pieces of onion, herbs, and grated Parmesan cheese stick to the linguini. In my opinion, this is a perfect linguini clams. Much different than a bowl of pasta with a traditional marinara and added clams.
I have ordered linguini clams or cioppino in Italian restaurants for years, paying close attention to the preparation variations. Notice how the dish is not saucy, but not dry! Slippery noodles with surprises hidden throughout.
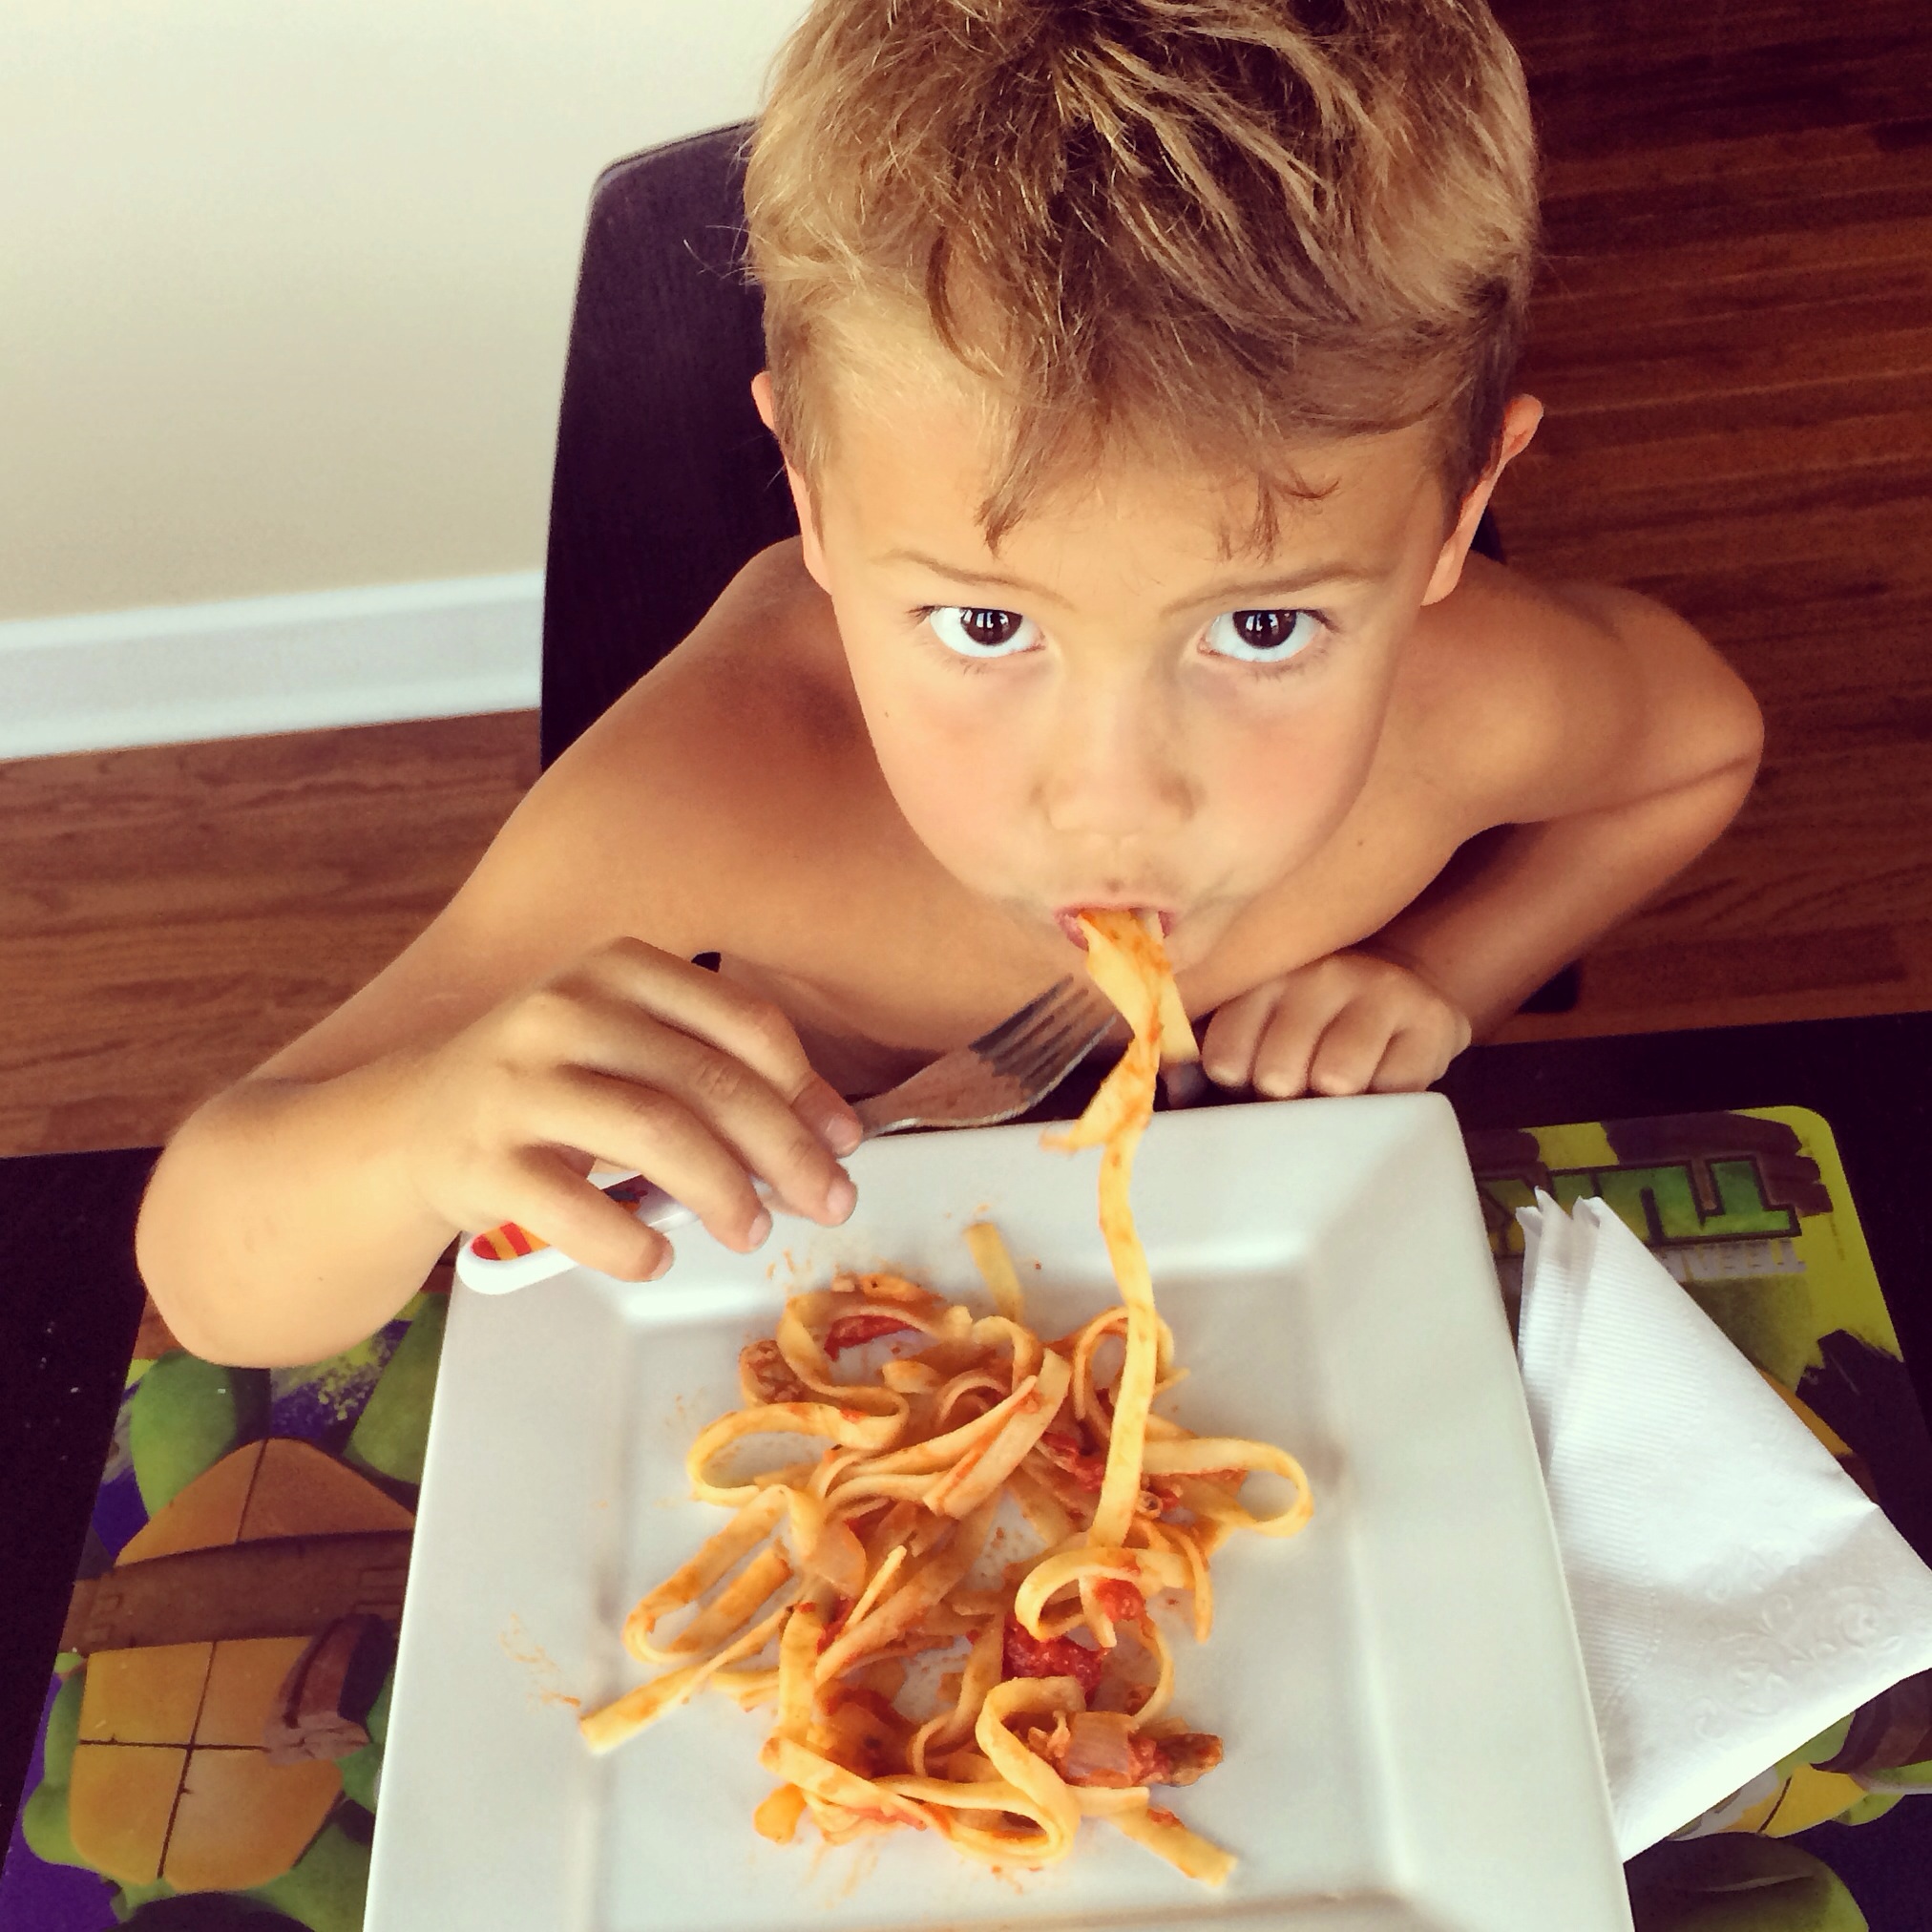
I say no shirt required because we have rookie pasta twirlers that splatter sauce everywhere and eat in their underwear ; )
As children, we would eat Sunday spaghetti in our underwear at my grandma and pappap Signorino’s house so we didn’t get sauce stains on our clothes!
Linguini Clams Ingredients:
2 tbsp. olive oil
3 cloves of garlic, pressed
1 small onion
1 35oz. can San Marzano tomatoes
1/4 cup chicken broth
1/4 cup dry white wine
1 lb. bag Pana Pesca baby clams
1 tbsp. chopped basil
1 tbsp. chopped rosemary
1 tbsp. chopped thyme
1 lb. linguini noodles (I actually use fettuccine noodles. They are a little thicker than linguini noodles and cook to a perfect al dente bite… Shhh!)
Salt/pepper
Freshly grated parmesan cheese
Directions:
Heat oil in your biggest,deepest pan.
Add onions and sauté until they begin to look translucent.
Add garlic and heat.
Add tomatoes, herbs, chicken stock and mix well.
Meanwhile, bring salted water to a boil in a stockpot for the linguini.
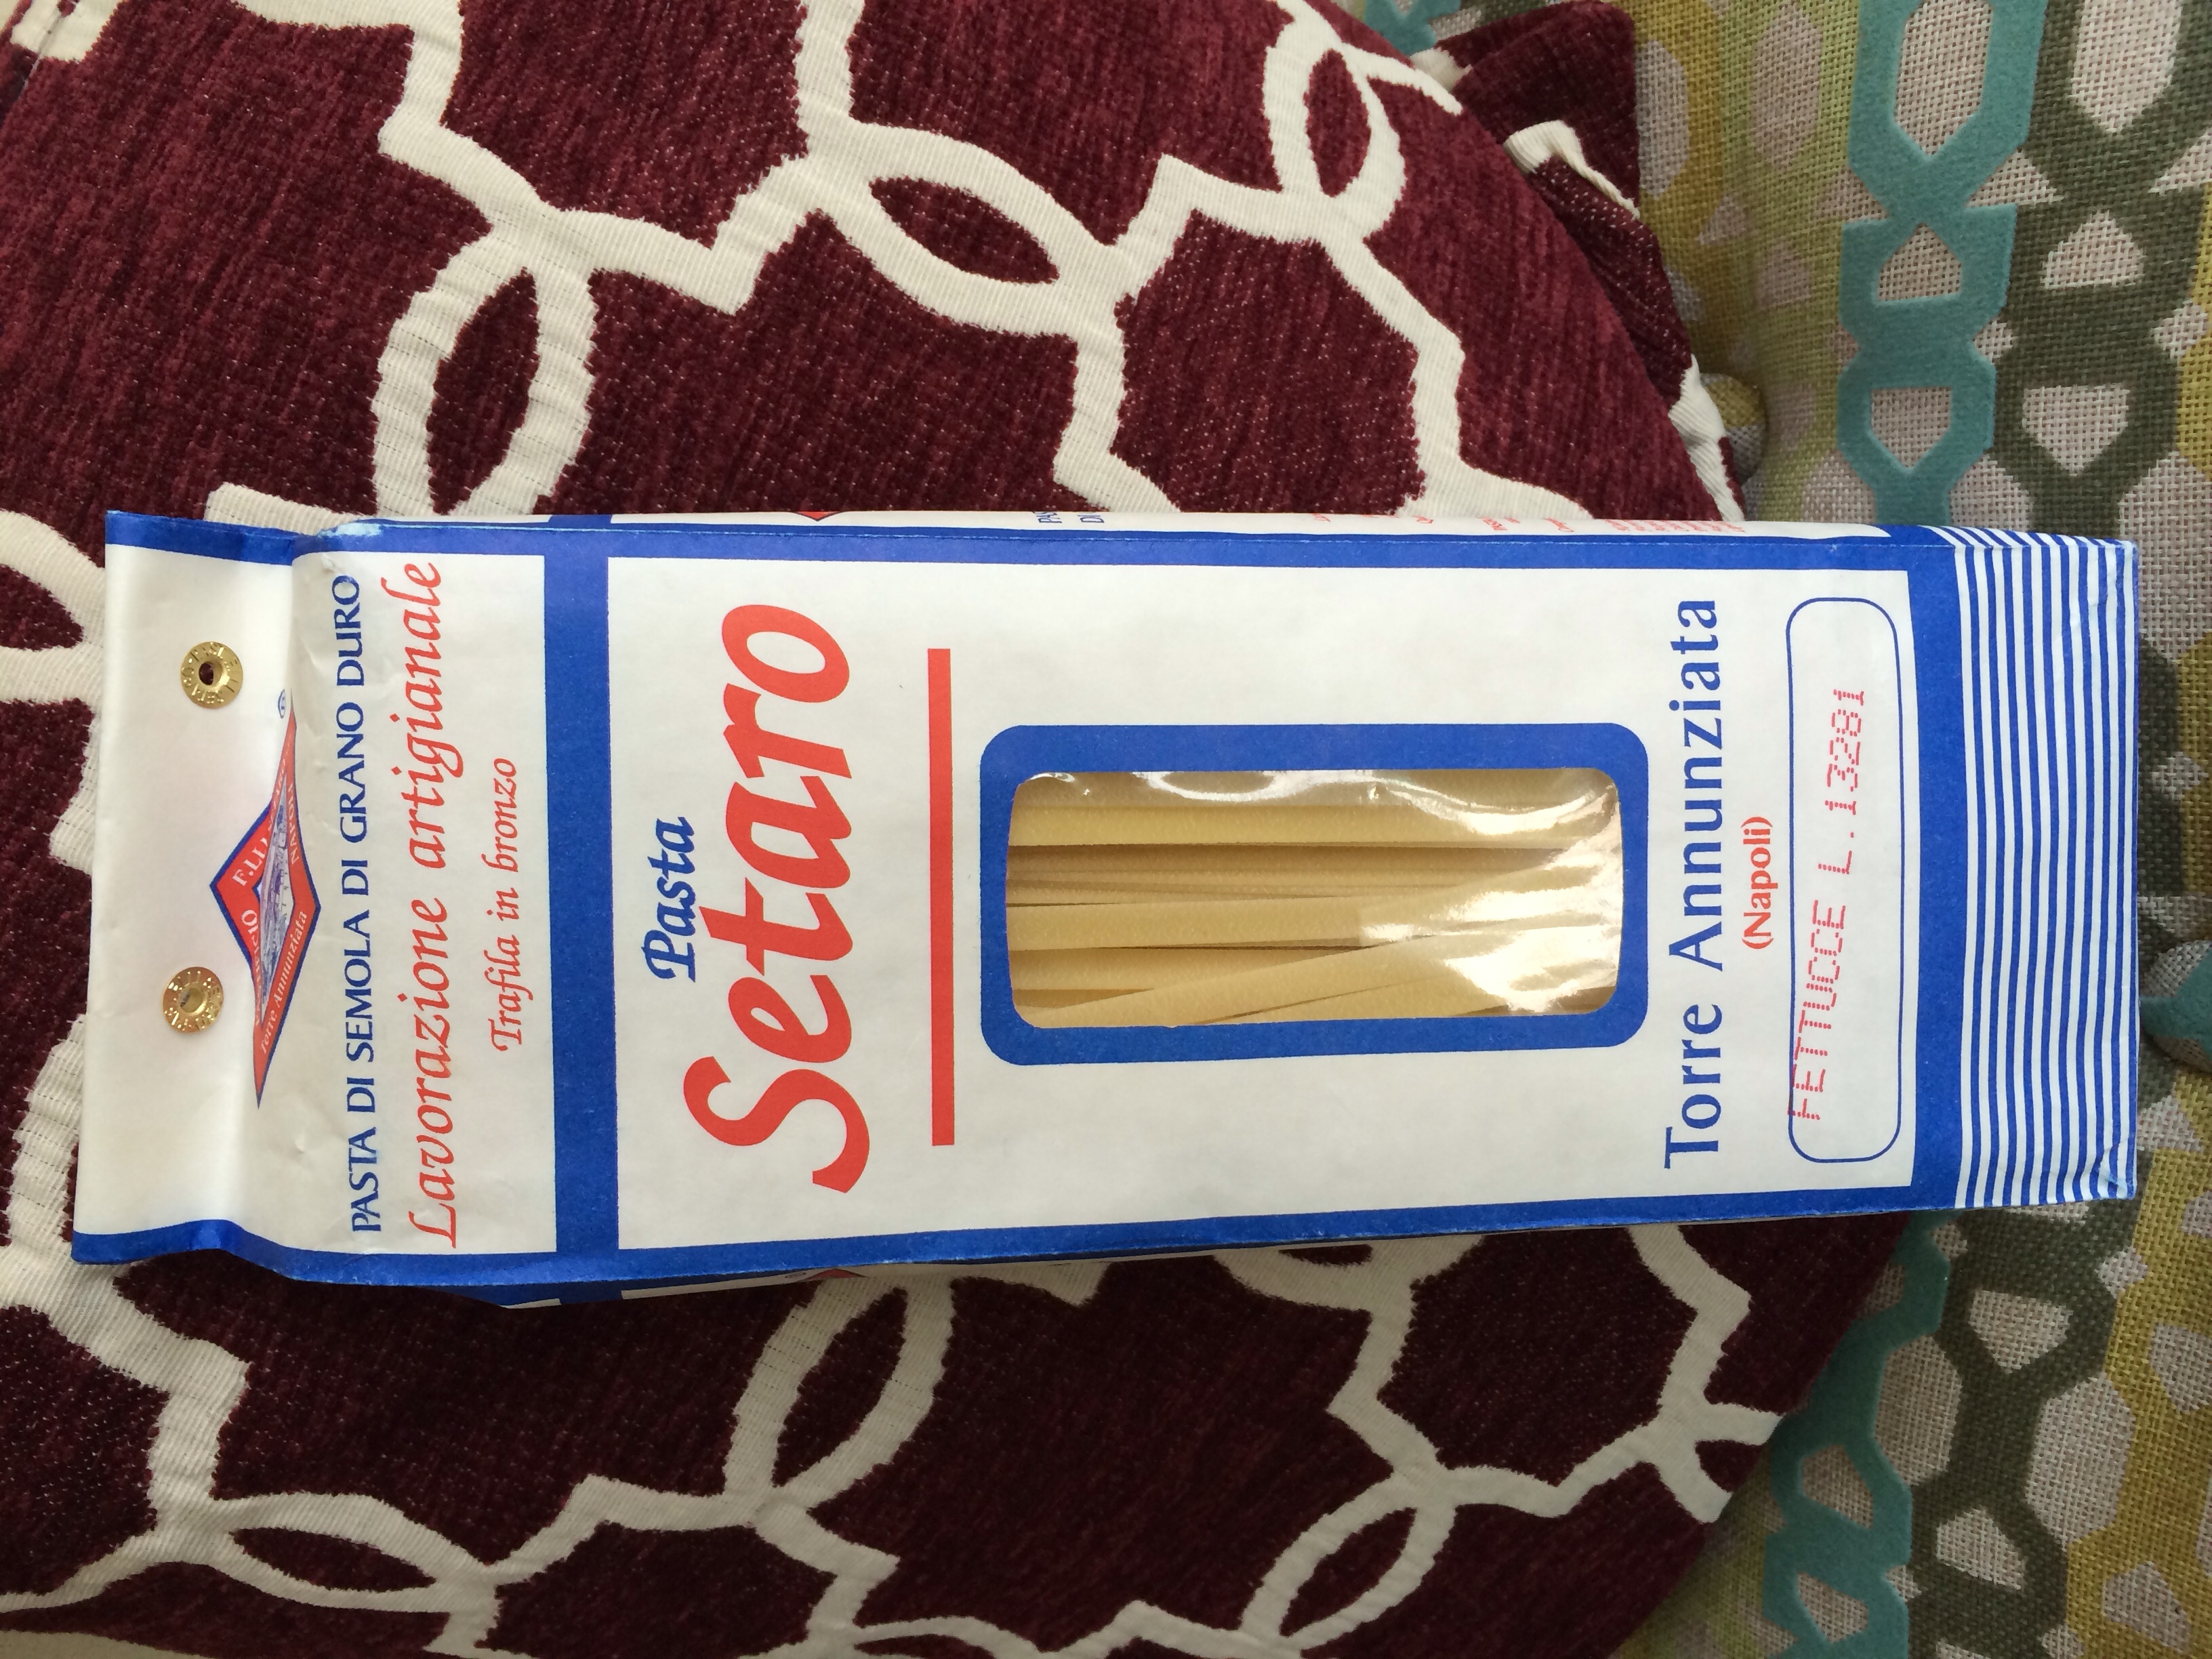
This Setaro Fettuce dry pasta is the closest to homemade. It is so heavily floured and cooks perfectly to the al dente bite. Best pasta ever! I get mine at Penn Mac in Pittsburgh’s Strip District. $10 http://www.pennmac.com/items/4895//setaro-fettucce-pasta
Add linguini and cook according to package or until al dente approximately 7-9 minutes.
Add clams to sauce pan and cook while linguini is boiling. Clams will cook within 10 minutes.
Drain the linguini and add slowly into the sauce pan while mixing well.
Before photo. The mixing and absorbing of the liquid is the most important part of this dish. Almost like mixing homemade sausage! Your arms will get tired!
Coat the linguini until your linguini/clam ratio is satisfactory.
After photo. See how the liquid is absorbed by the pasta. Continue to mix well so the clams are in every bite!
Scoop onto a serving plate.
Serve with a loaf of ciabatta bread and butter. Always top with freshly grated parmesan cheese!
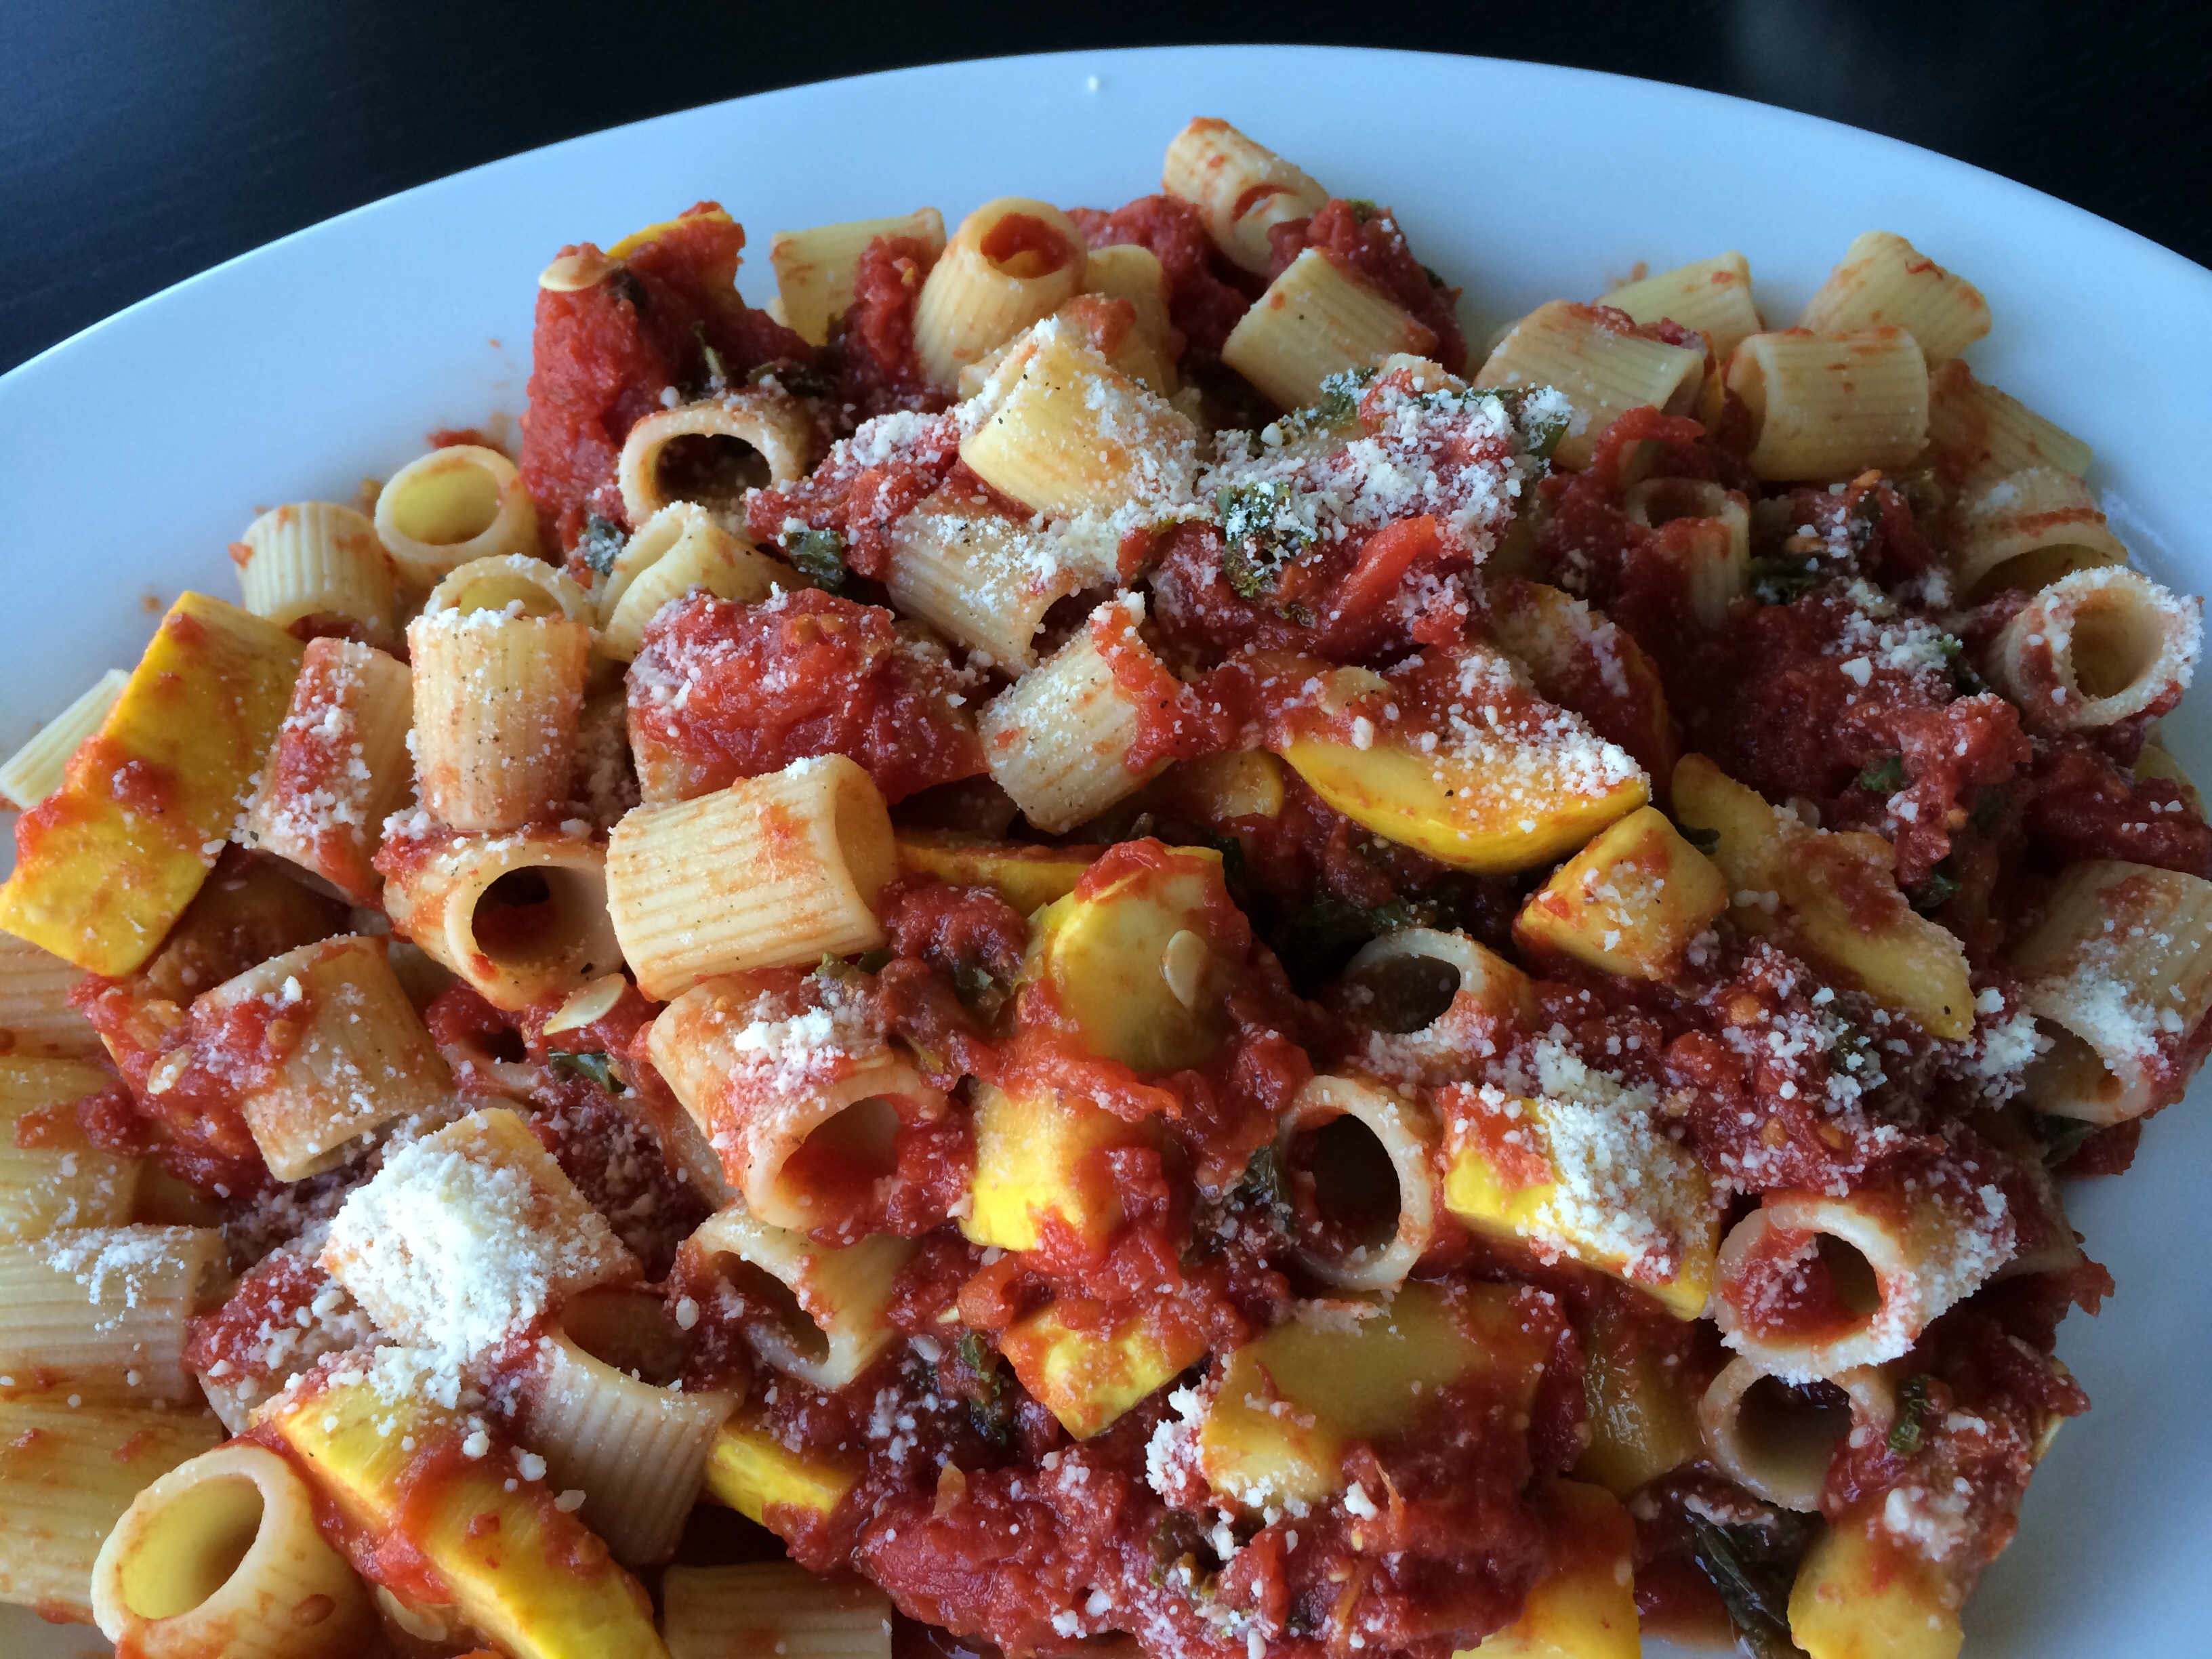
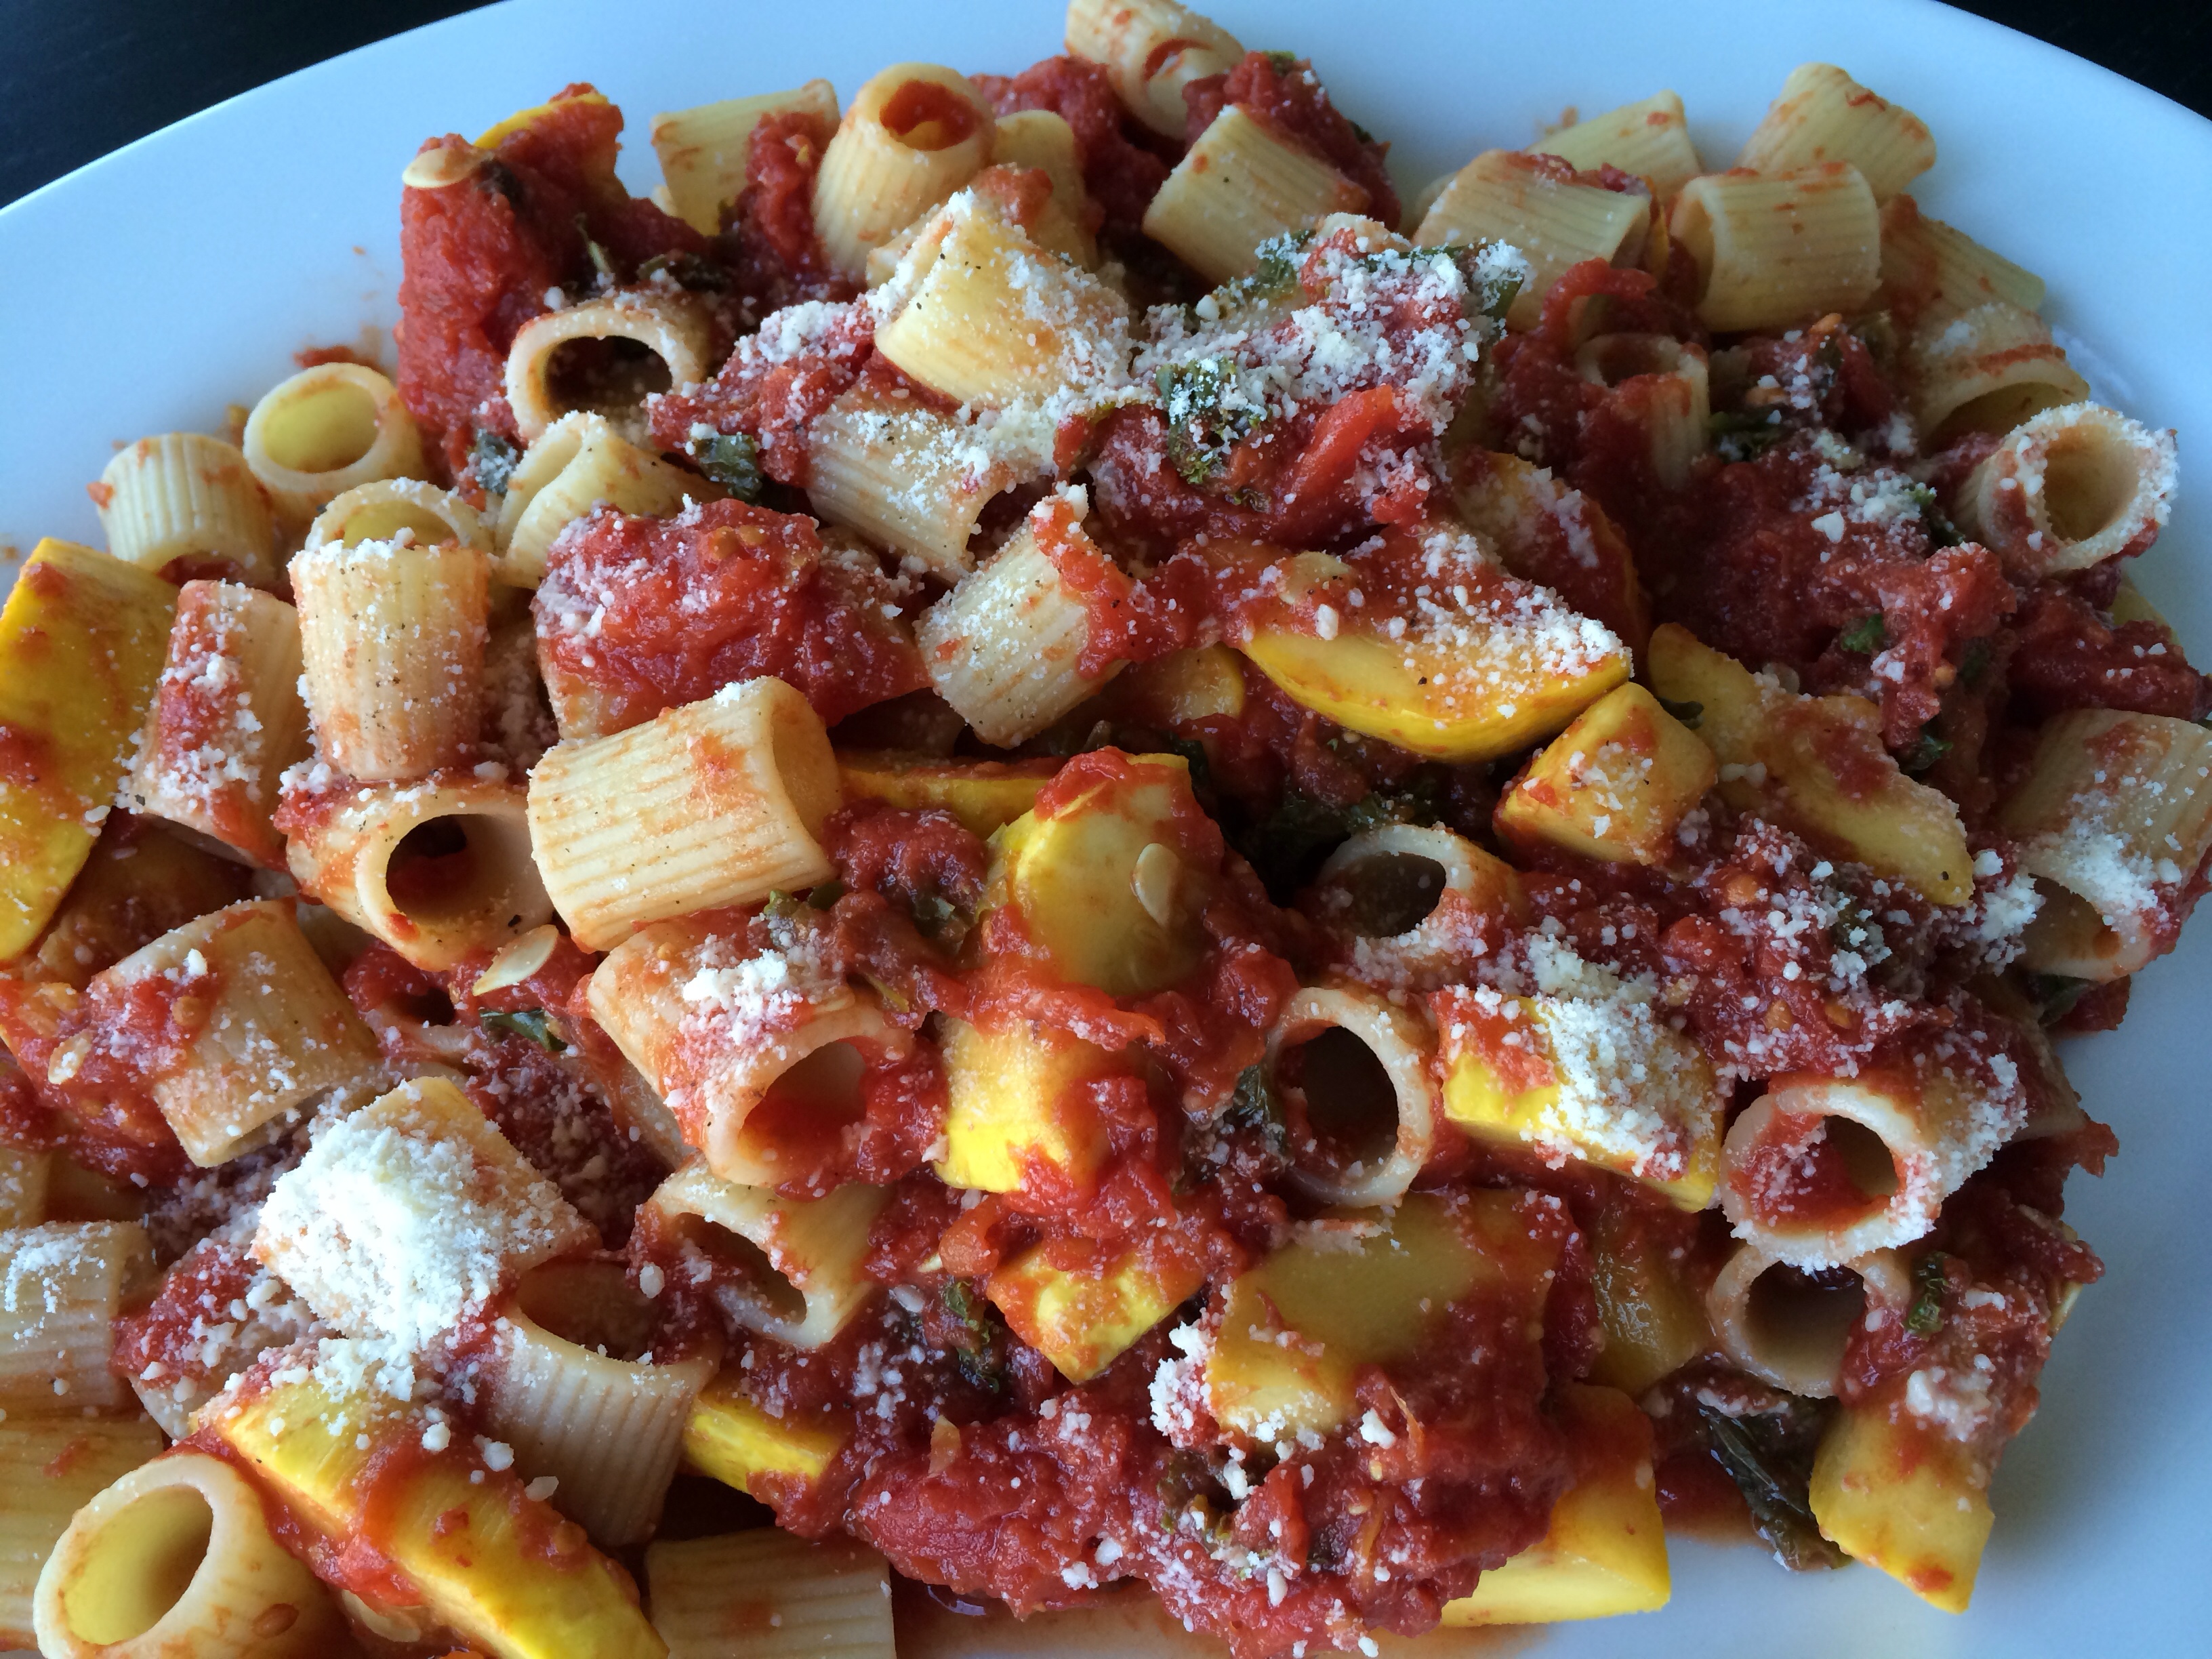
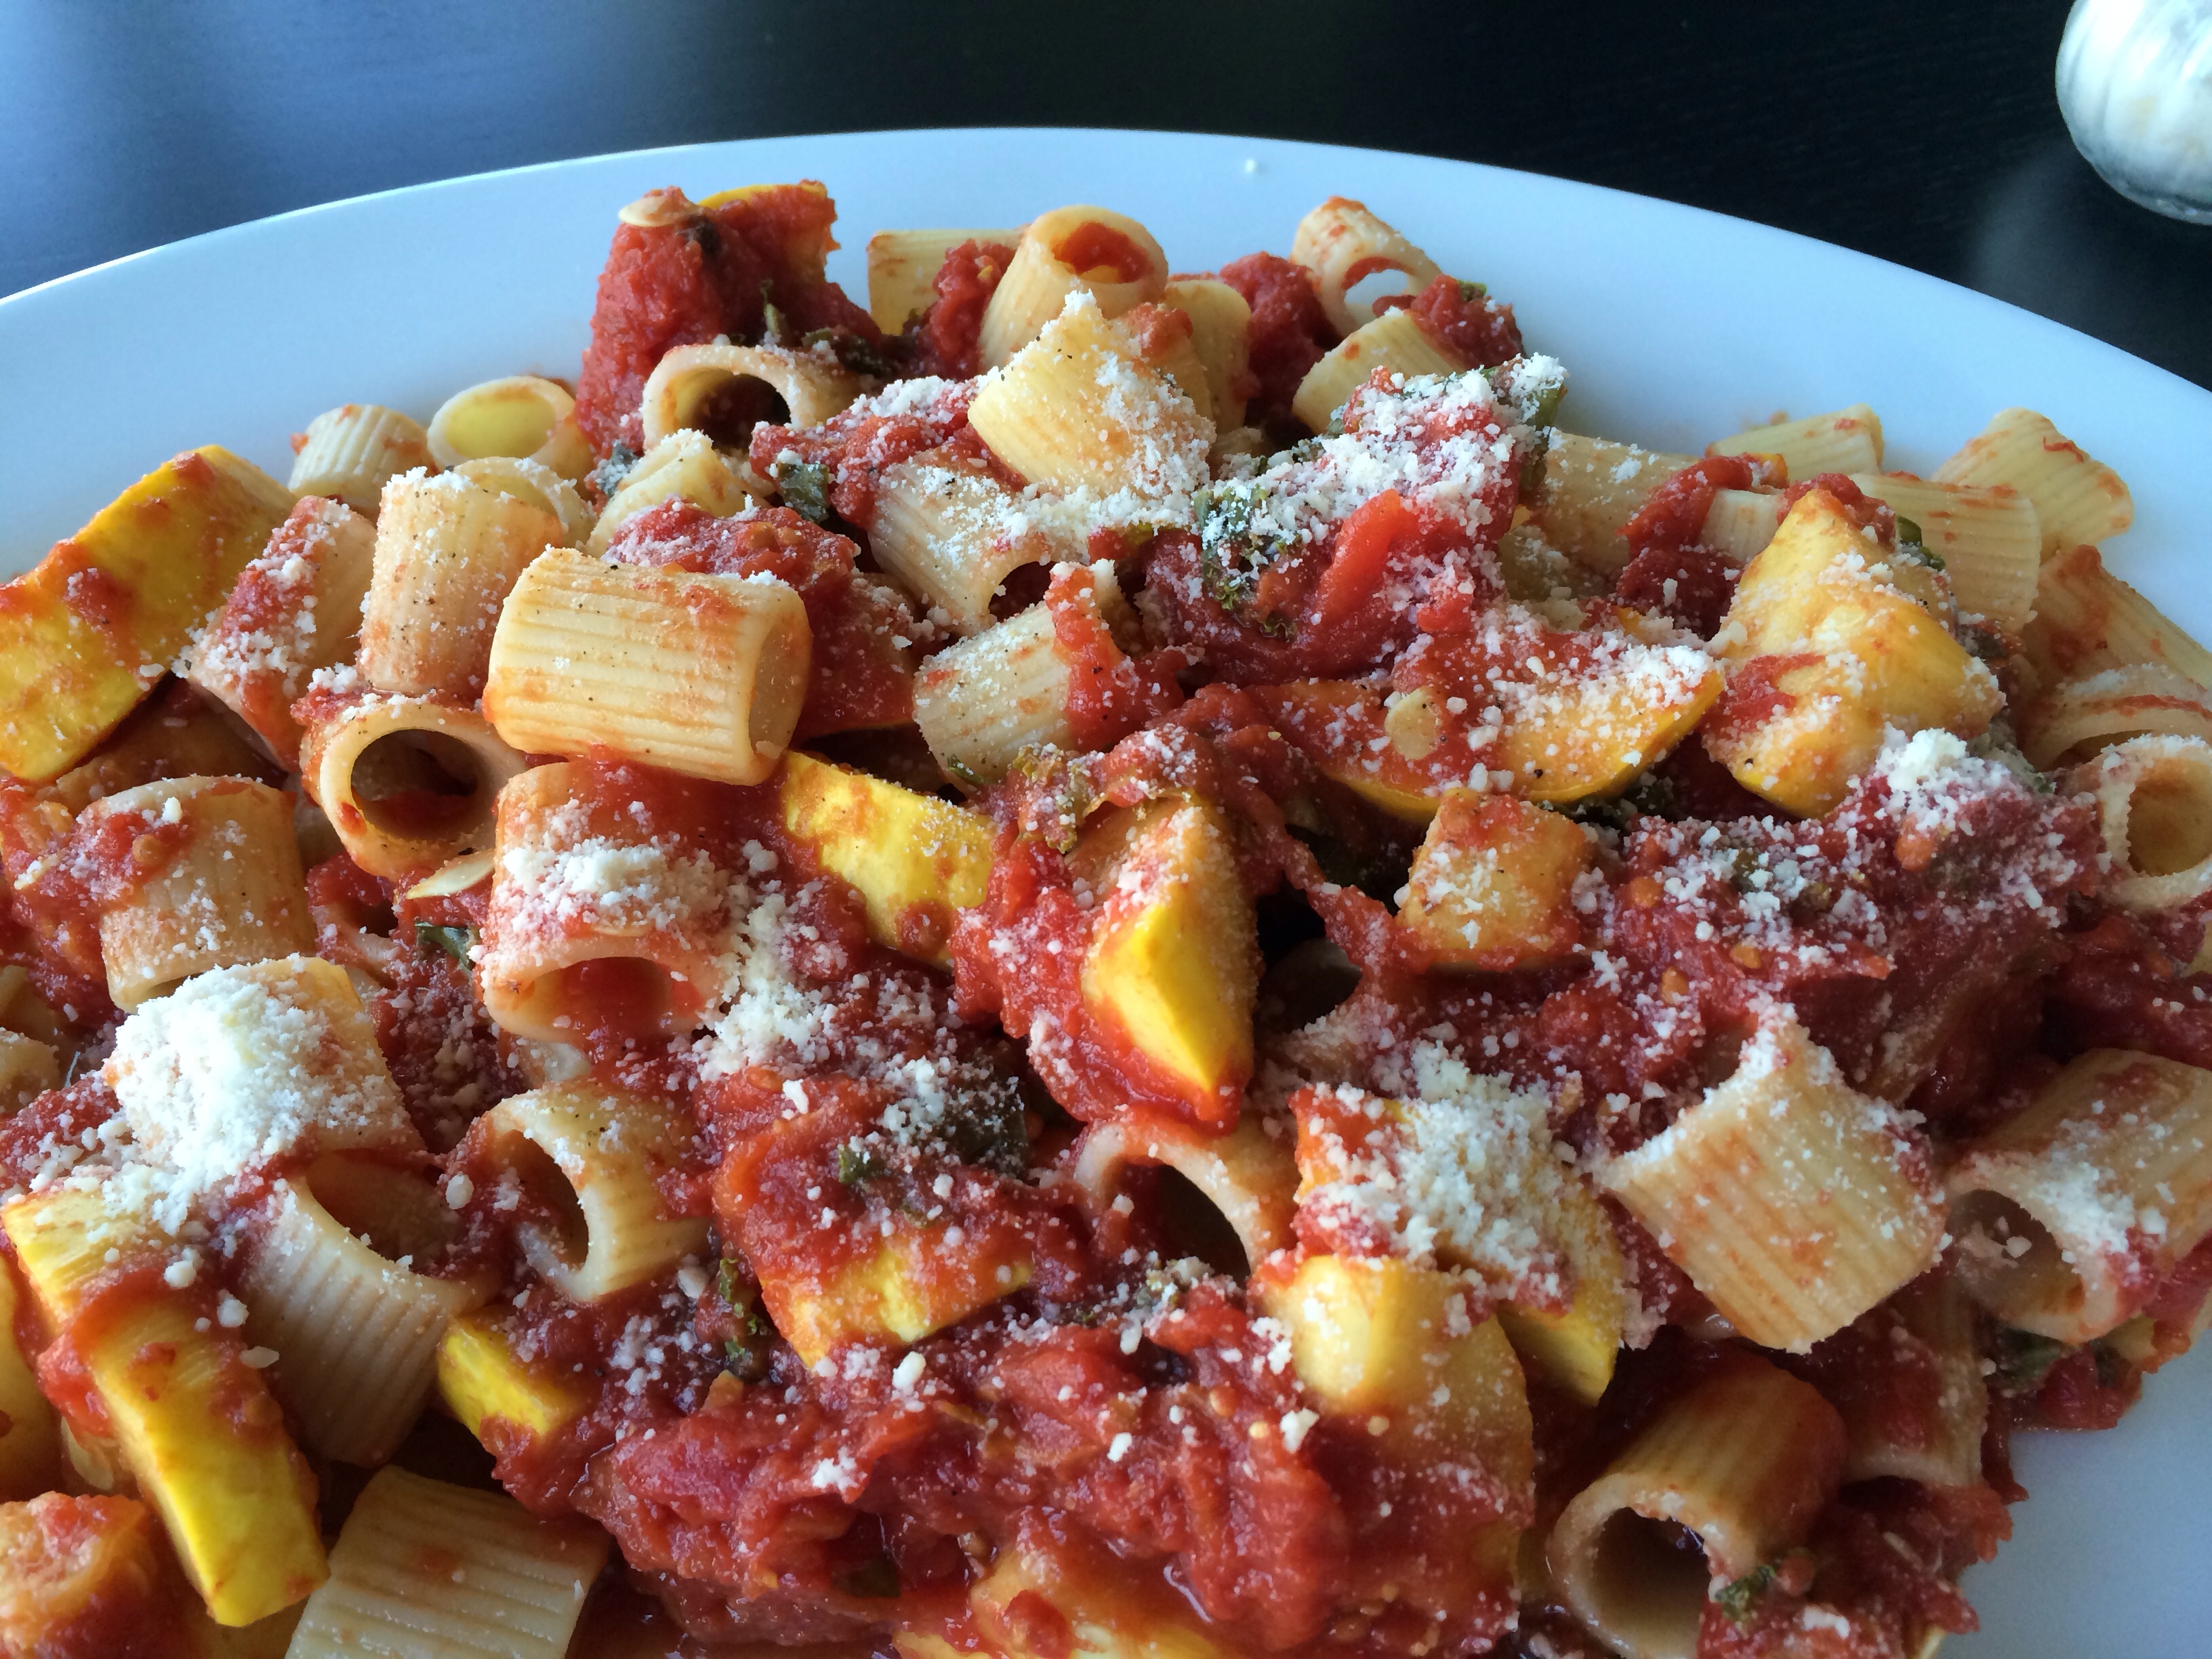
Sometimes I only have 20 minutes to cook dinner! A quick San Marzano tomato pan sauce mixed with cooked pasta is quick, light, and delicious! In the summertime, I include fresh vegetables and fresh herbs! Here is one of my favorite summertime dishes!
The key to a great tasting quick pan sauce is getting the acidity out of the veggies by tossing them with olive oil and garlic before adding them to the tomatoes.
Simply adding squash and zucchini to the tomatoes creates a sour taste. Follow these simple steps and your simple pan sauce will be transformed into a gourmet dinner!
Super easy and so flavorful, a summer vegetable pasta can be dressed up or down! Serve it with a salad and fresh ciabatta or by itself!
Summer San Marzano Veggie Pasta
Ingredients:
1 yellow squash, chopped into quartered rounds
1 zucchini, chopped into quartered rounds
2 cloves garlic, pressed
2 tbsp. olive oil
1/4 cup chopped kale
2 35 oz. cans San Marzano tomatoes
1 tbsp. fresh chopped basil
1 tbsp. fresh chopped rosemary
Salt/pepper
Freshly grated parmesan cheese
1 lb. of your favorite pasta
Directions:
Heat olive oil in your largest, deepest frying pan on low to medium heat, and add pressed garlic.
Cook on low/medium heat. Be careful not to burn the garlic! No brown just a golden glow!
Add squash and zucchini, cook until slightly softened but still firm.
Add kale, basil and rosemary and coat with liquid.
Mix in tomatoes and heat through.
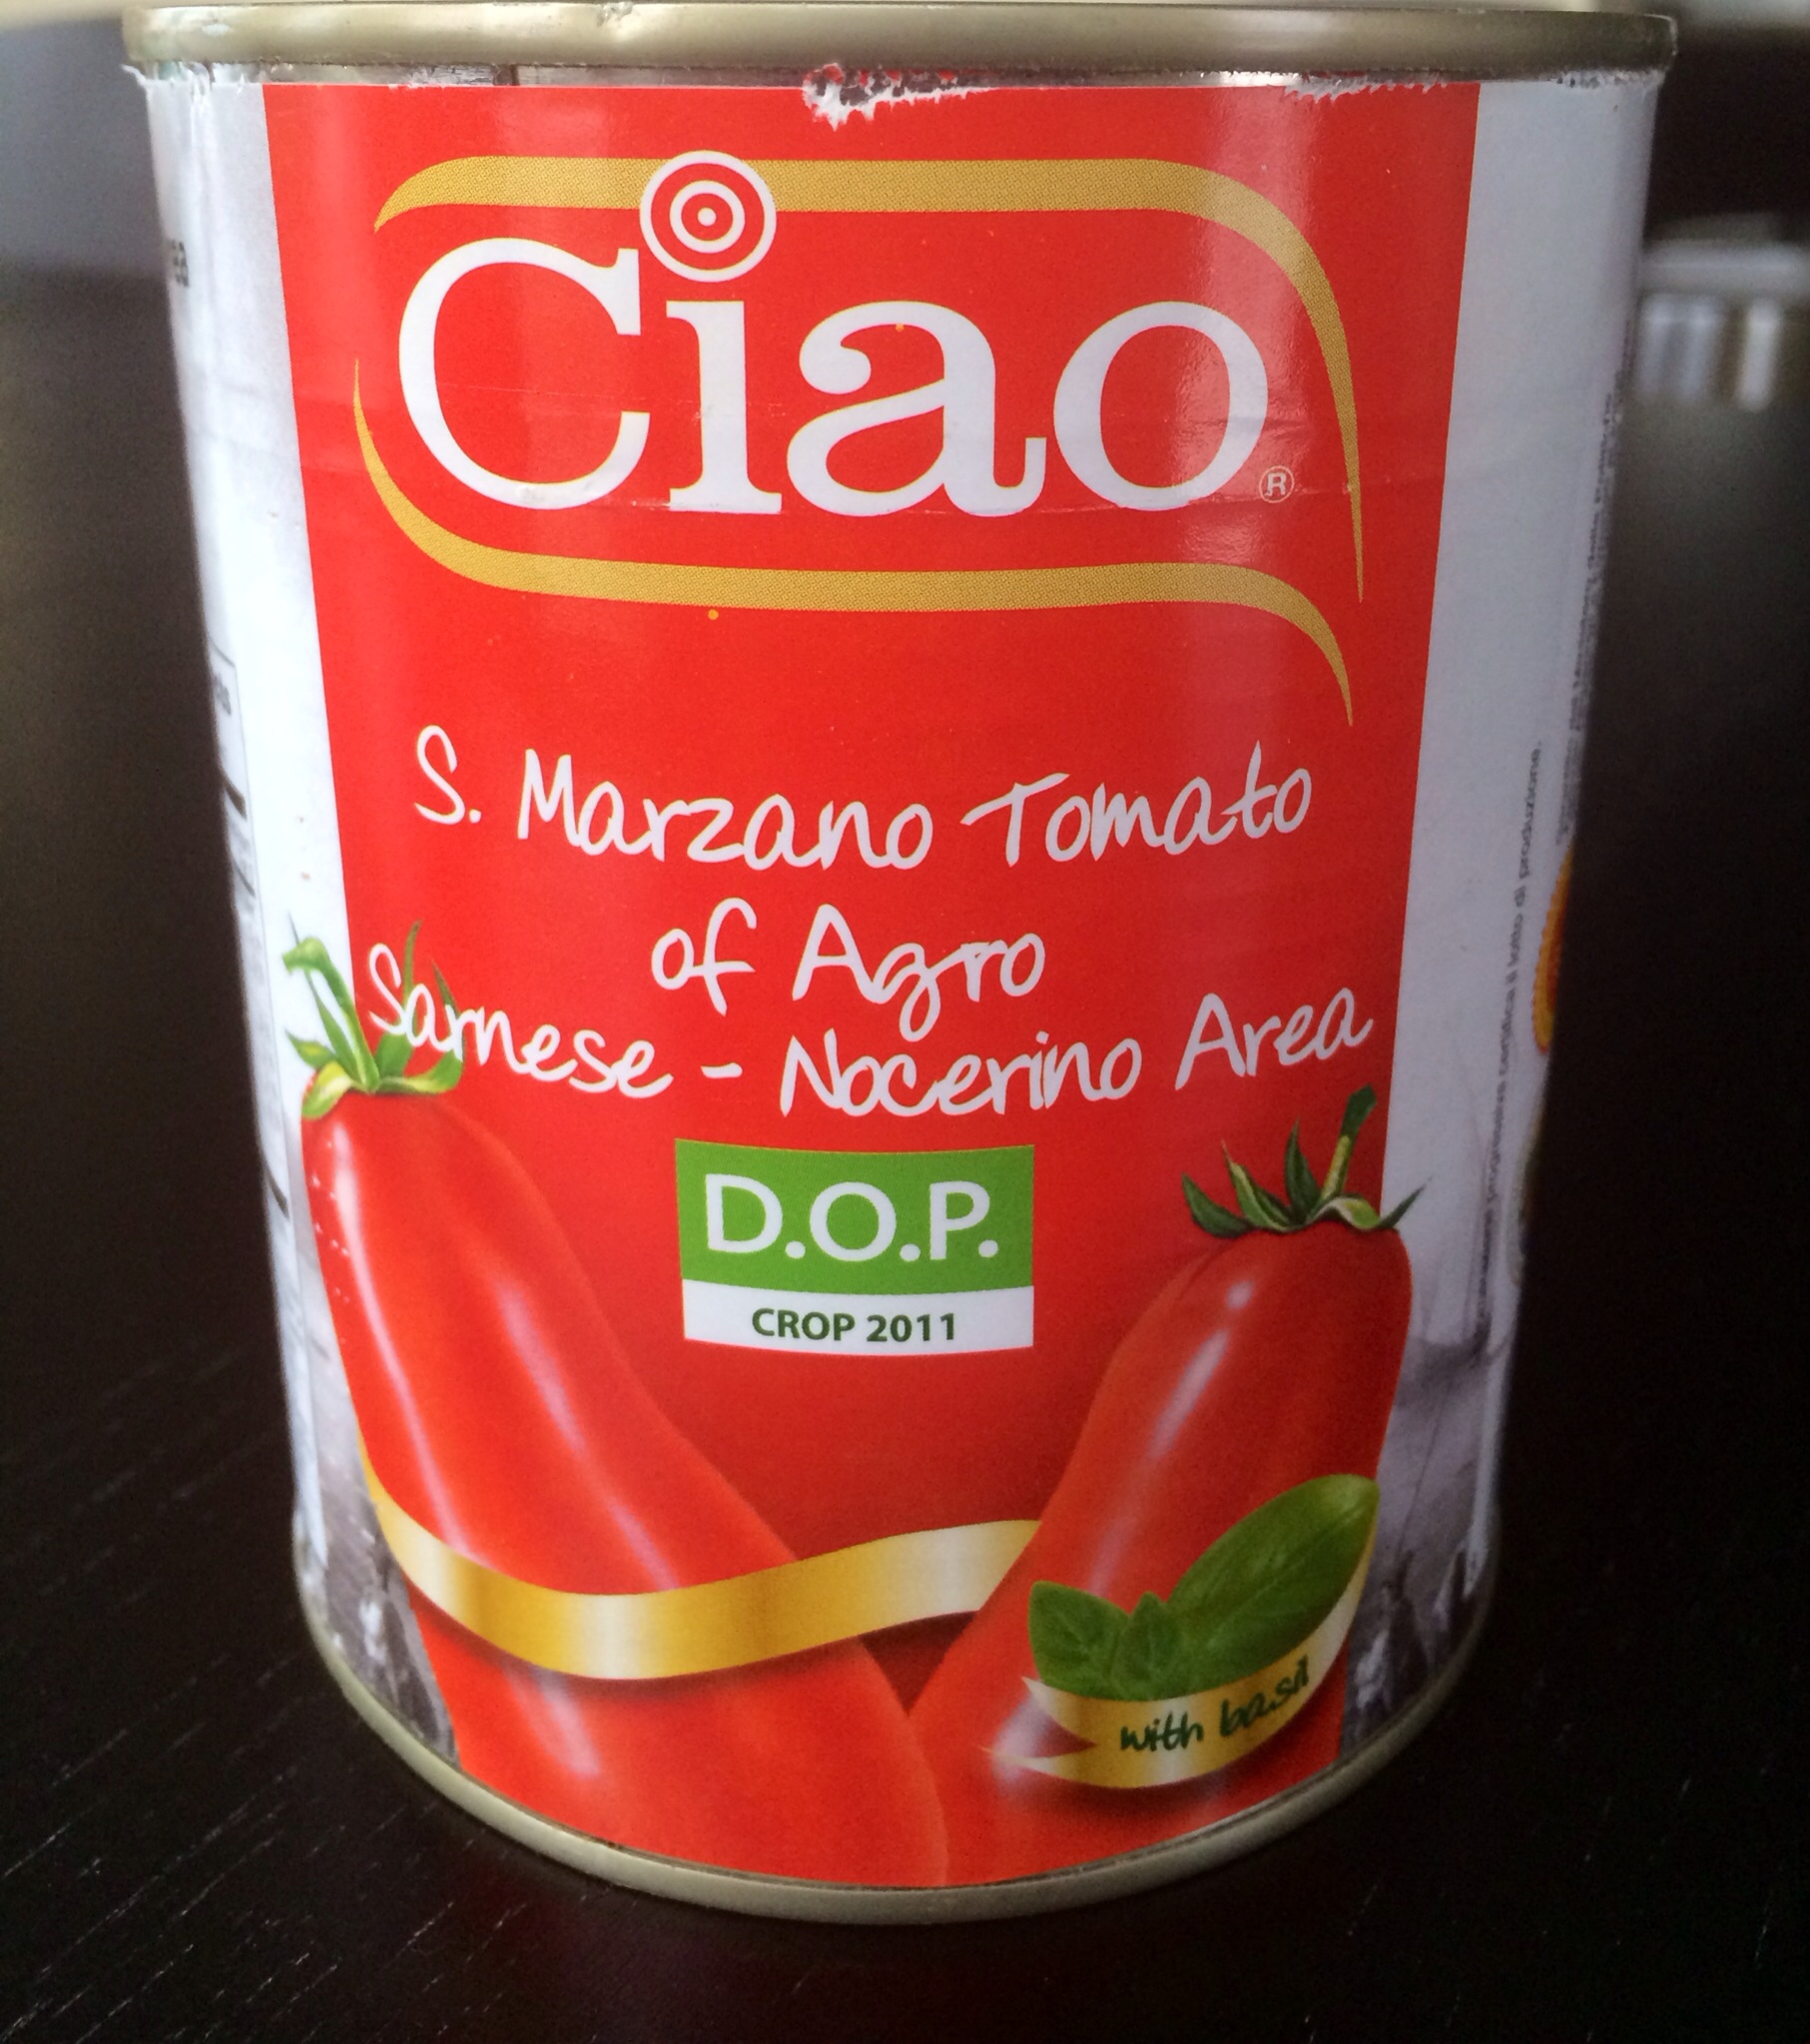
My favorite brand is Ciao tomatoes! Break up the whole tomatoes while mixing.
Cook pasta according to package in a separate pot of boiling water until al dente.
Add pasta to sauce and mix well.
Always top with fresh grated parmesan cheese.
Dinner tonight! Summer Veggie Pasta!
Want to add meat?
The addition of chopped bacon, italian sausage, or ham adds another layer of flavor! Experiment!
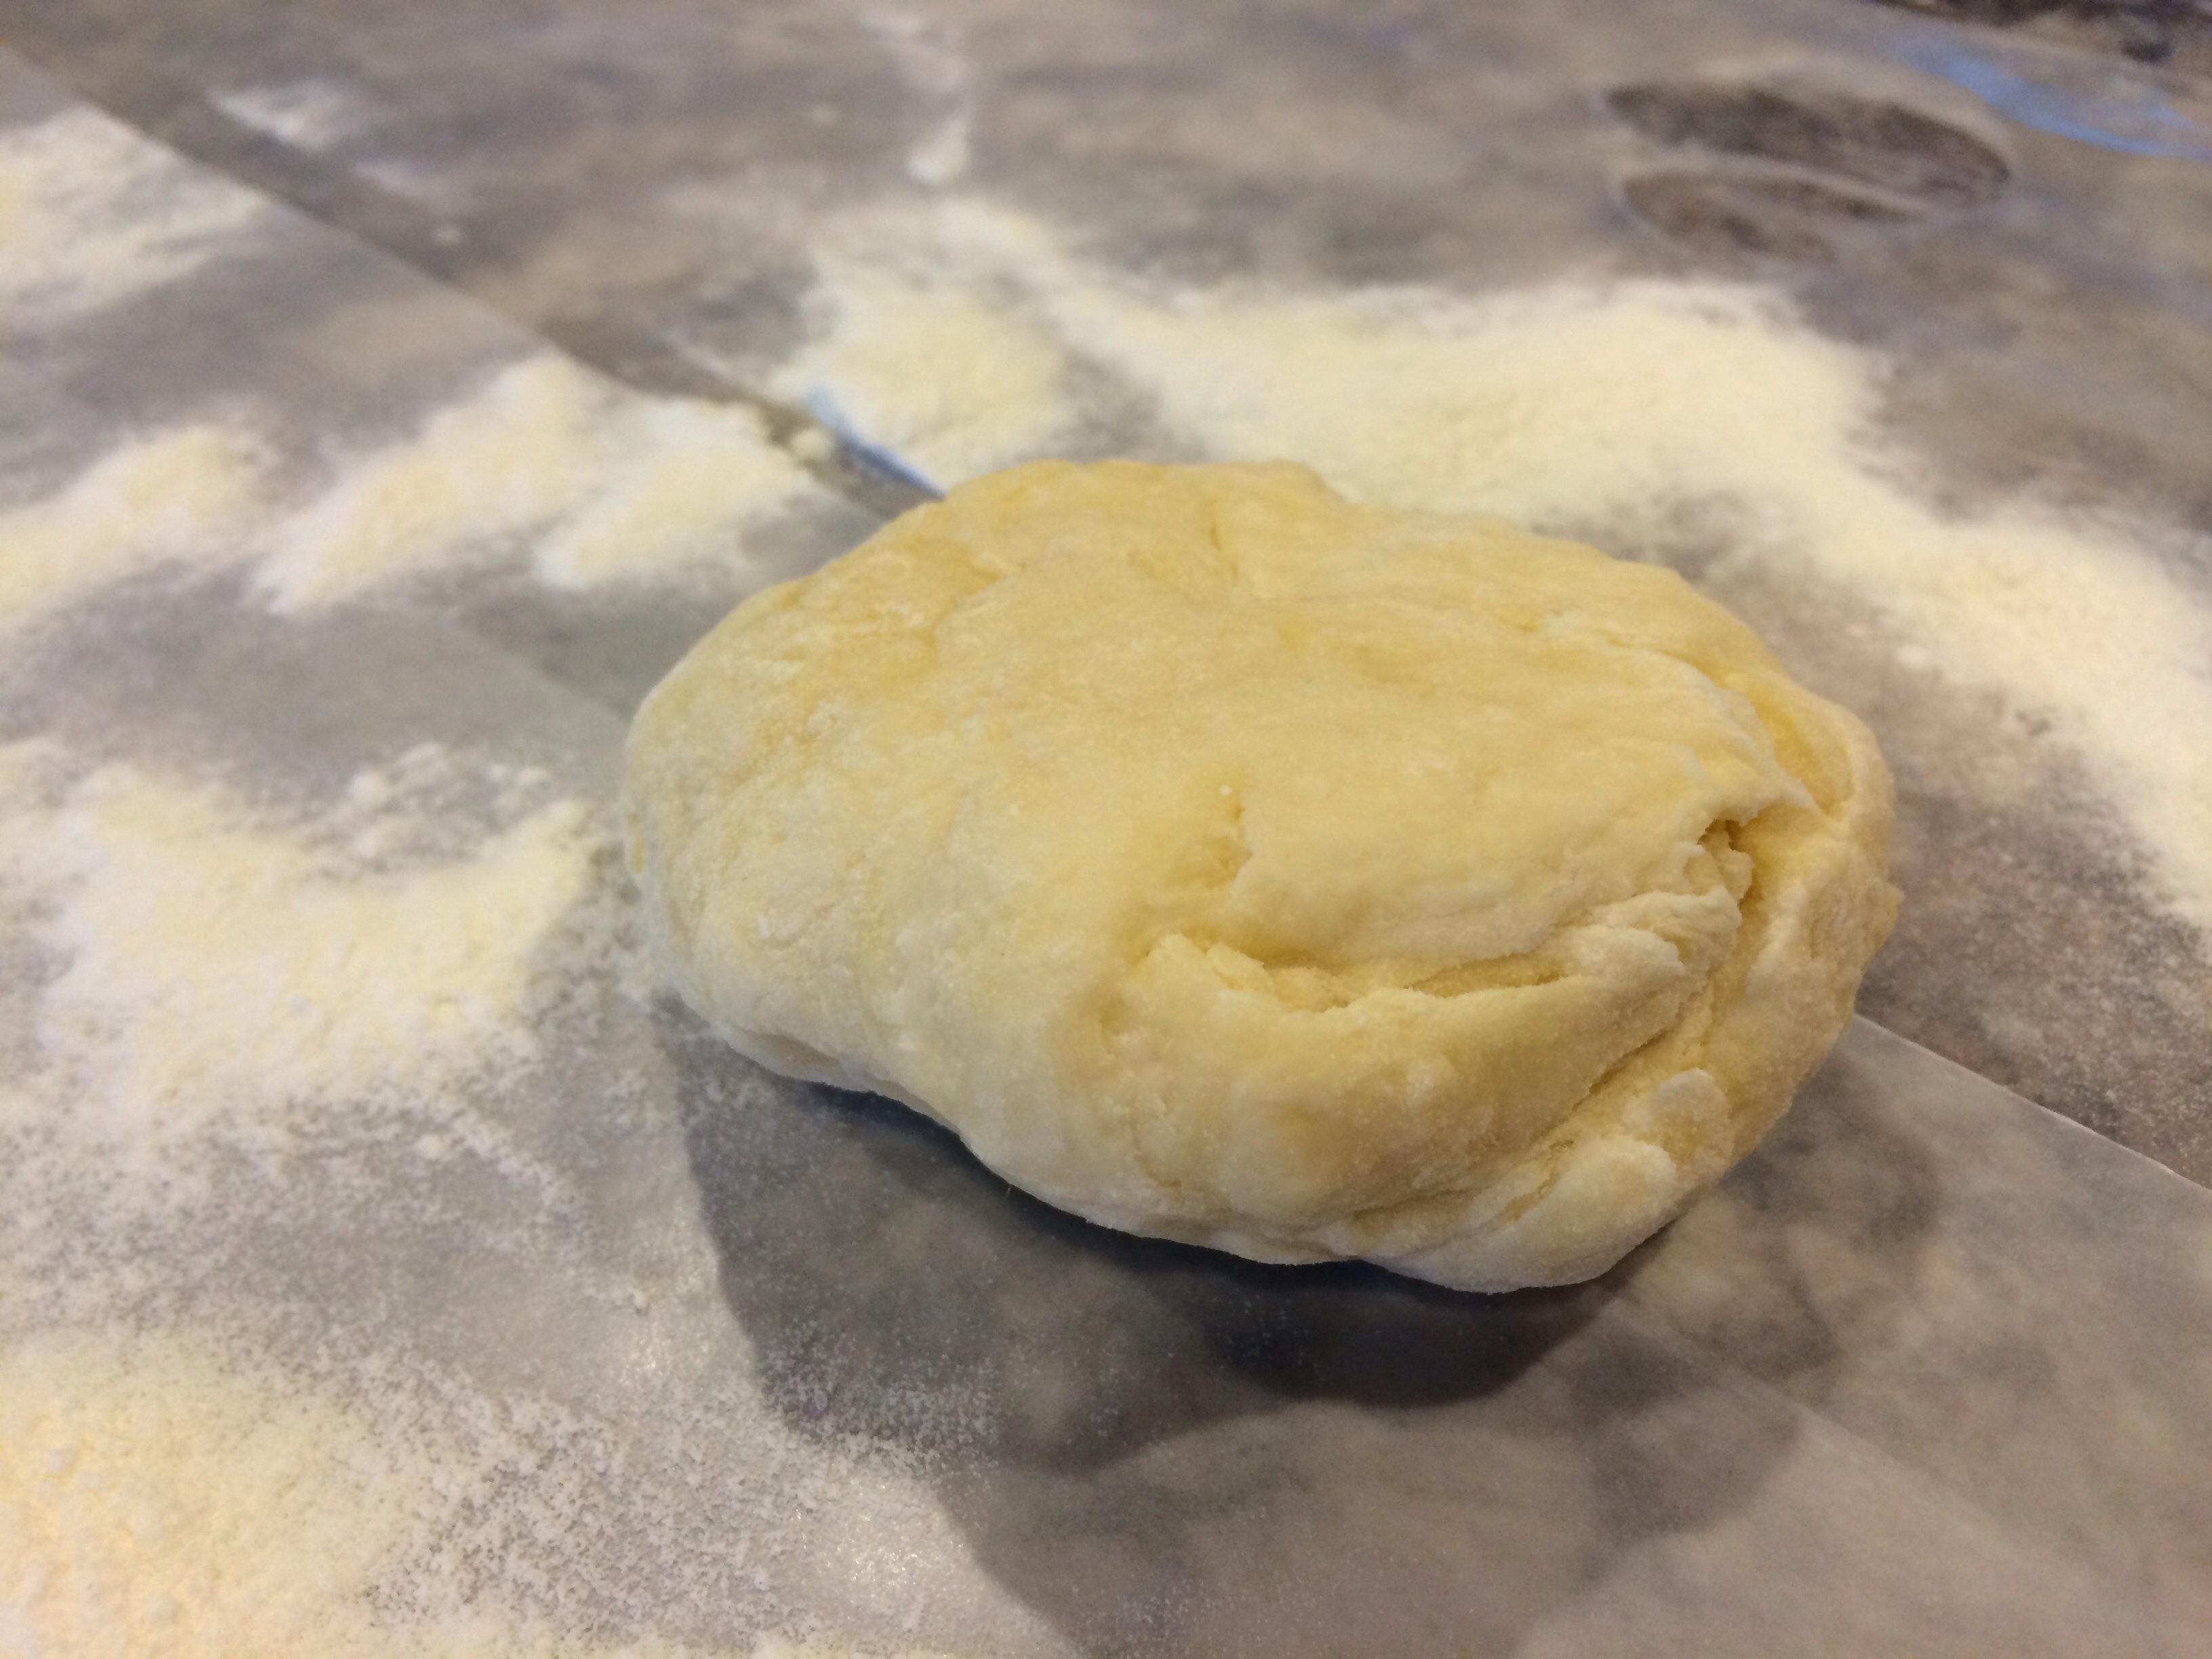
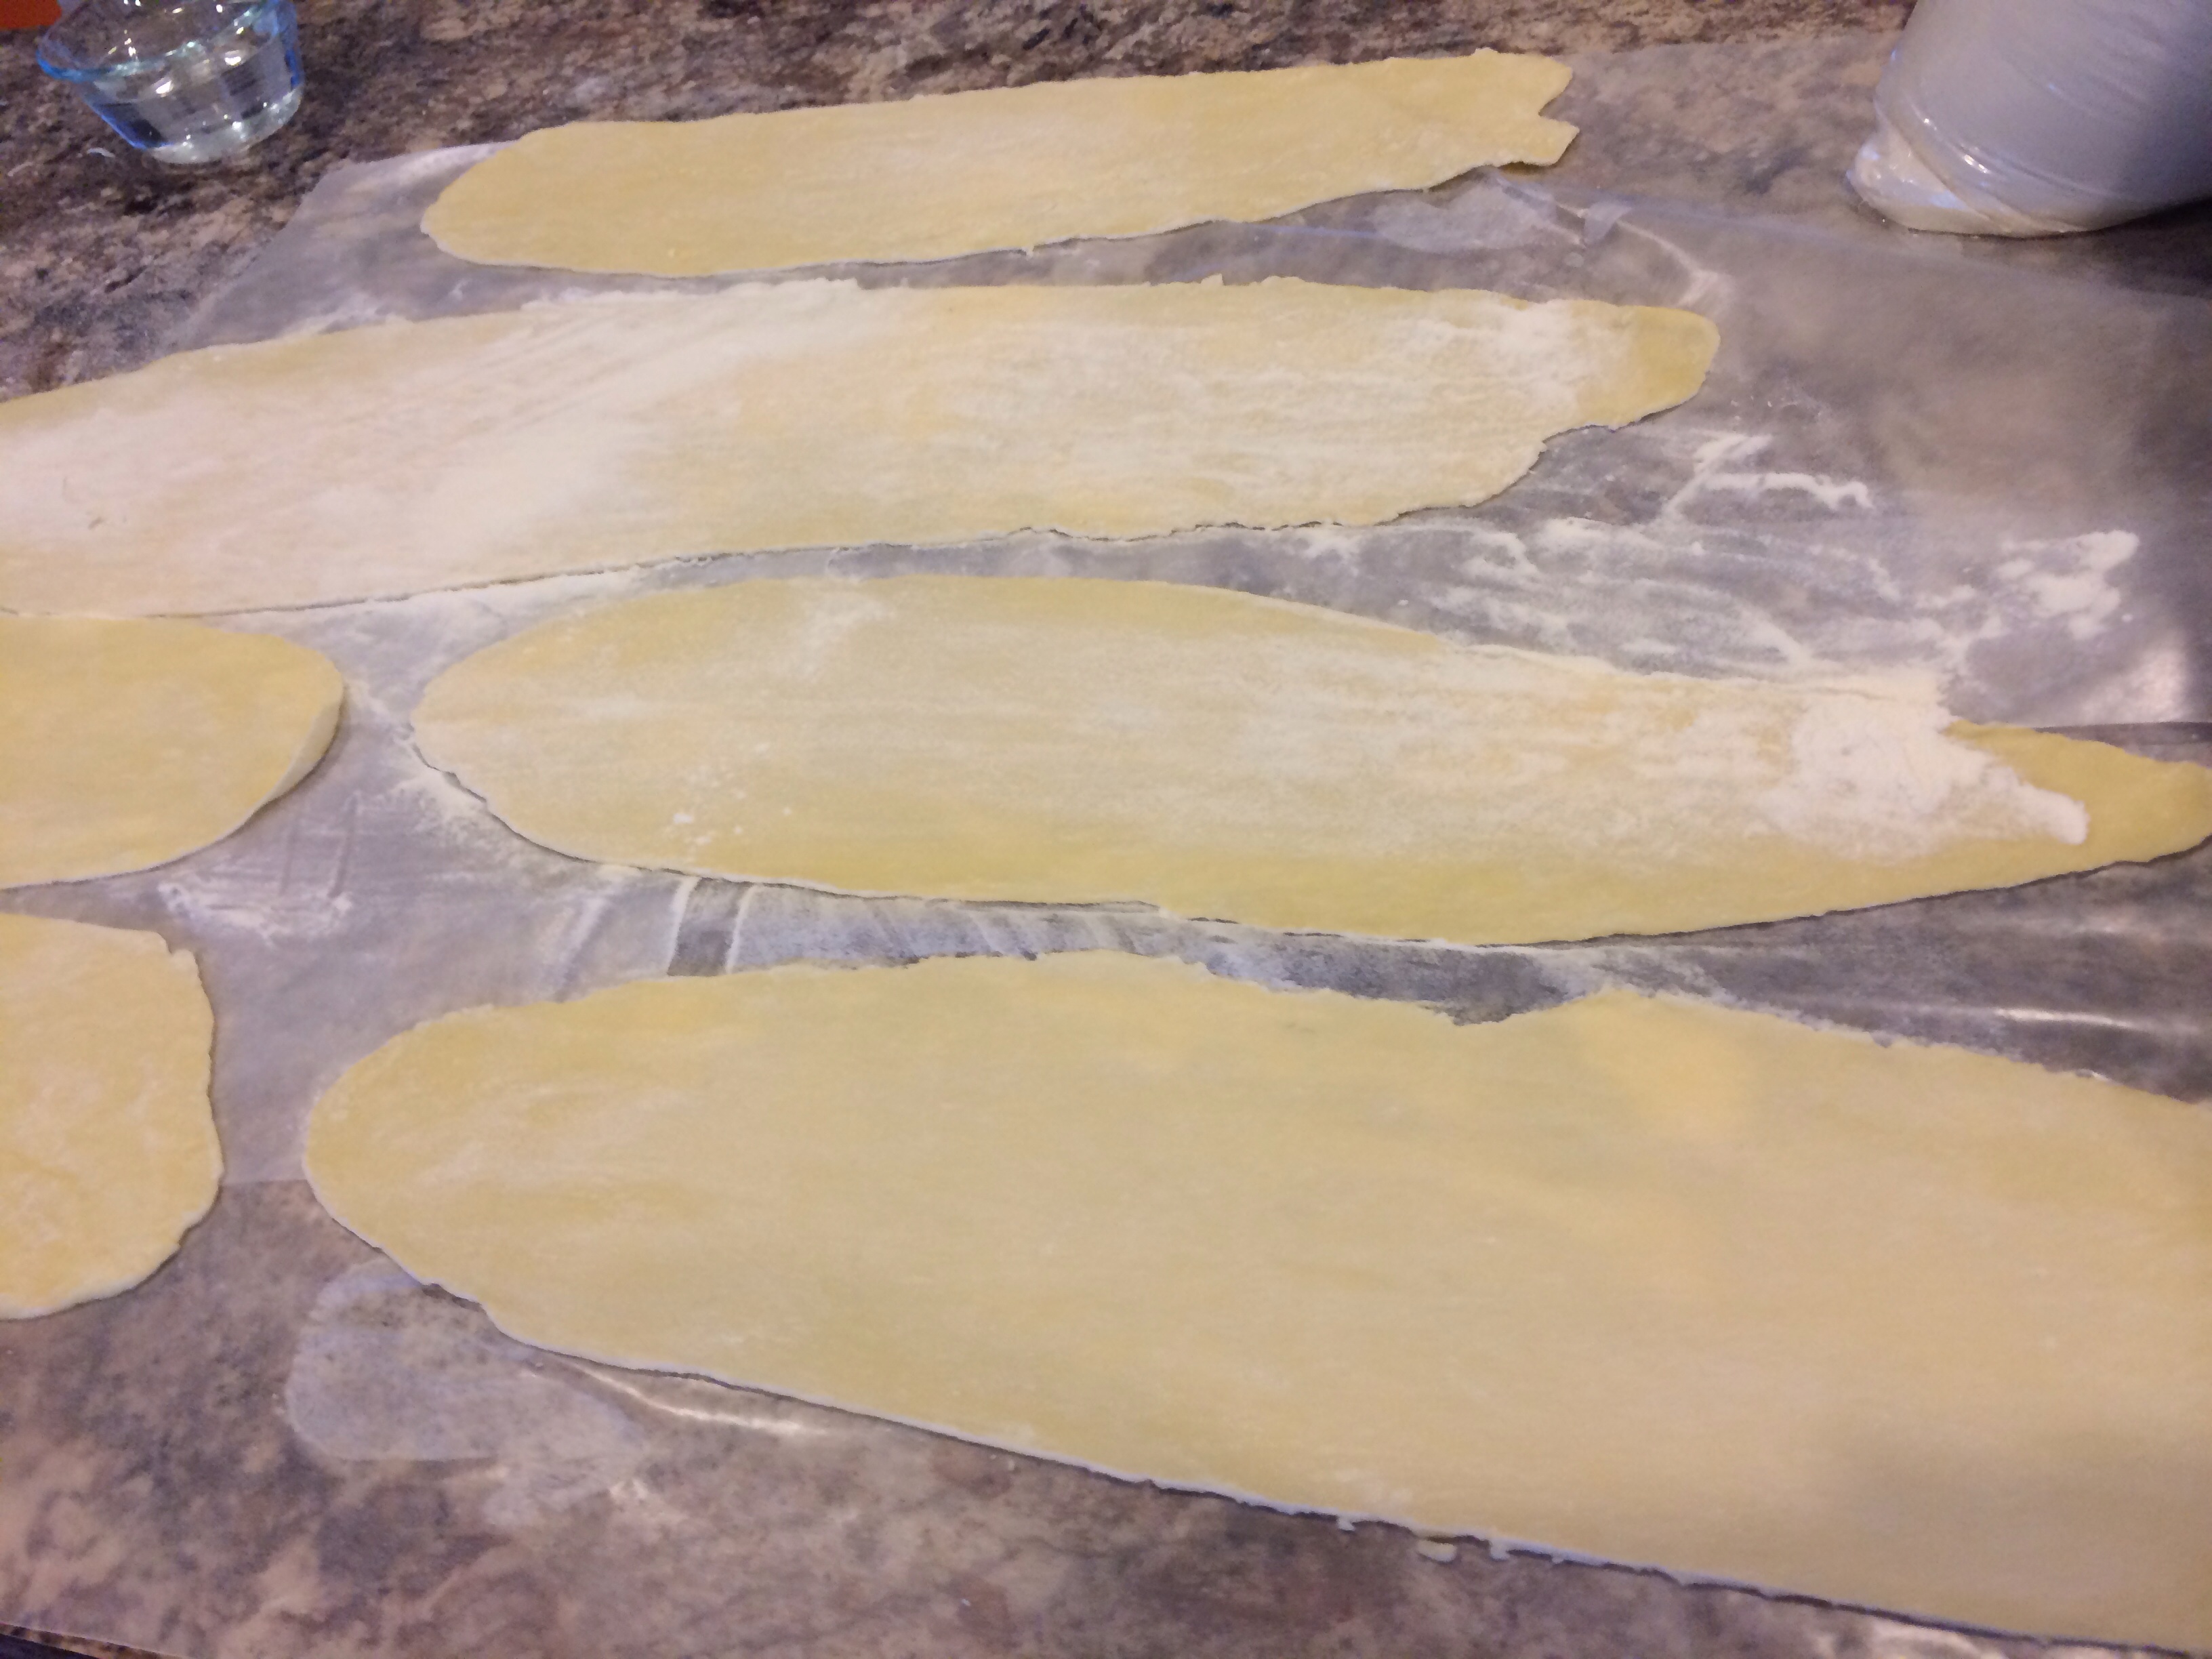
Eggs plus flour plus water equals homemade pasta! Surprised? The ingredients are extremely basic. The process takes practice, and a whole lotta patience!
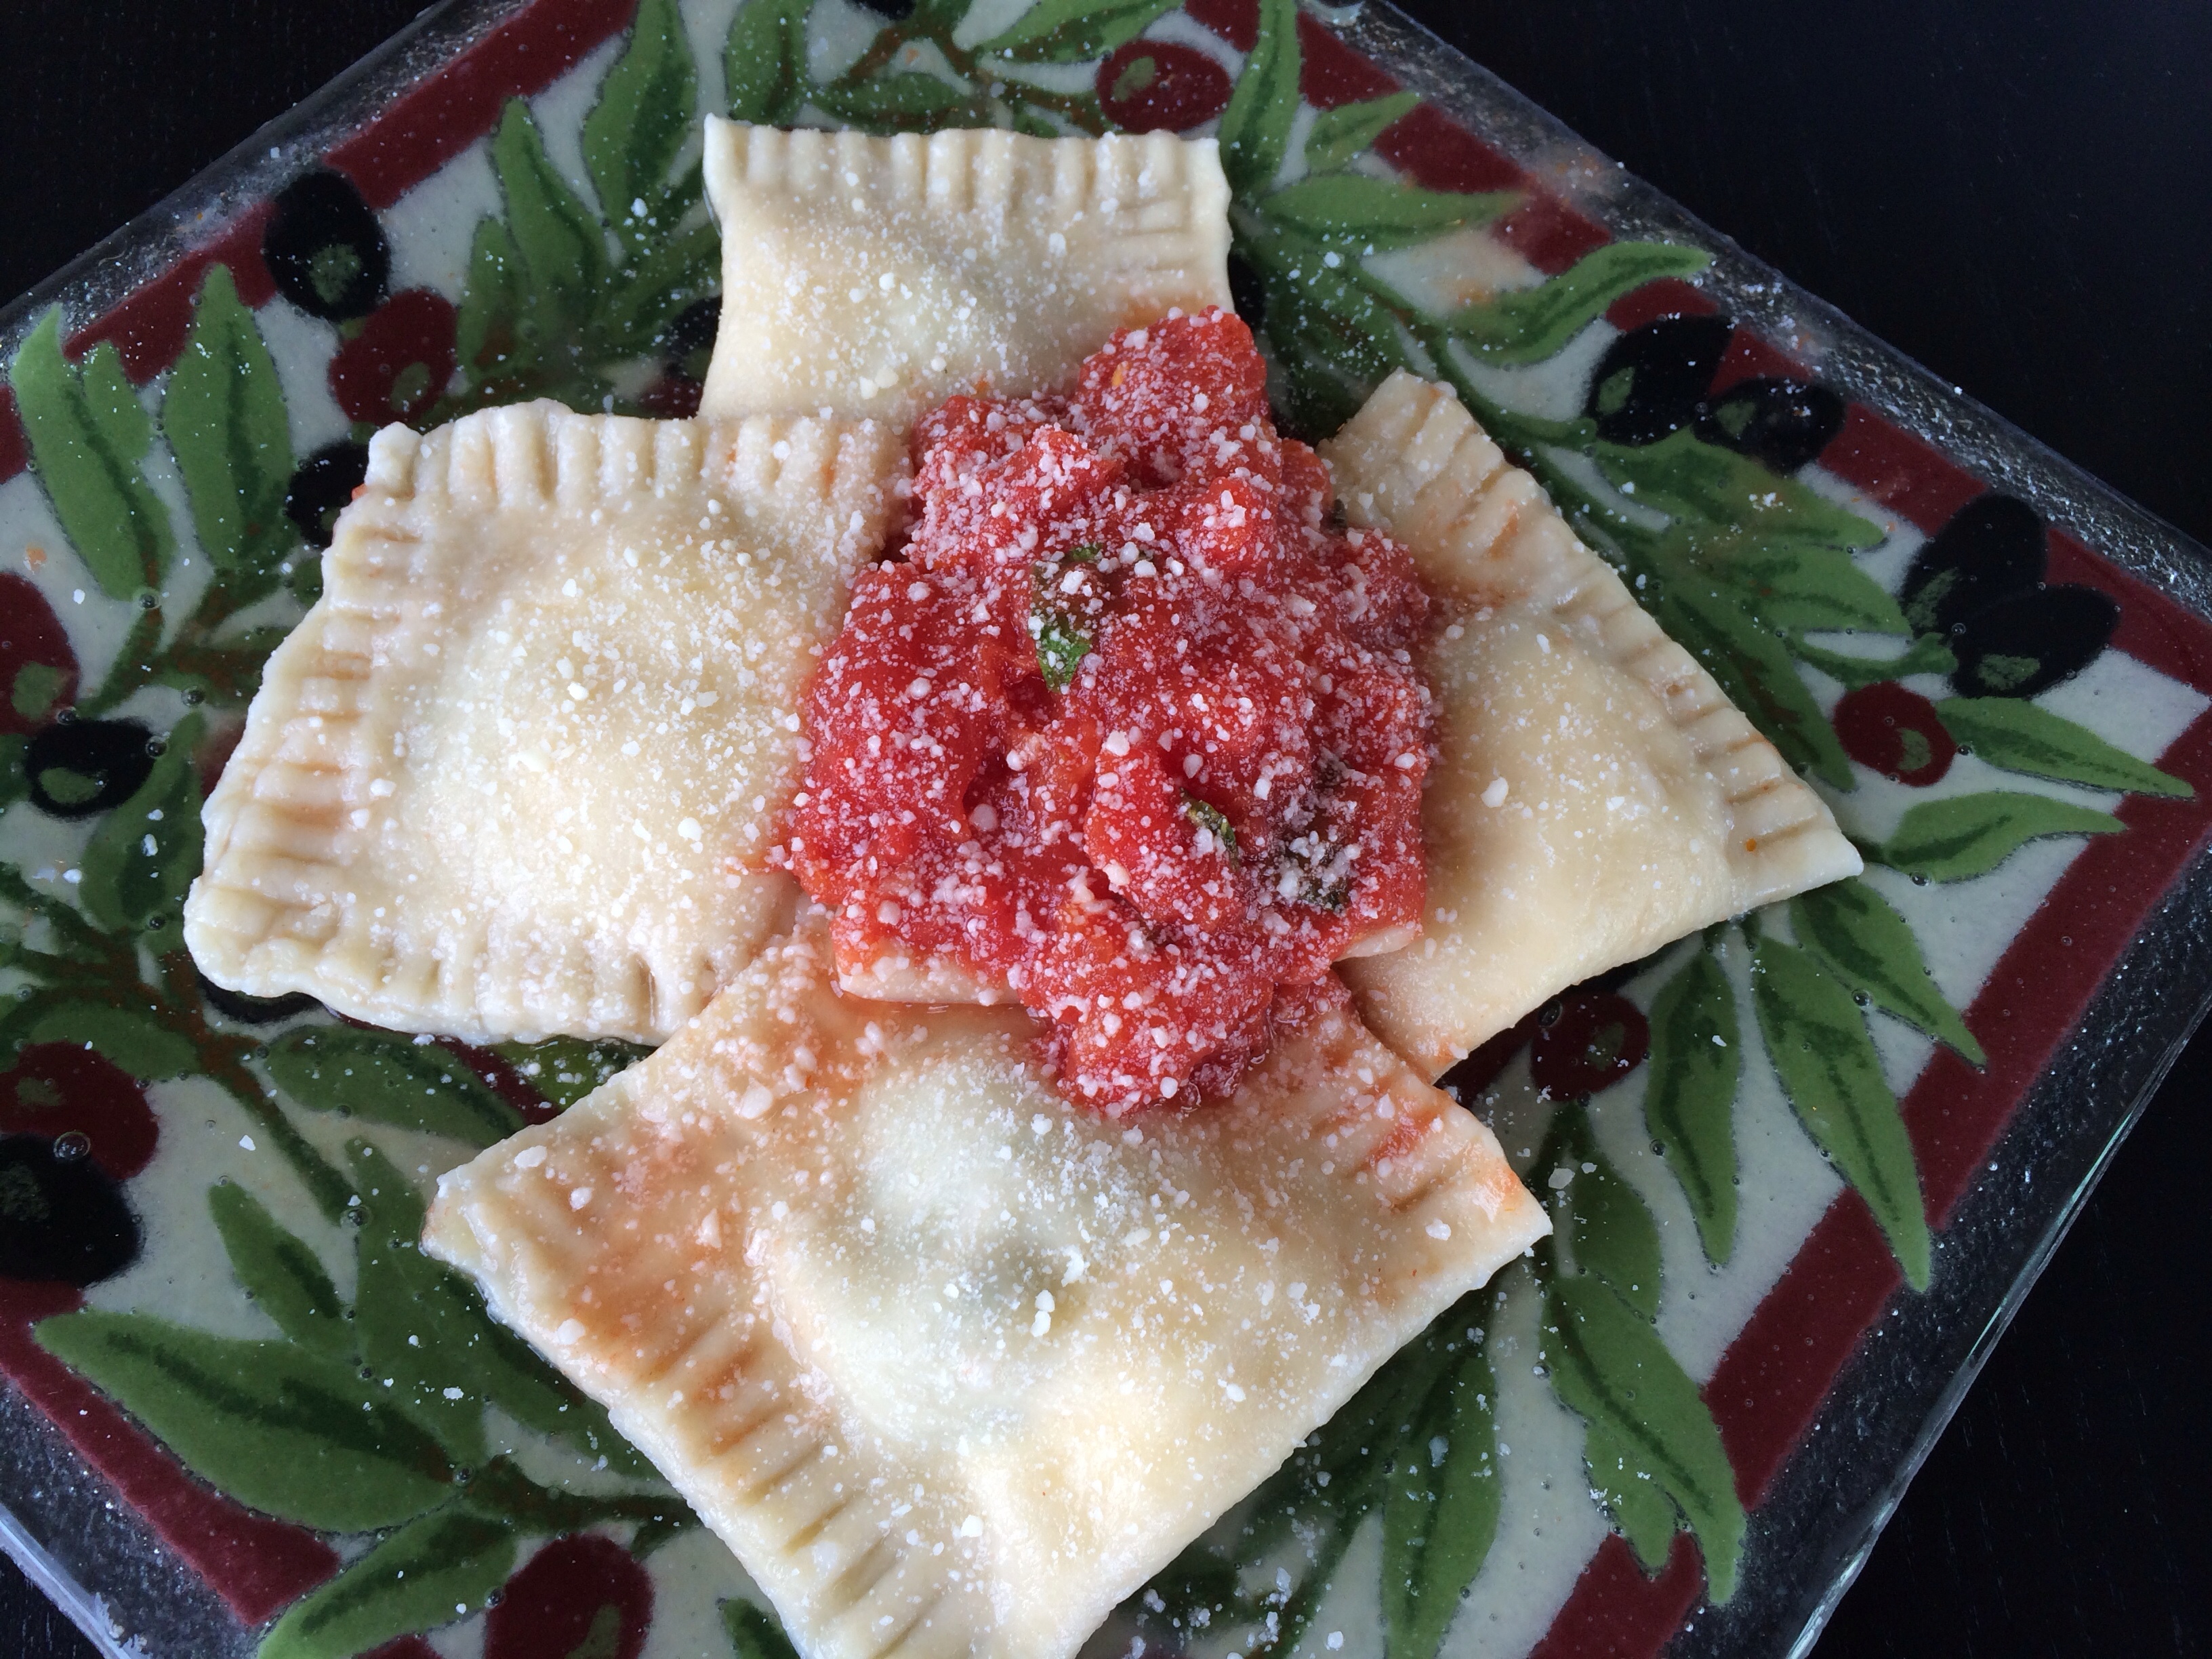
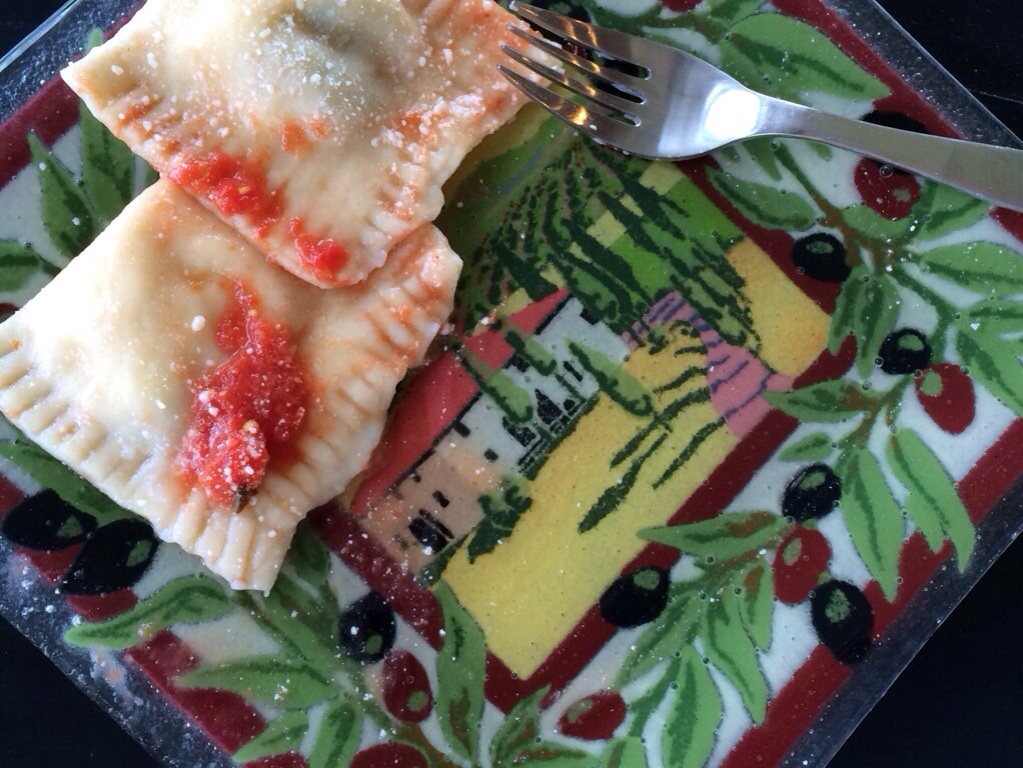
Ravioli … Little pockets of taste explosion! I love creating different flavor combinations!
I am very “old school,” so everyone says, and old school ravioli making involves a hard surface, eggs-flour-water, a hand crank pasta machine, some filling, a knife, and a fork. I do not use pasta making KitchenAid attachments or ravioli cutters. I’m so fancy. Ha!
One big beautiful dough ball!
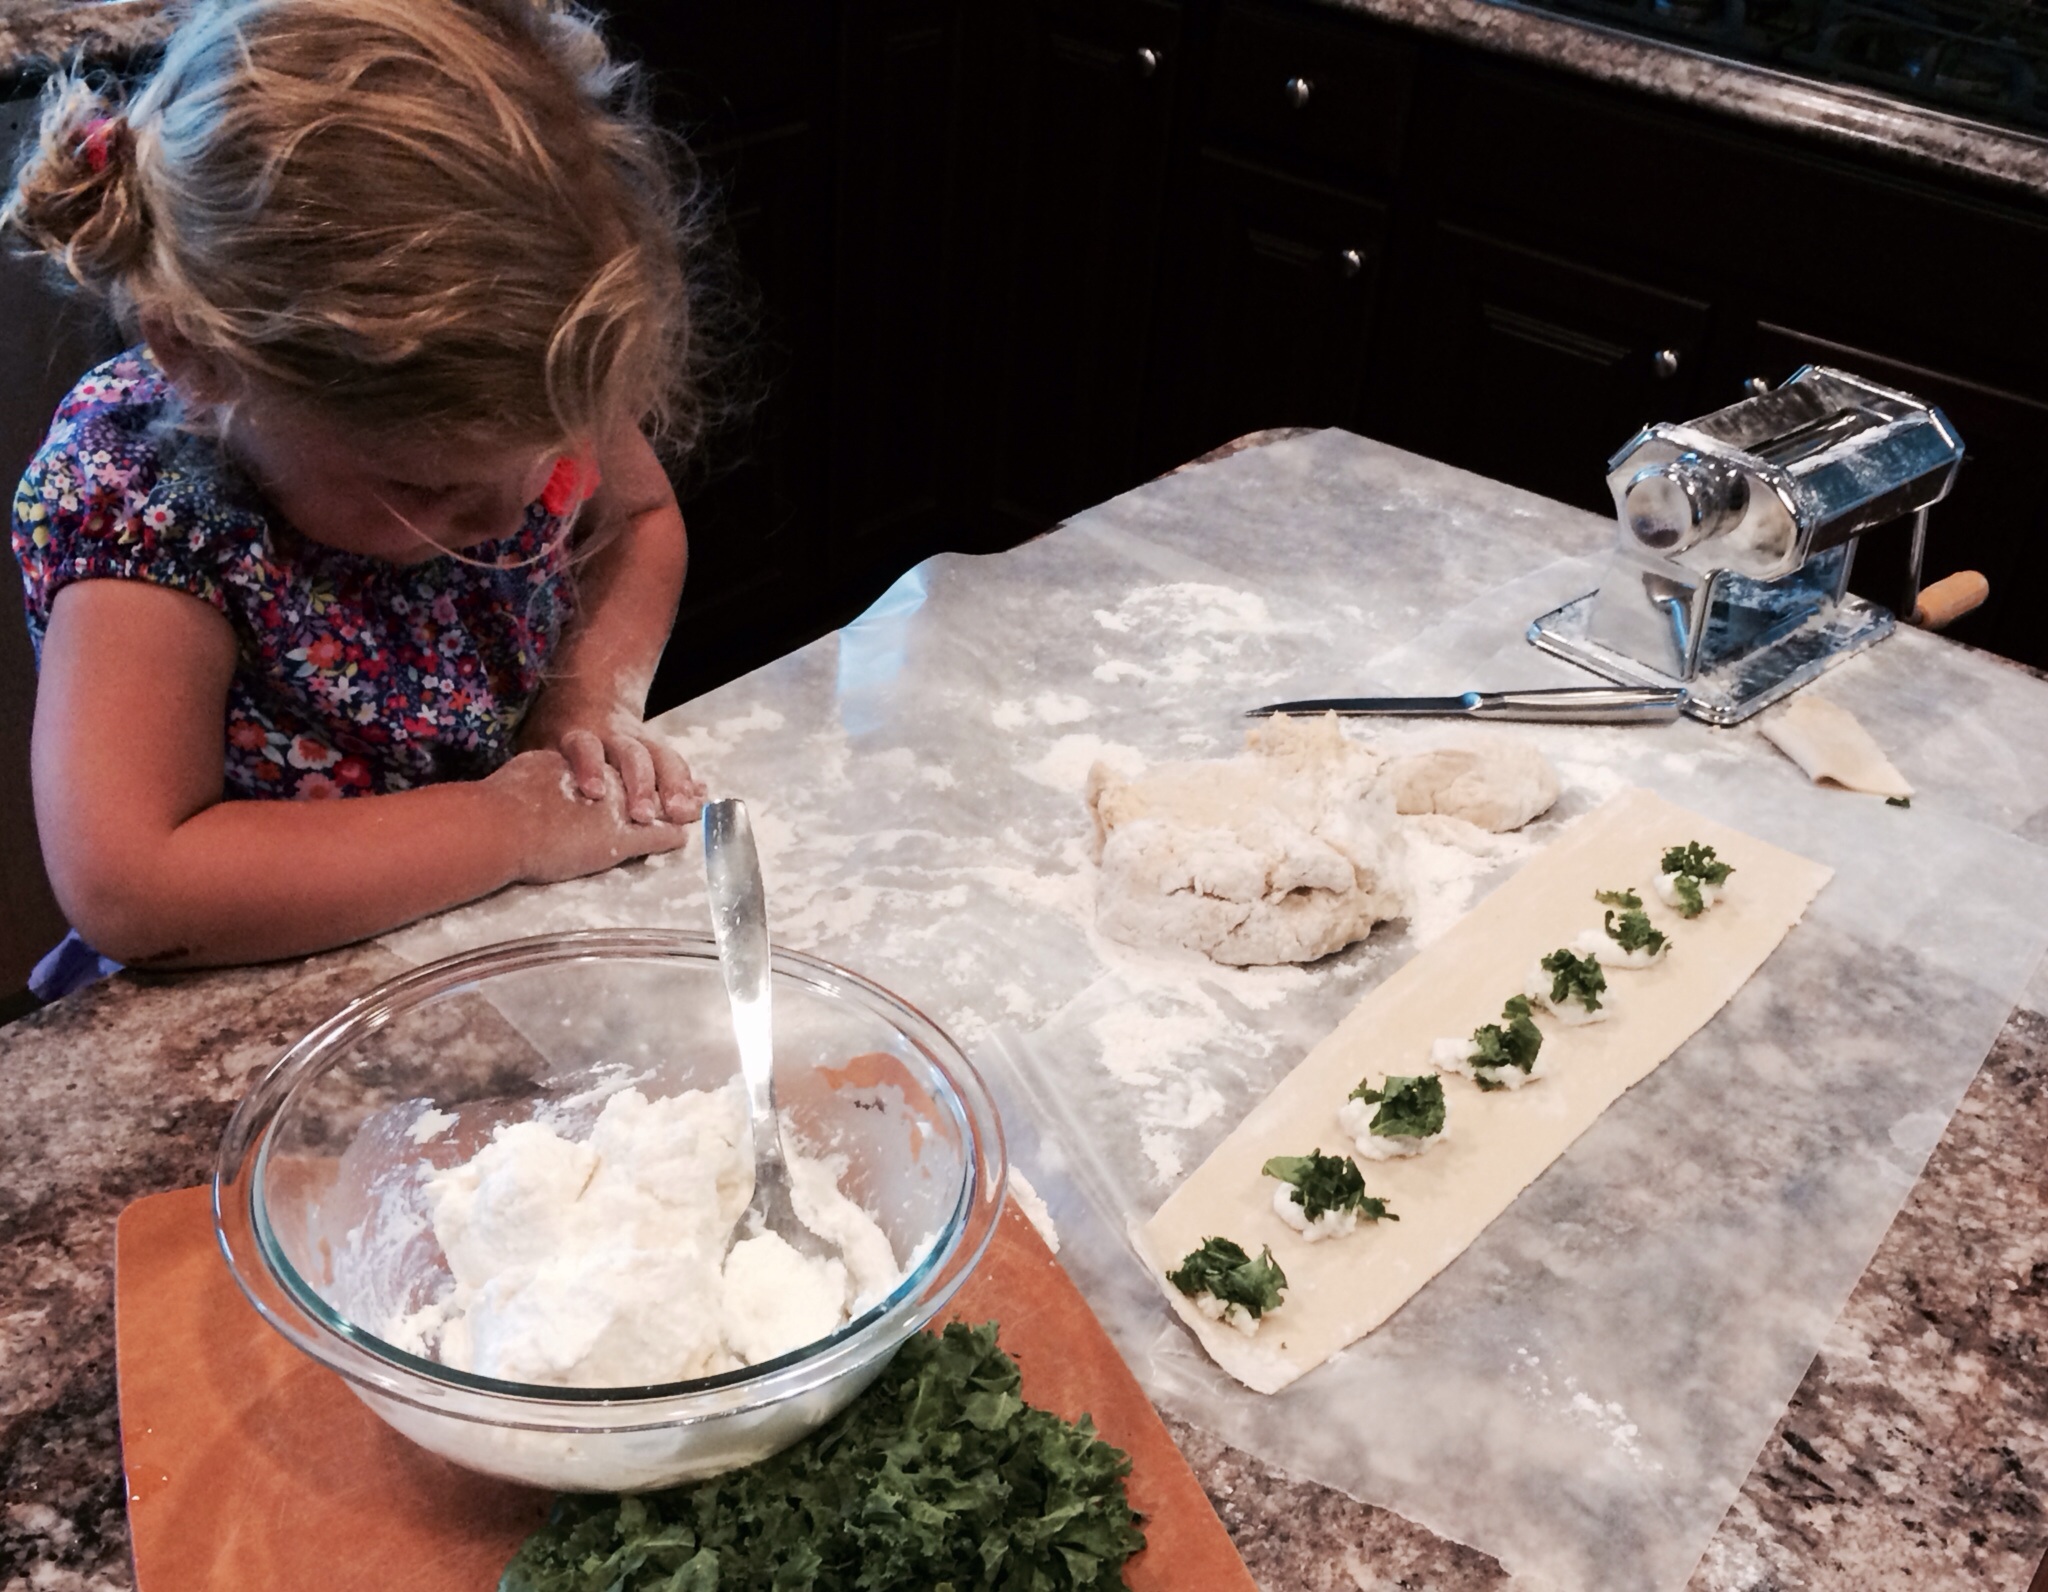
Kale Ricotta Ravioli
Makes approx. 3 dozen 3″X 3″ ravioli
Ravioli Ingredients:
3 eggs
3 cups flour
1/2 cup water
Extra flour for surface.
Filling:
2 cups ricotta
2 tbsp. Parmesan cheese
Salt and pepper
1/2 cup kale, finely chopped
Fun Fact: One is a Raviolo and the plural is Ravioli.
Directions:
Clean your work surface. If it is porous, cover it with waxed paper.
Wash your hands!
Crack the eggs on top of the flour pile and mix with your hands using a squeezing molding motion.
Add water 1 tbsp. at a time and continue kneading until a dough ball forms.
If the dough is sticky, add 1 -2 tbsp. flour. If the dough is dry and cracked looking, add water 1-2 tbsp. at a time.
This is the trickiest part. I always keep a pile of flour and a a little bowl of water right on the work surface. So many external factors are involved with dough making including humidity and air temperature.
When you feel that the dough ball is malleable and well mixed, break off a handful of dough and flatten it into an oval.
Sprinkle some flour on the pasta machine and work surface.
Starting at #1 setting, feed the dough through the machine while turning the crank in one fluid motion. Repeat at #3 and finish on #6.
(I have the craziest pasta machine ever! The numbers are backwards, so I start with #7. Took me minute to figure it out!)
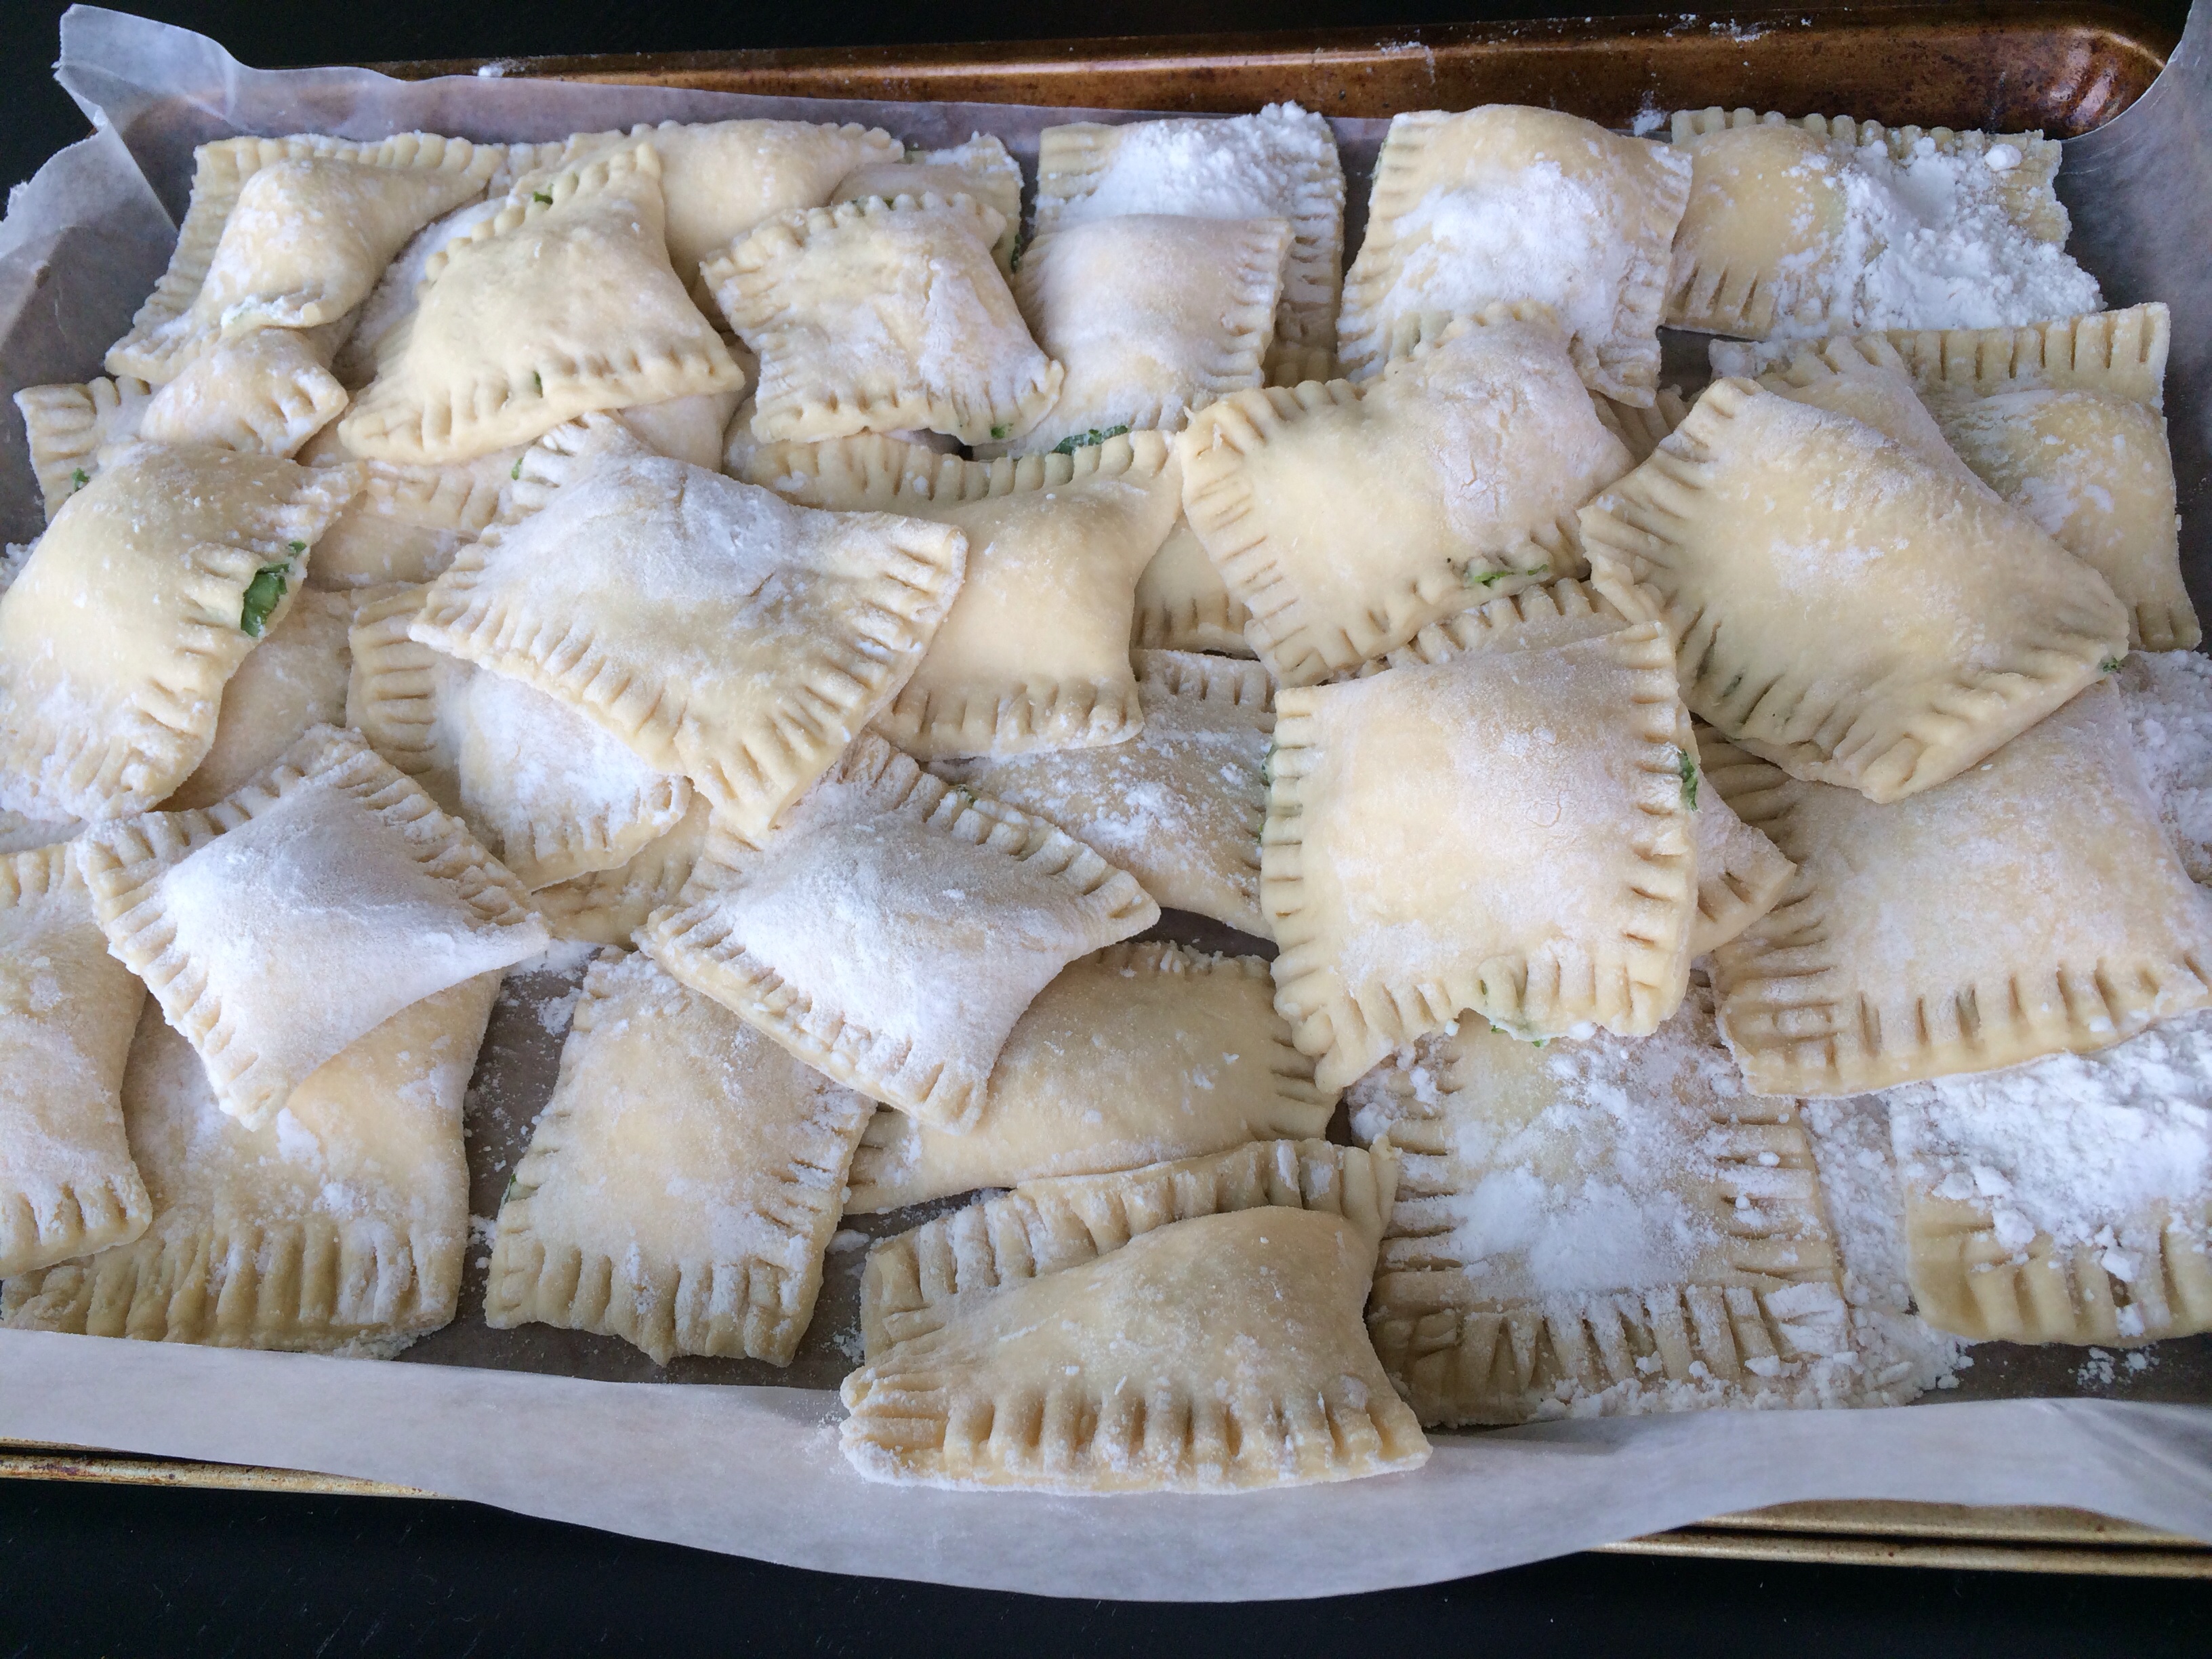
Trim the ends to leave a rectangle shape. That way the ravioli will be square.
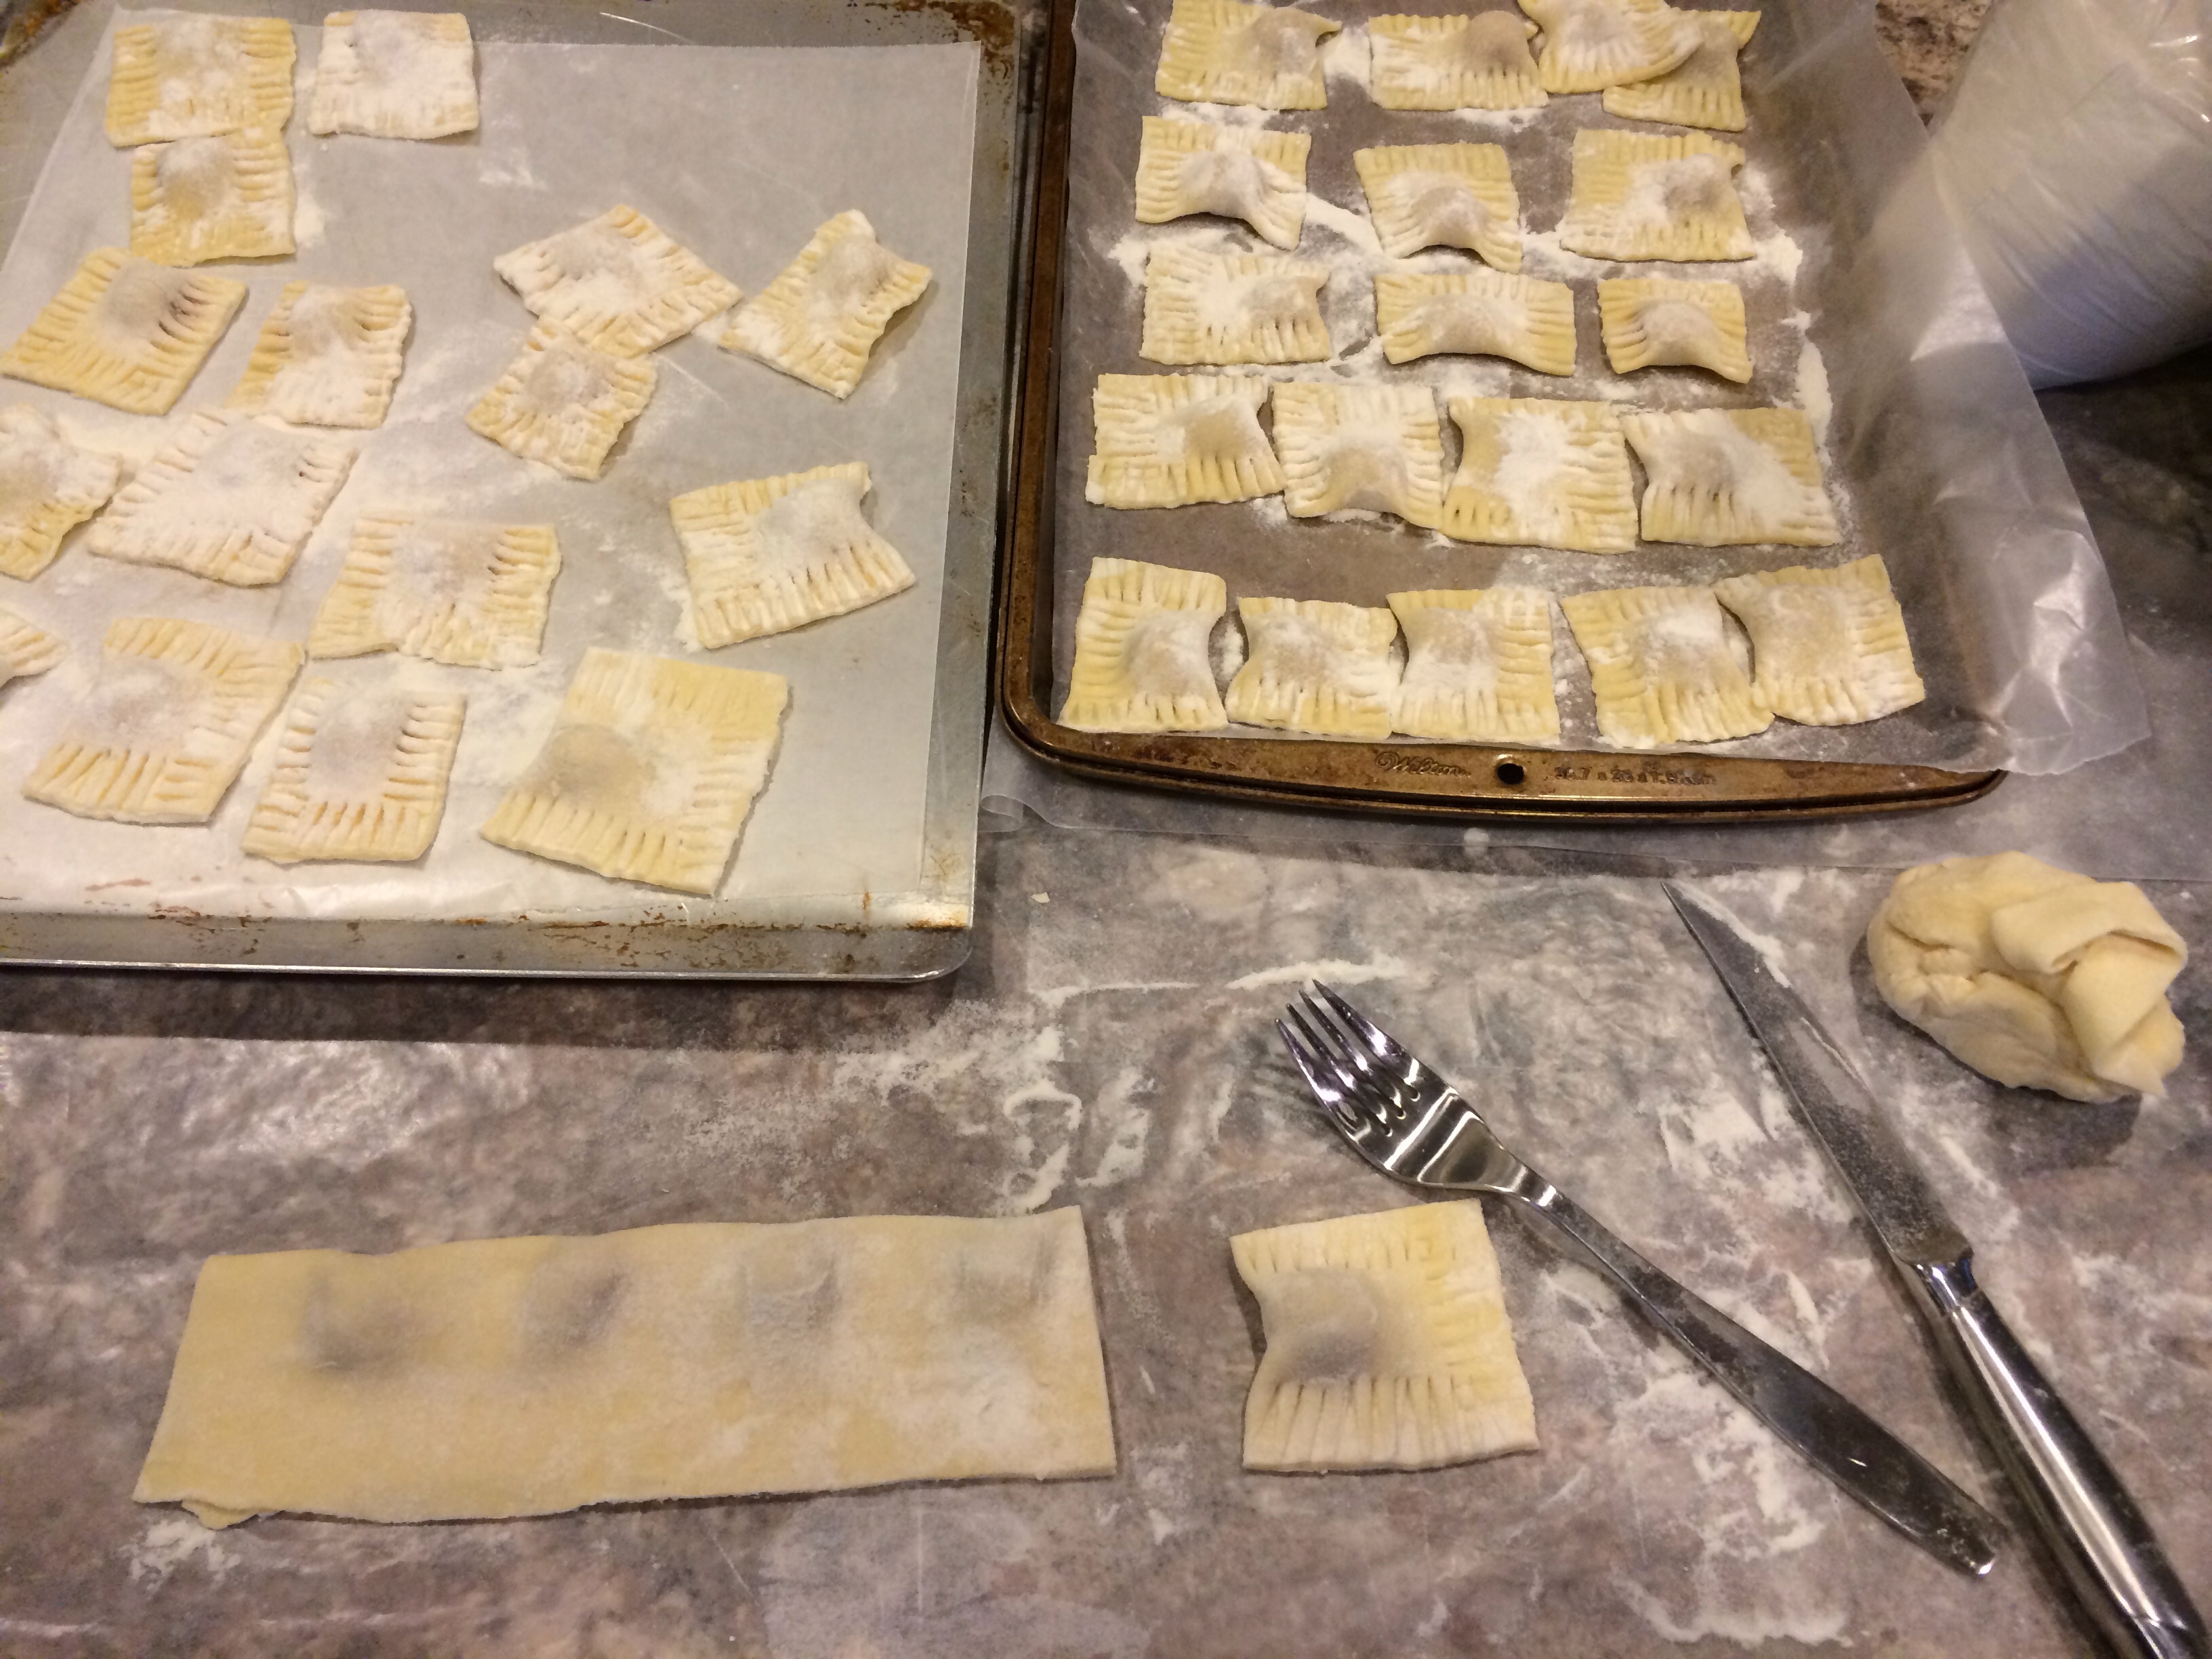
Place 1 tbsp. of filling on the dough approx. 1 inch apart.
A skinny rectangle and placing the filling closer together will make smaller ravioli. See photo!
Fold the dough over and press finger between filling.
My assistant Bella helped me! I assisted my grandparents in making thousands of dozens of ravioli. I remember the feel of the dough between my fingers, the smell of the dough, the smell of my grandparents, and the sputter of the pot of sauce cooking in the background. I knew with absolute certainty the taste and the bite of a perfectly cooked raviolo. I teach my kids and through repetition it will become easy for them. I hope they will make ravioli for and with their families, as I do, from the heart.
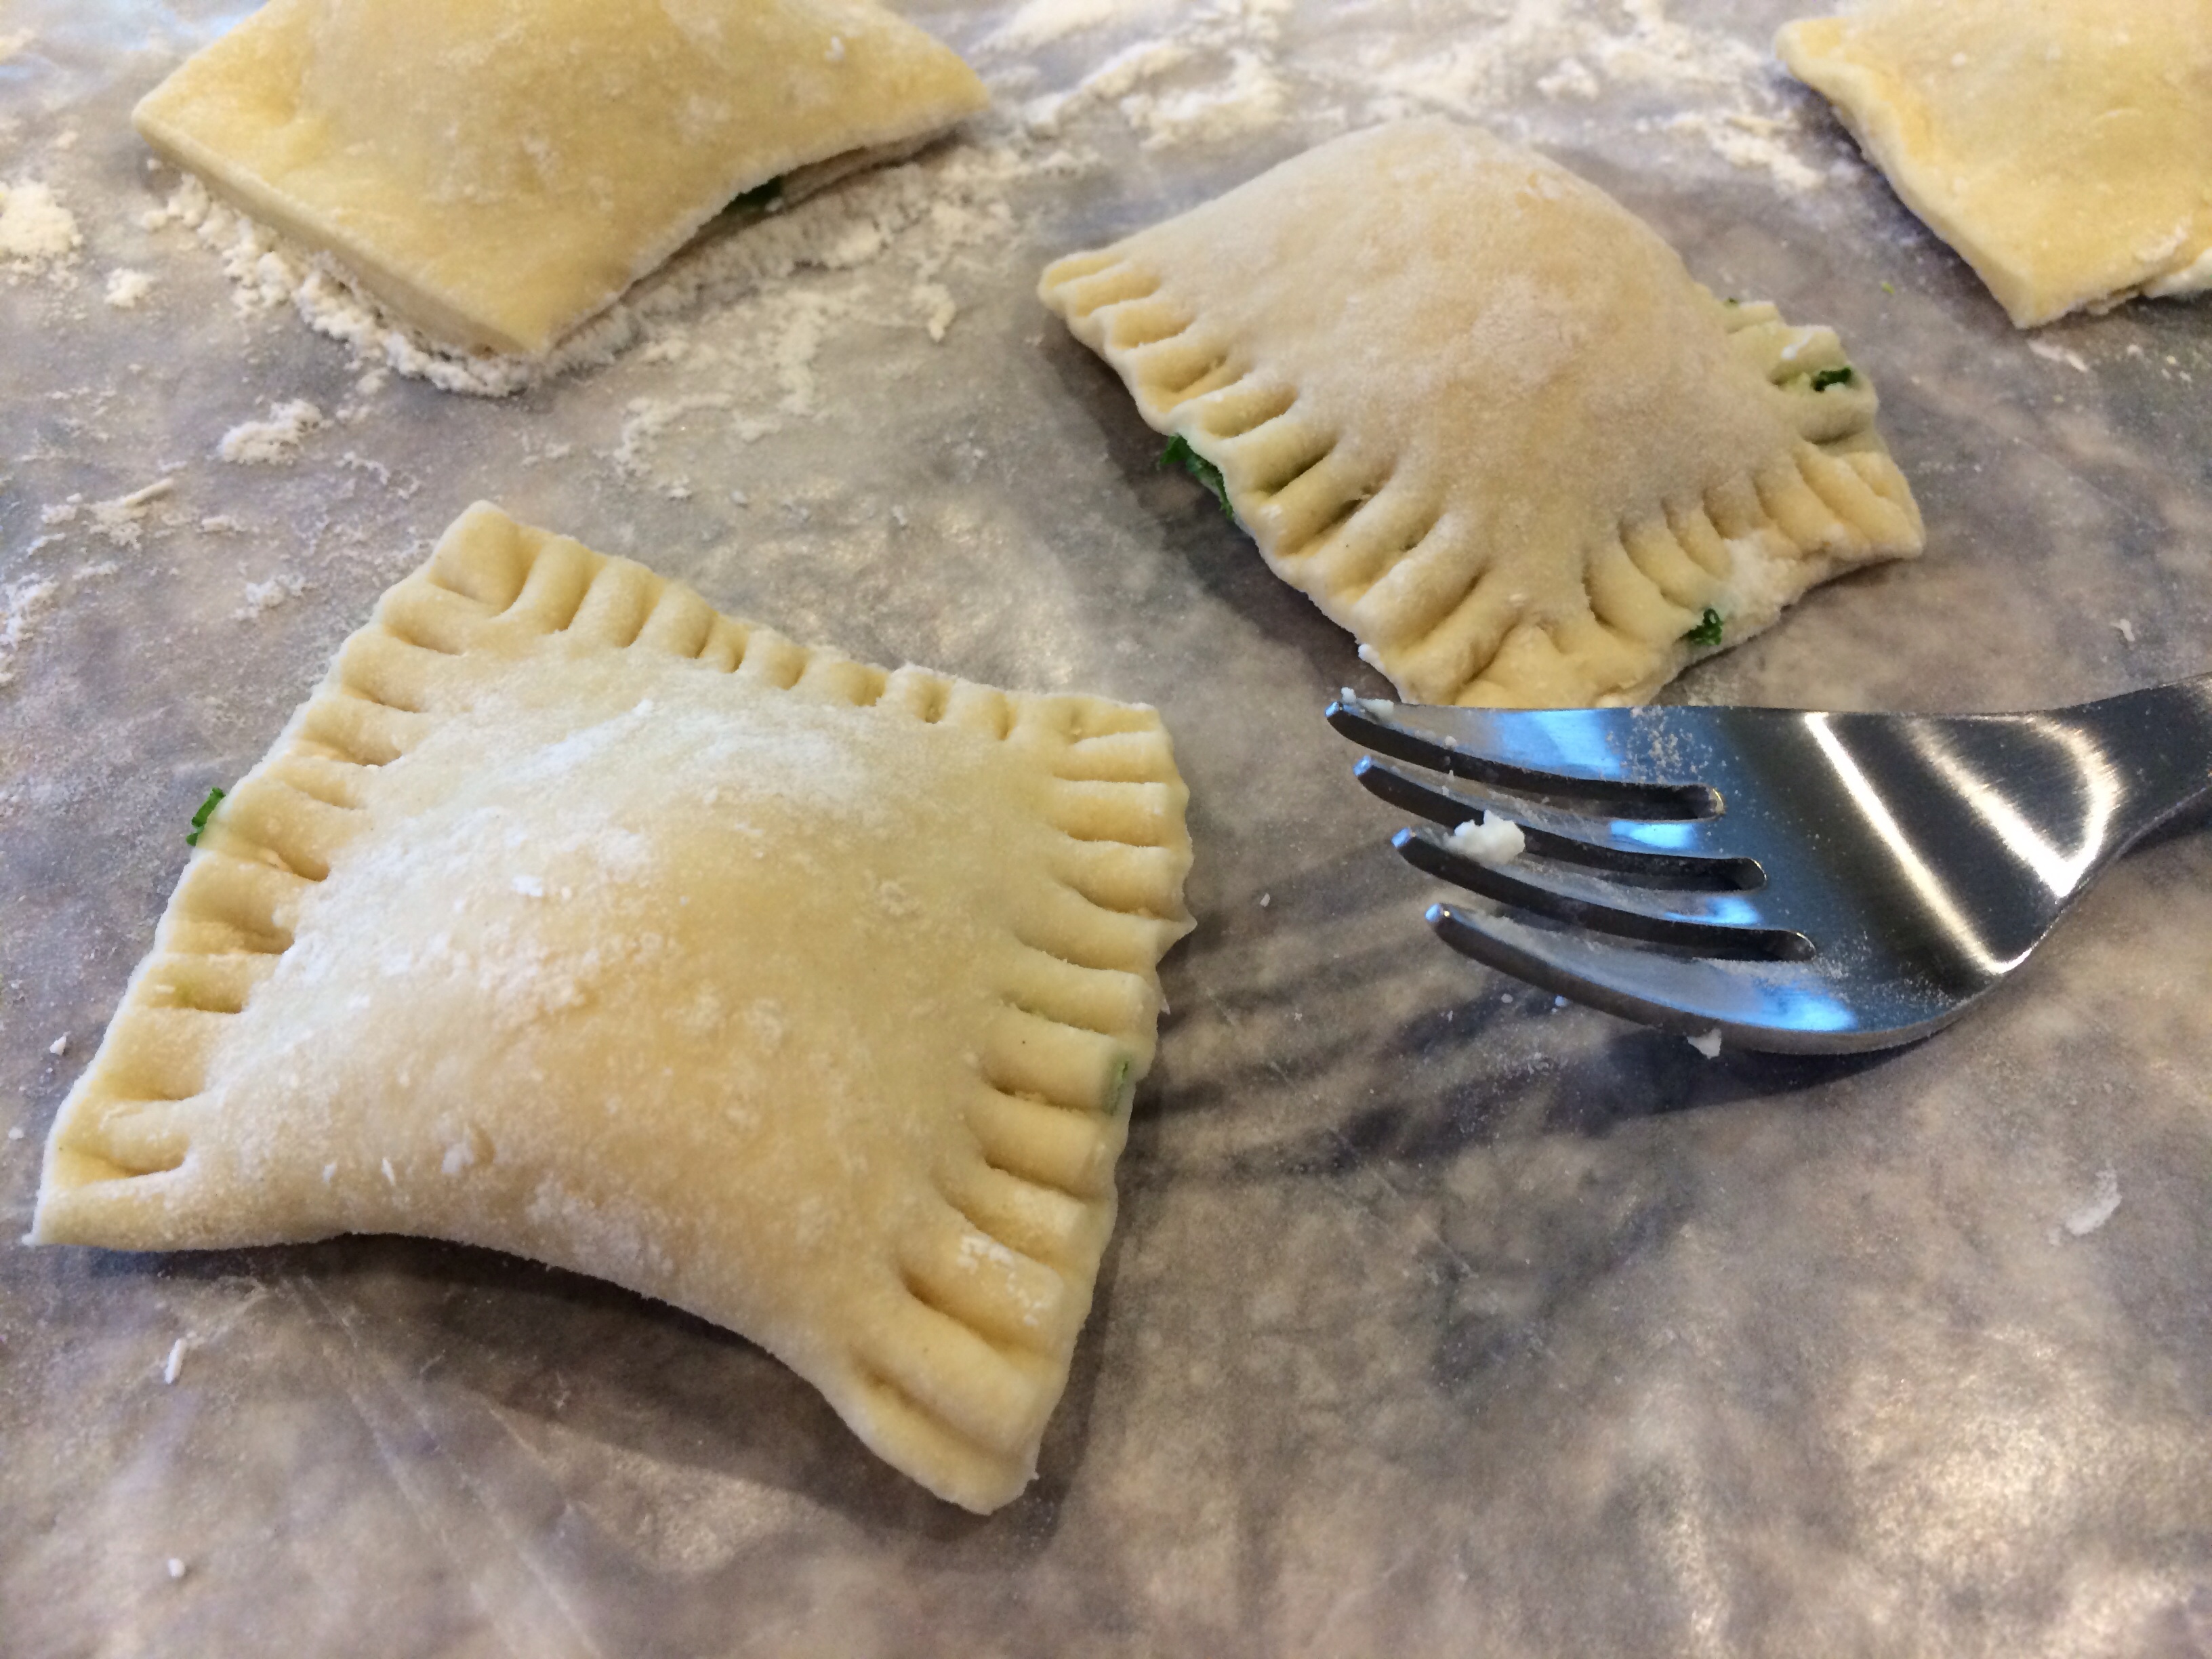
Cut with a knife into squares.
Press and seal the raviolo’s edges with a fork.
Press hard so that the dough adheres and so that the ravioli won’t lose their filling in the water!
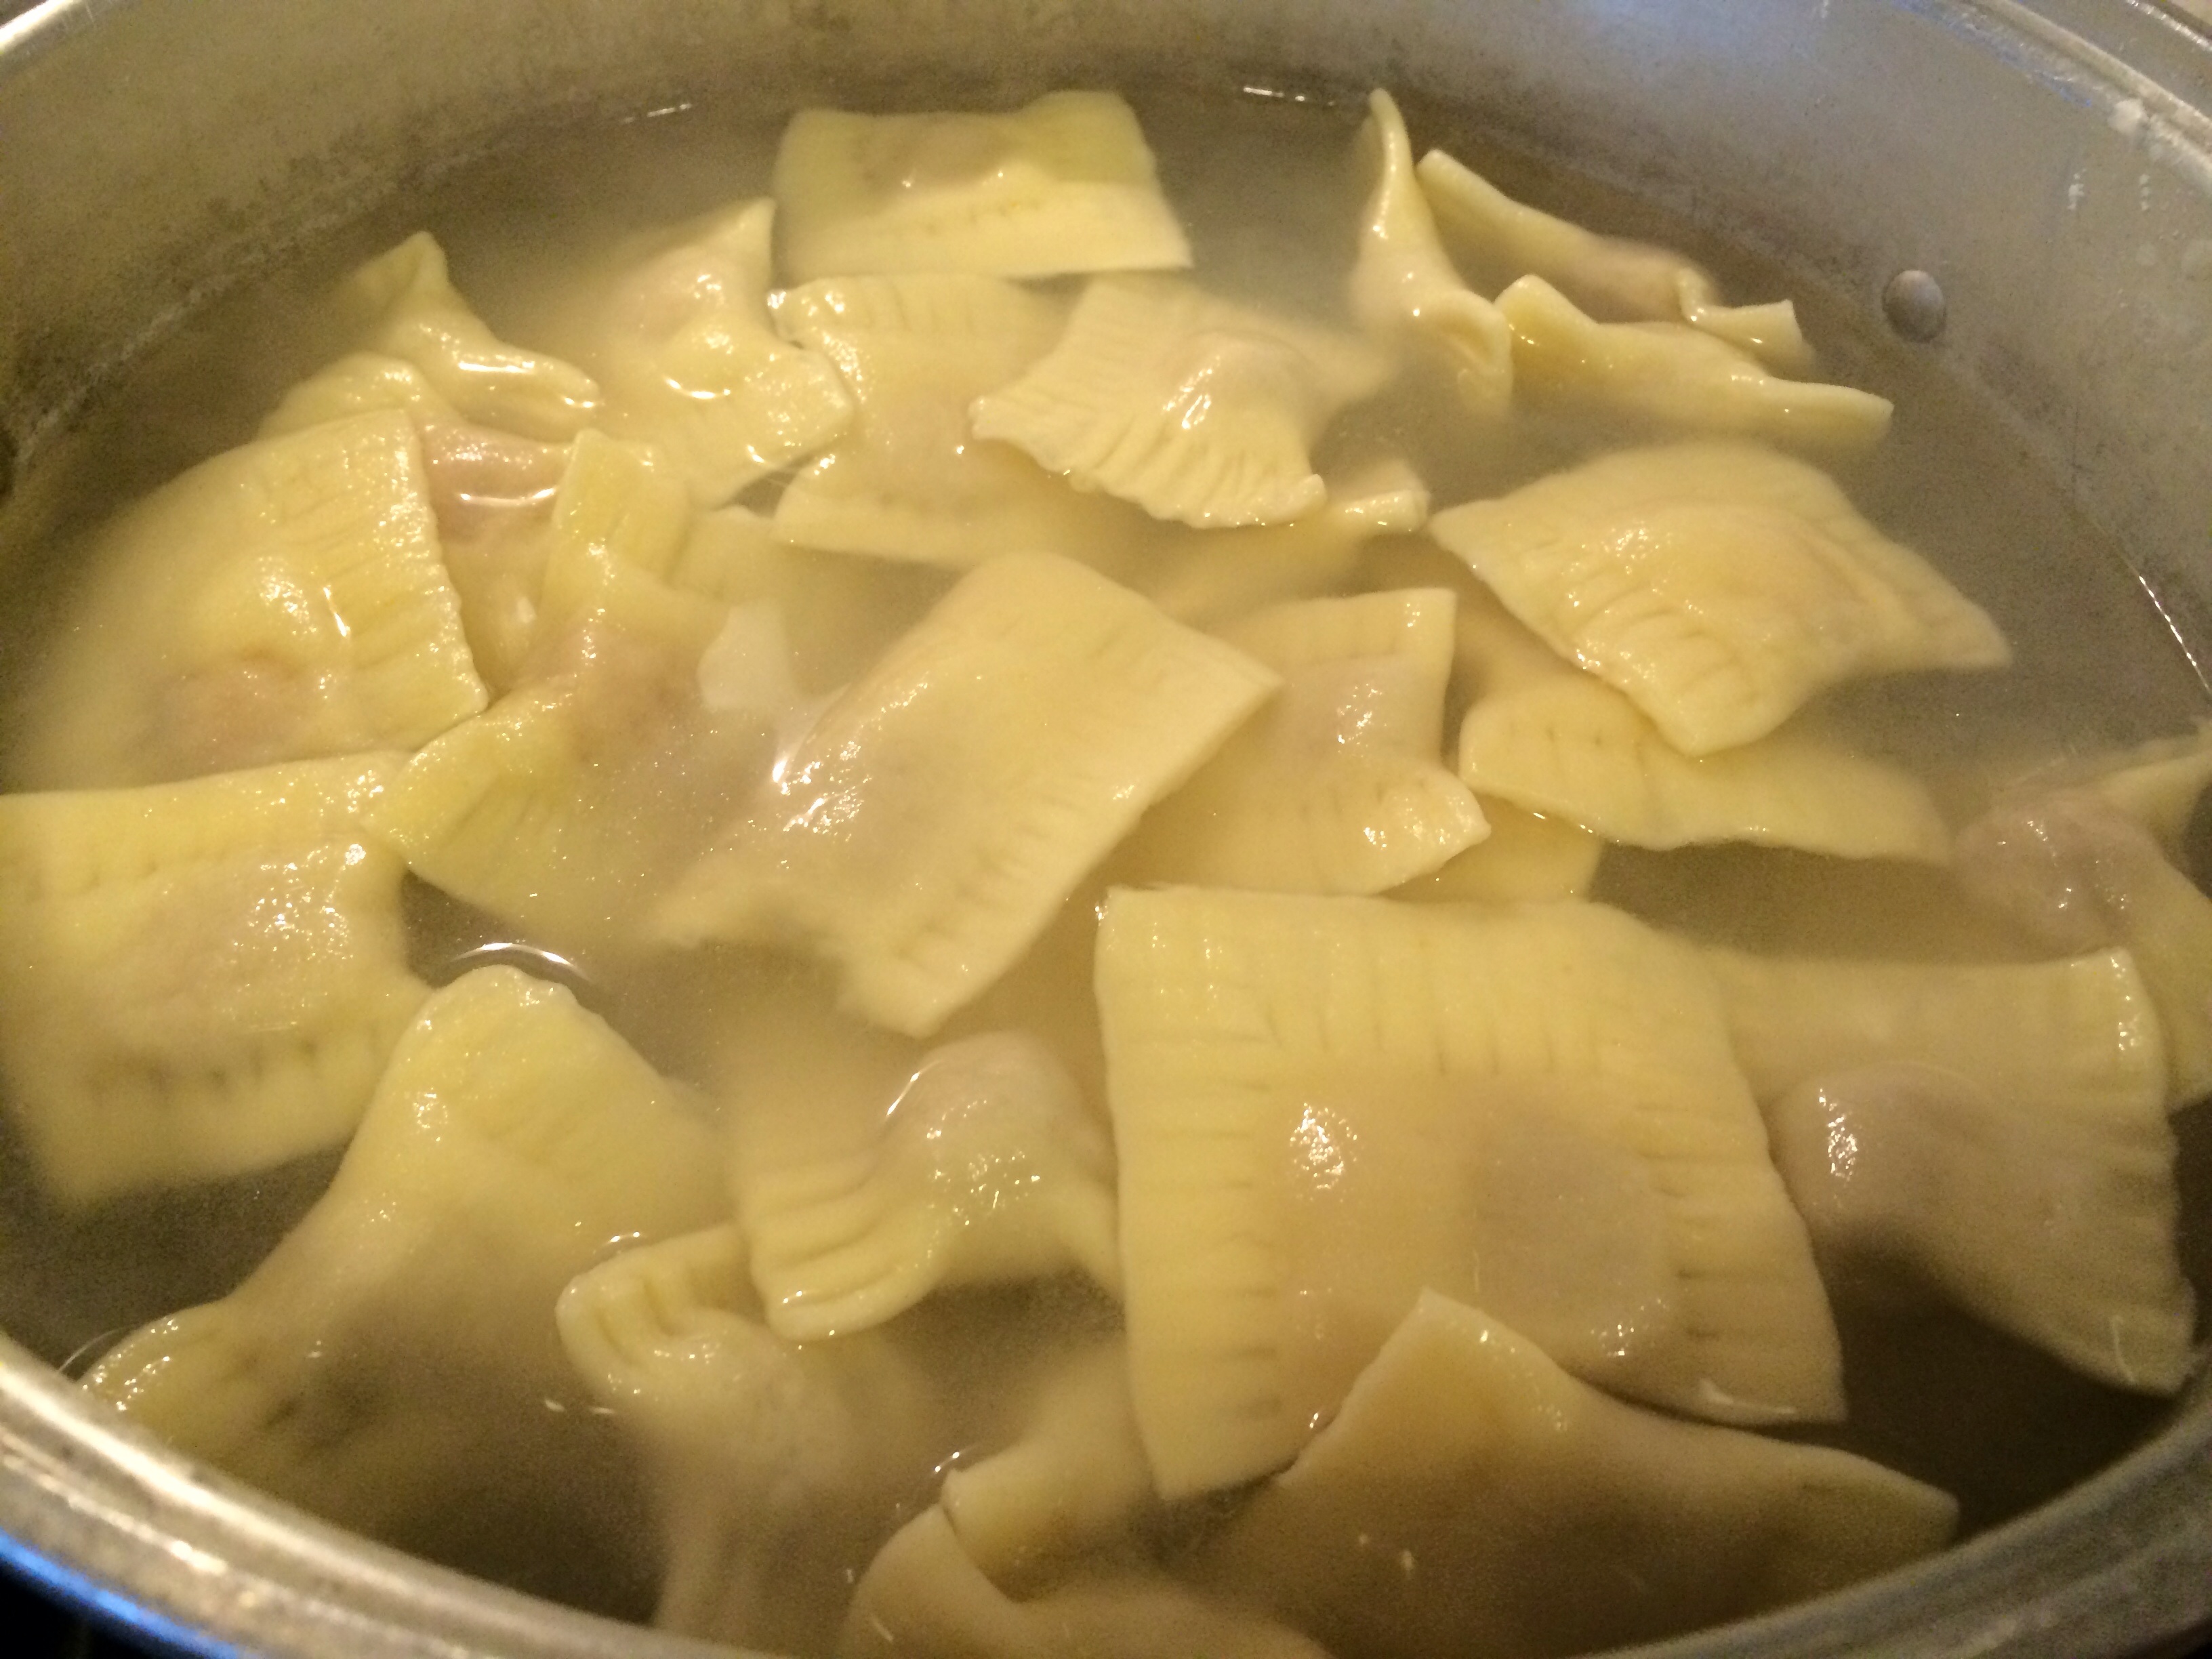
Add the ravioli to salted boiling water and remove with a slotted spoon when the ravioli are floating.
When they are floating, spoon them out with a slotted spoon and add the second batch to the water. I cook 12-20 at a time (depending on the pot) to ensure even cooking.
Try saying that one five times fast! My foodie friend @NickyDCooks is responsible for my dinner tonight! She made zucchini blossoms for dinner and her action photos on twitter got me in the mood! I had to make some form of fried zucchini!
I grew up with this simple side! My grandma made fried zucchini all summer every summer!!
Parmesan Pecorino Panko Pan Zucchini
Ingredients:
2 zucchini, sliced 1/4 inch thick rounds
1-1/2 cup Panko breadcrumbs
2 tbsp. fresh rosemary, chopped
2 tbsp. Parmesan cheese
2 tbsp. Pecorino Romano cheese
Salt/ pepper
1/4 cup olive oil
Directions:
Slice zucchini into 1/4 inch thick rounds.
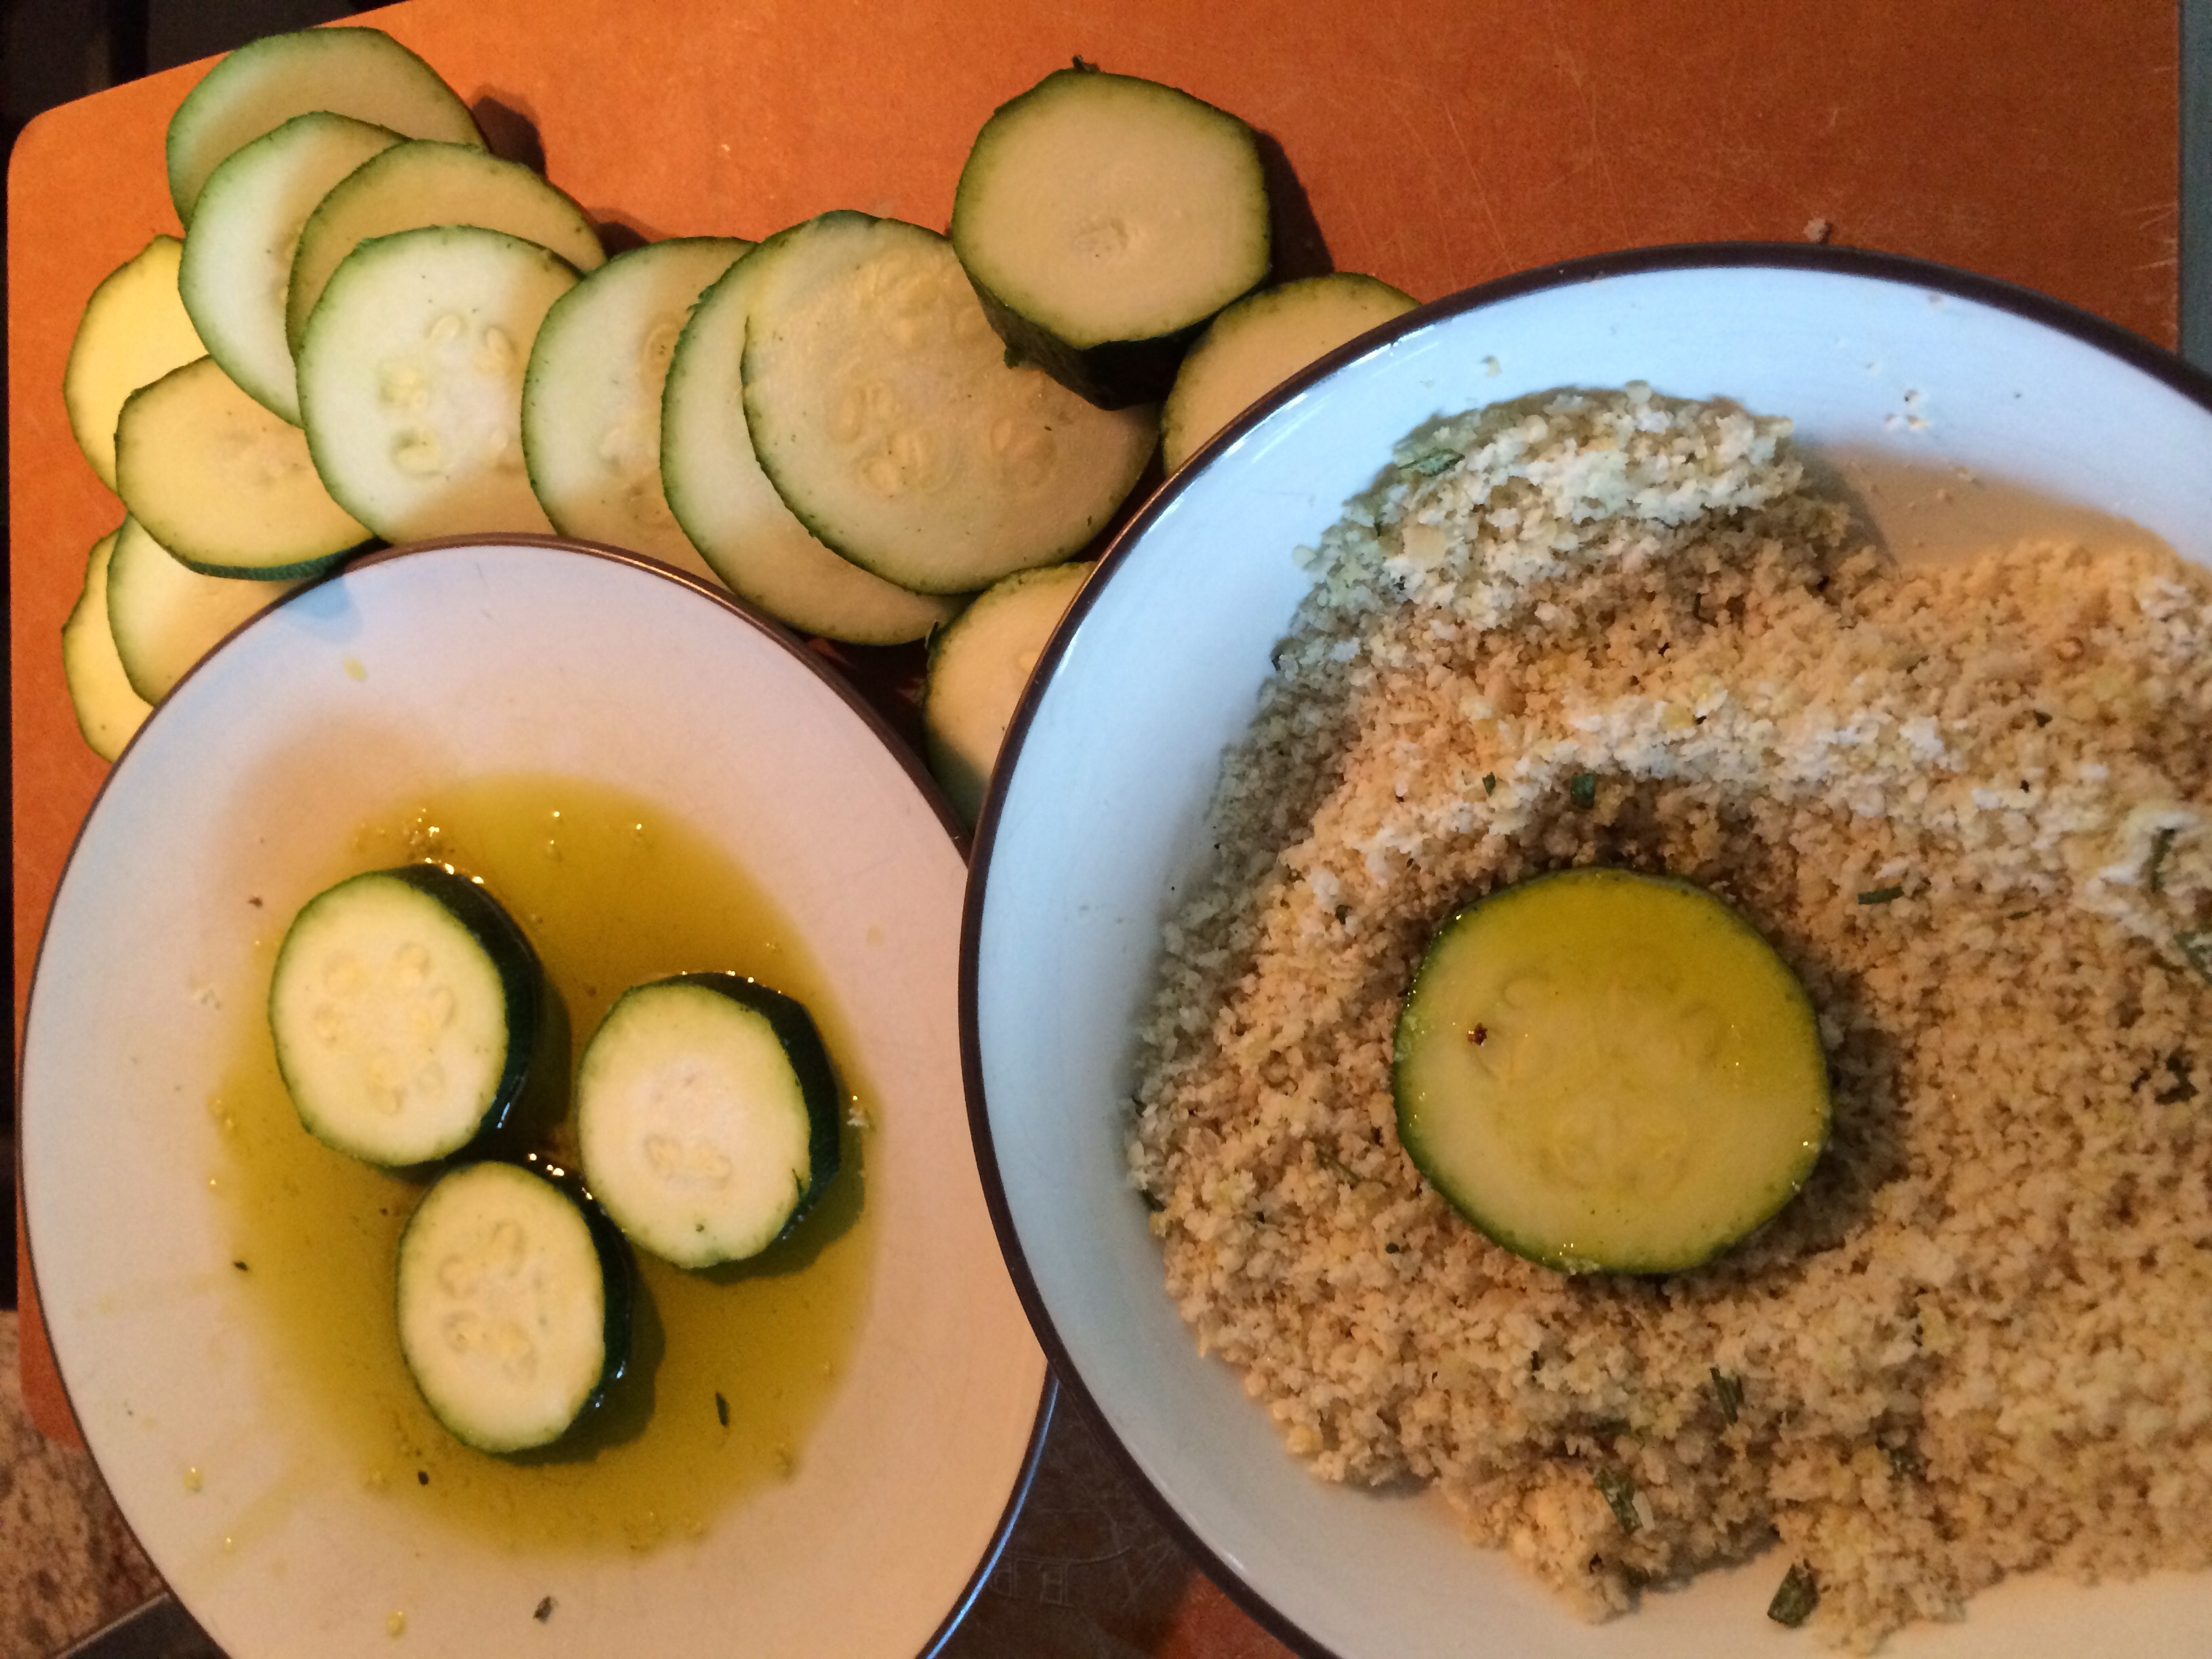
Set up an olive oil plate to dip zucchini.
Set up a little assembly line! Dip in olive oil, then cover in Panko mixture, then throw them into the pan!
Mix the Panko breadcrumbs with chopped rosemary, freshly grated Parmesan and Pecorino Romano cheese, salt and pepper.
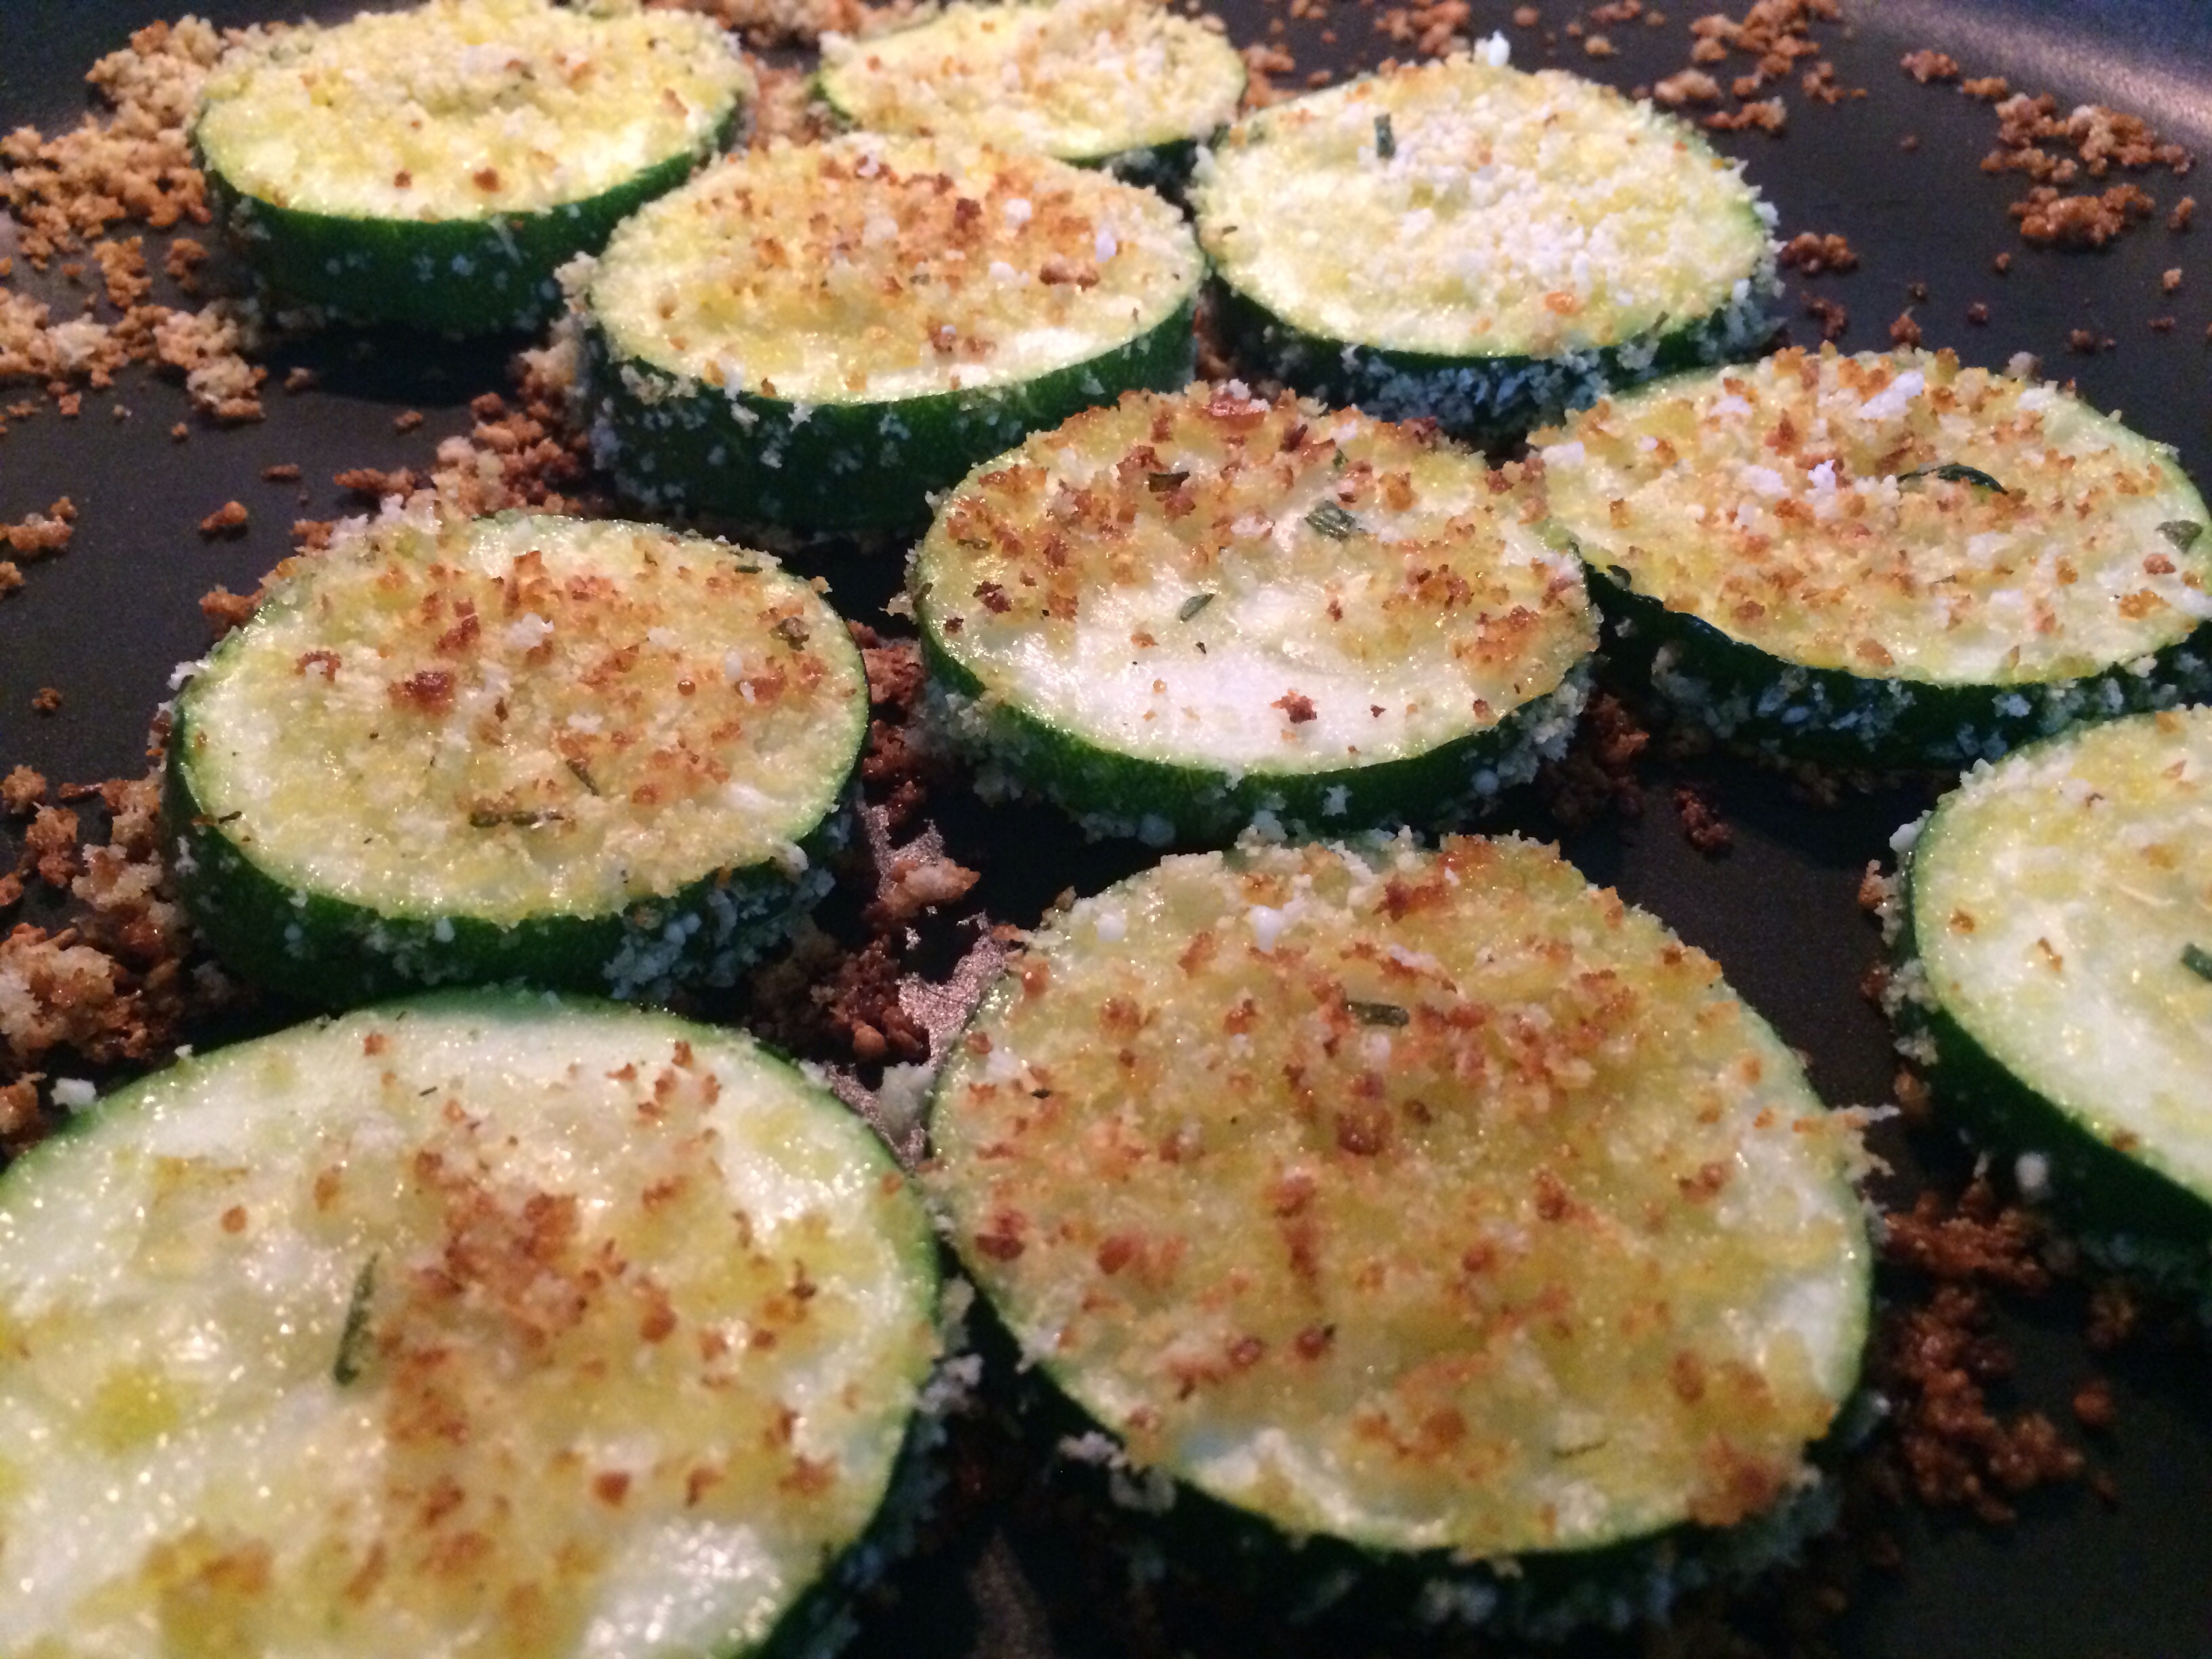
Using Panko breadcrumbs gives the zucchini a crispy finish. I always season my Panko crumbs. Unseasoned Pankos are crispy, but so blah!
Set up breadcrumb bowl.
Dip zucchini slices and flip in olive oil to coat.
Dip zucchini slices in Panko breadcrumb mixture and flip to cover both sides.
Heat your biggest pan on medium heat.
Add coated zucchini rounds to the pan, flipping when golden brown.
I love when some of the coating gets a little burnt!! Golden is an ideal time to flip! 3-5 minutes per batch at medium heat.
What is the most daunting task involved in stuffed pasta making? Boiling the noodles! Then stuffing them, while scalding hot, because I have no patience! I get this honestly from my grandma who can pull pans out of the oven without mitts. I think slowly we singe the skin and lose feeling.
If the art of making stuffed shells, manicotti, cannelloni required no boiling, I bet more people would cook these delicious dishes. So I did an experiment with my cannelloni today…
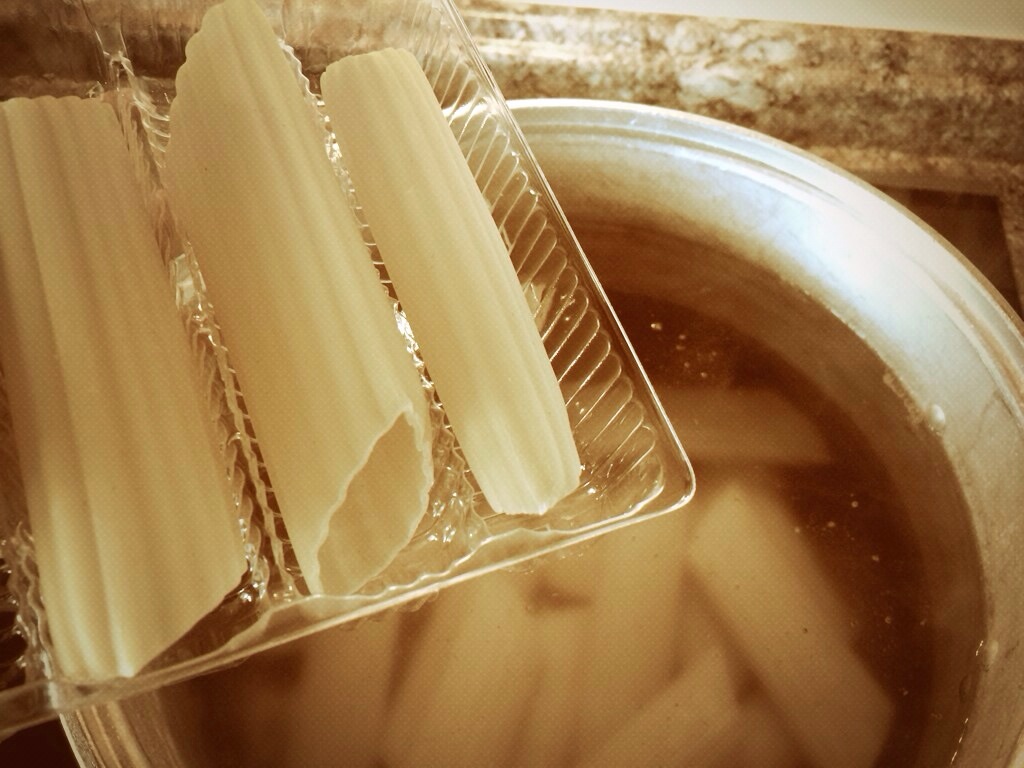
In the first tray, I boiled the noodles…
Do Not Overcook the shells if you boil, they will break while being stuffed. Also, al dente or even undercooked is fine because you are baking them in the oven.
In the other tray, I stuffed the uncooked, hard noodles.
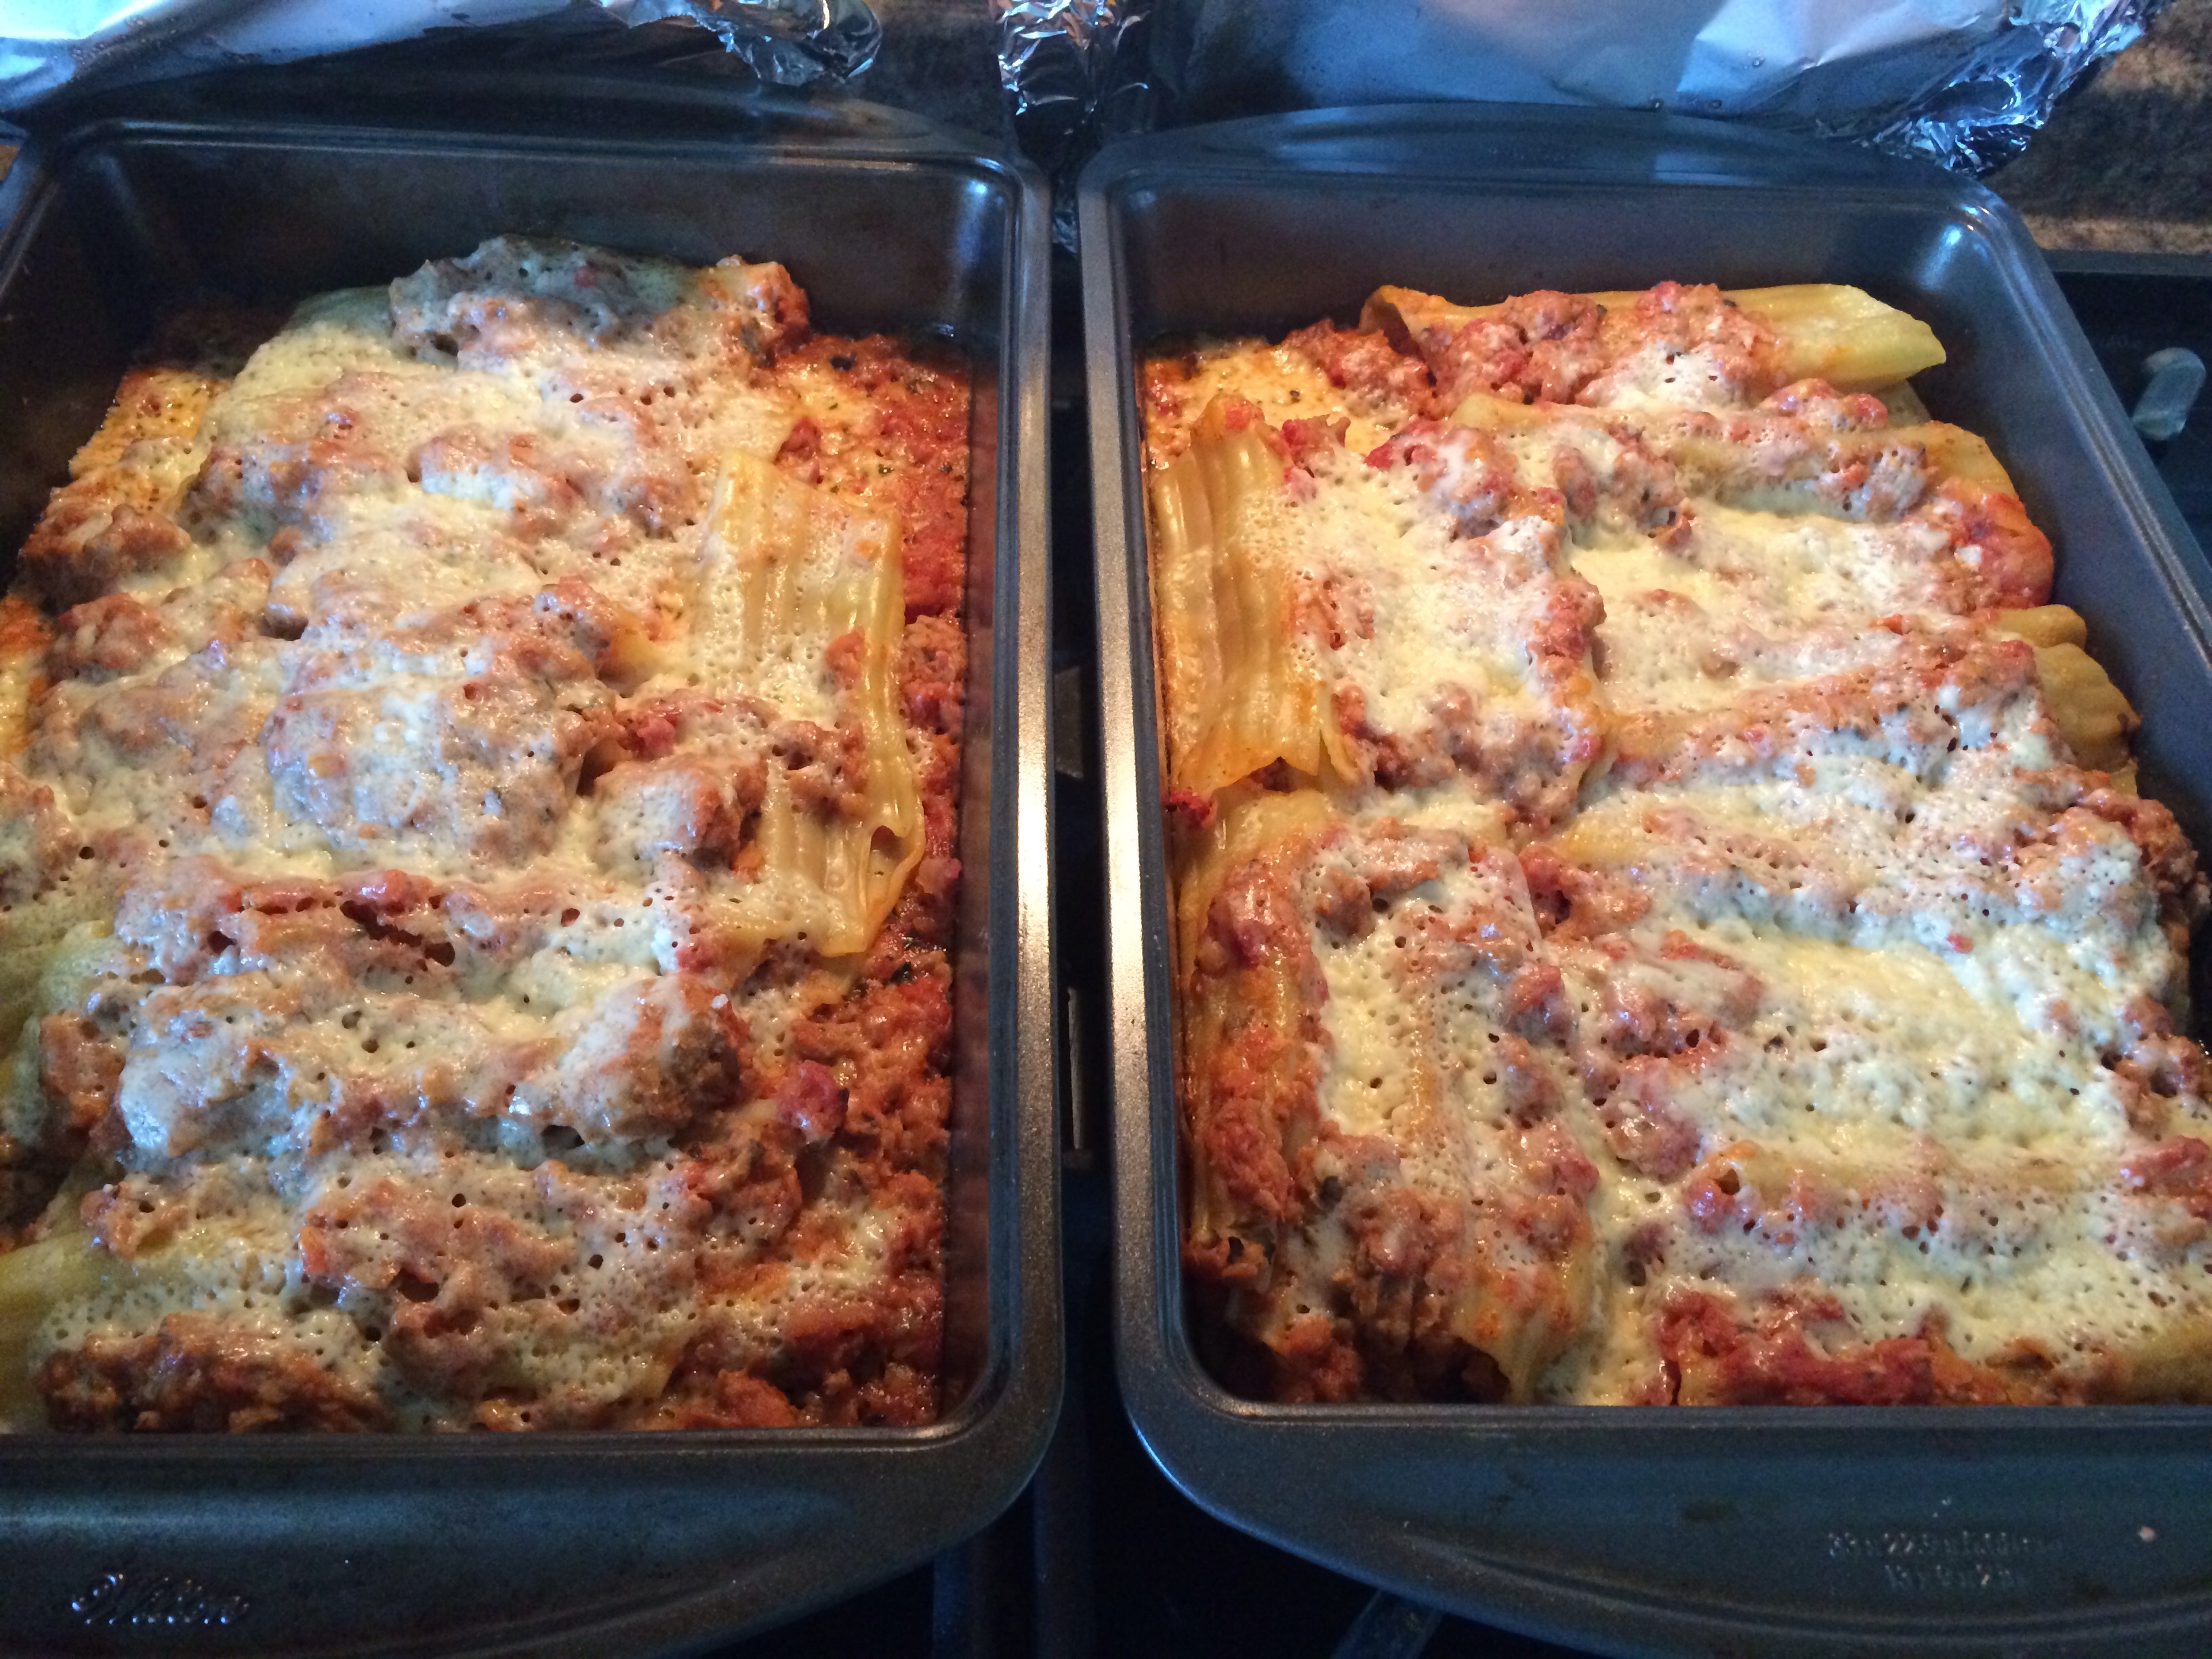
The result?
Was it pure luck? Who knows! But it worked!
They turned out exactly the same!! NO BOILING REQUIRED!!
Now, was it the heavy filling I used as sauce? Was it the cheese? Was it the brand of noodles?
It could have been luck, but you better believe I will be trying the no boil method again!!
OK, What was the filling?
I did a crockpot cannelloni filling because we were headed to the pool for the day!
Ground Turkey and Lentil Cannelloni
Makes 18 cannelloni
1.2 lb. package ground white meat Turkey
1-1/2 packages of Barilla manicotti shells
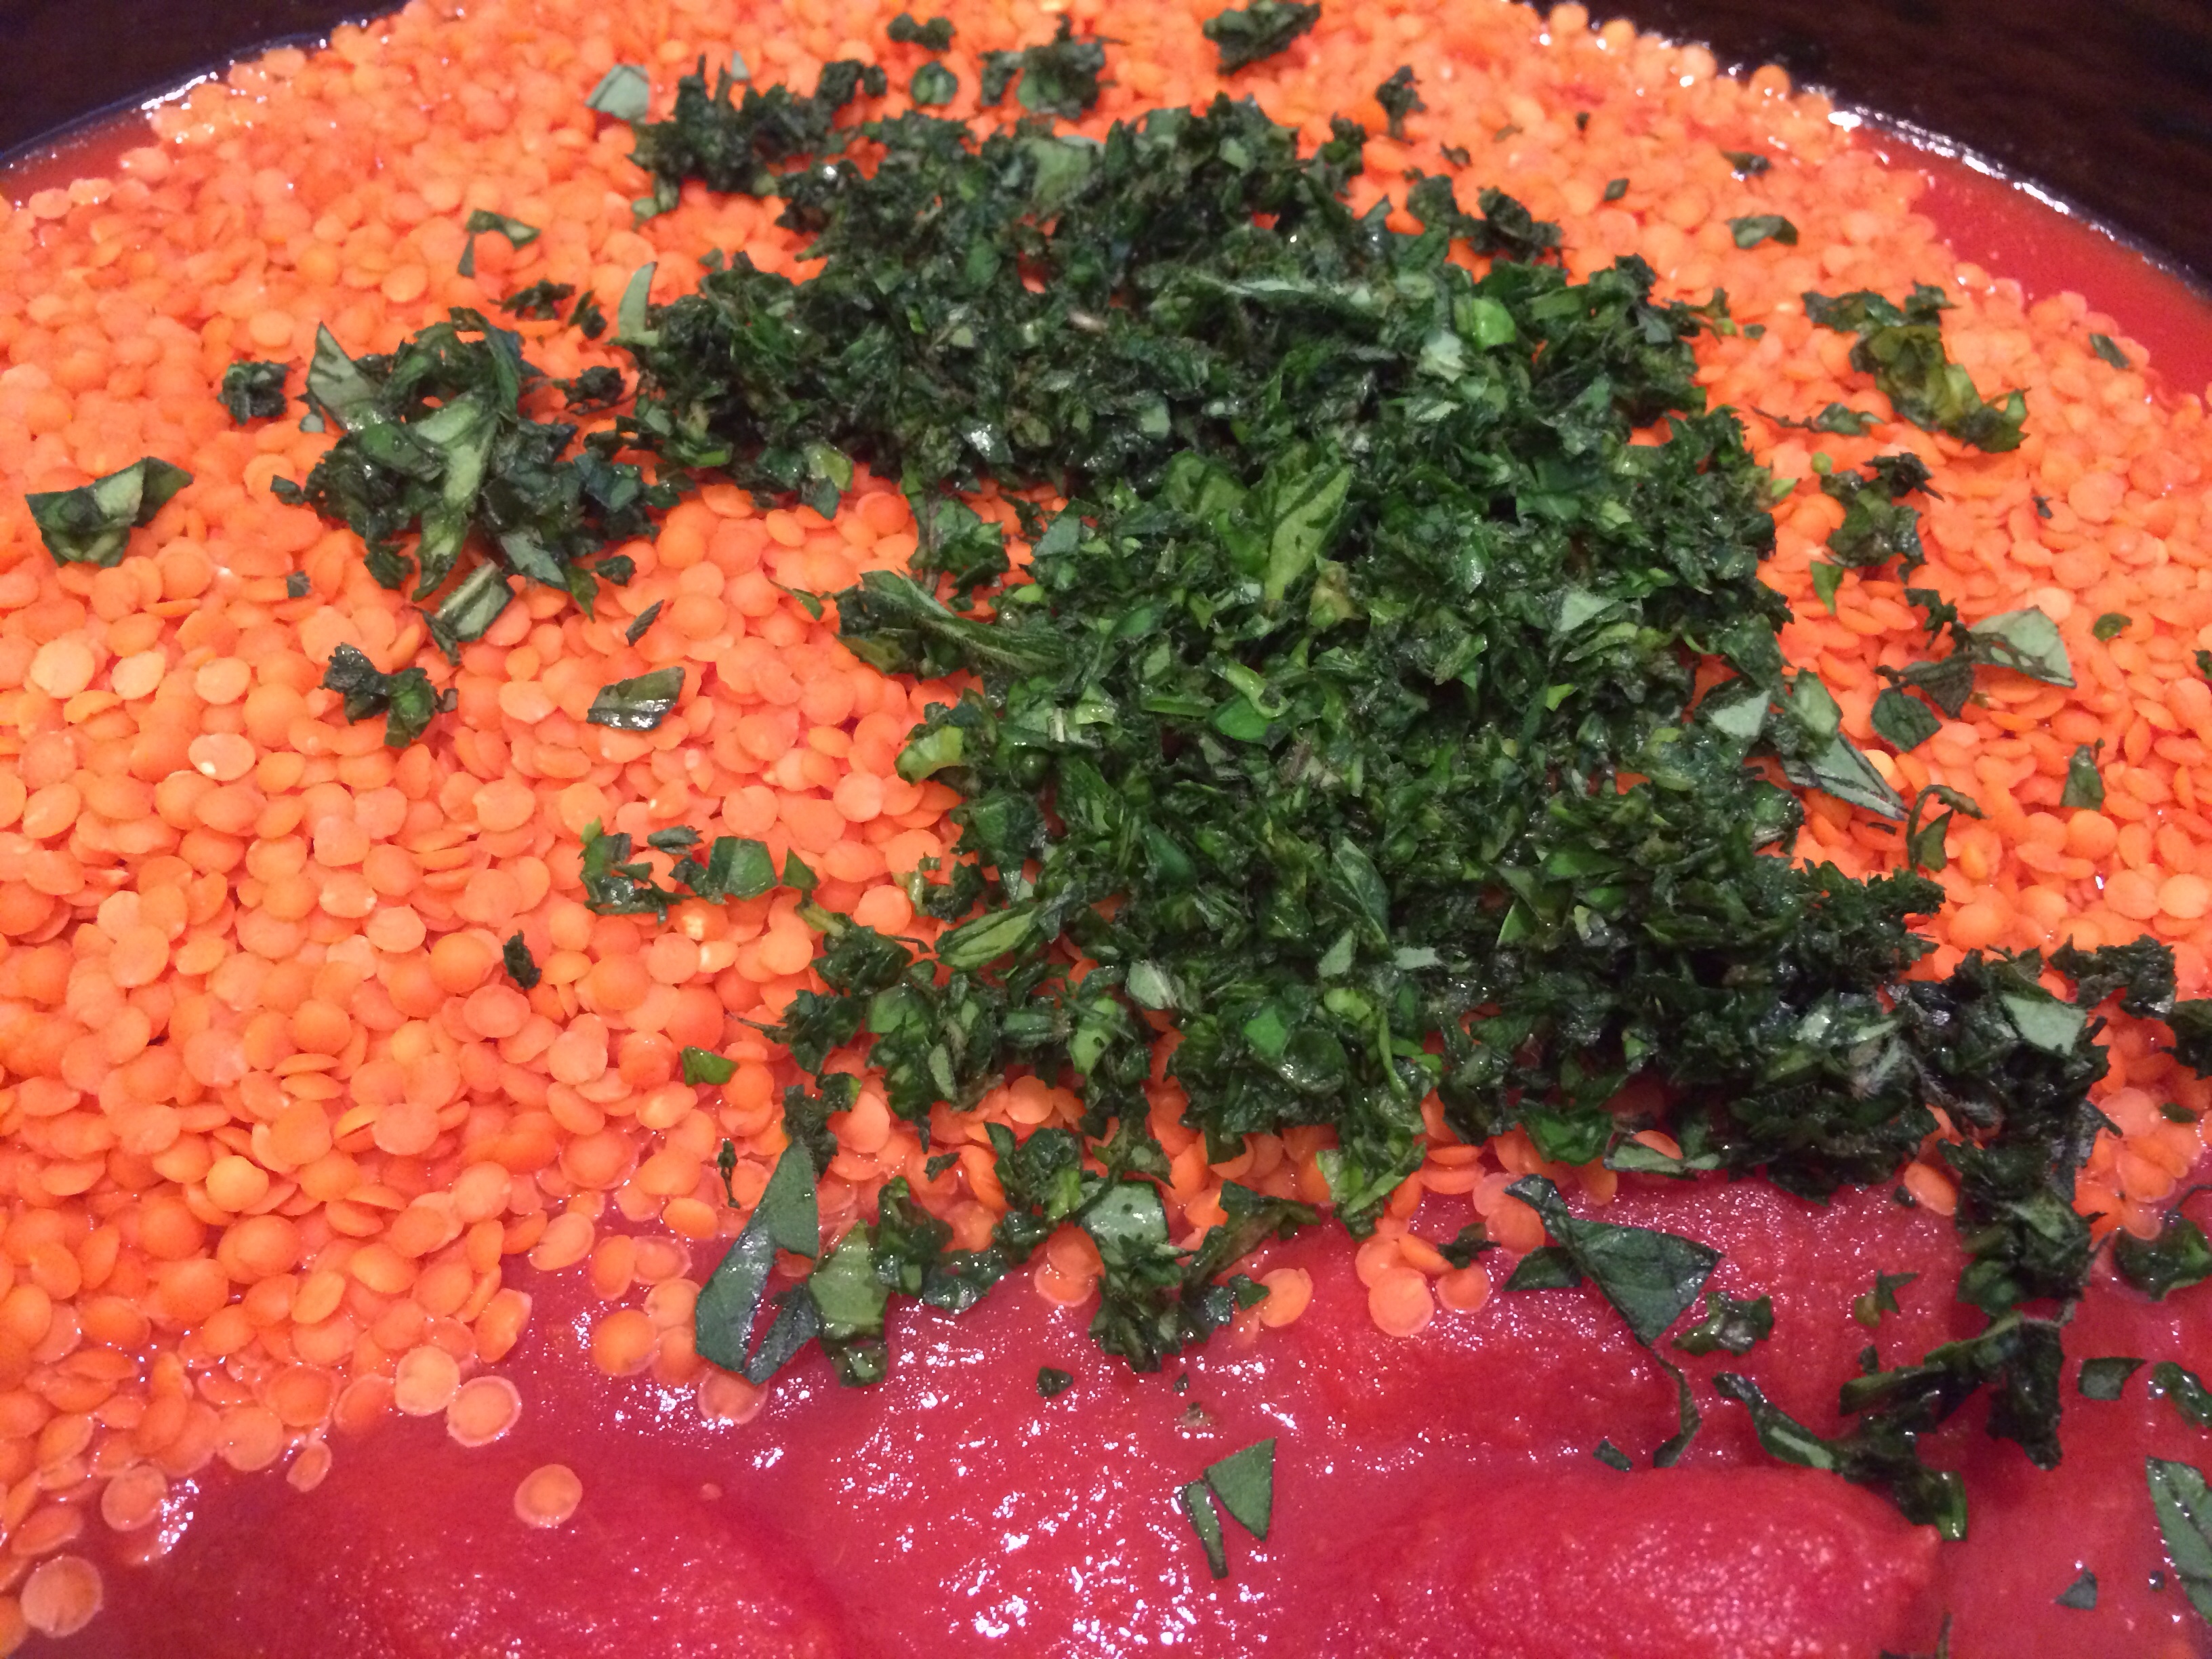
1-1/2 cup red lentils
2 35oz. Cans La Valle San Marzano whole peeled tomatoes
1 small onion, chopped
3 cloves garlic, pressed
1 tbsp. olive oil
2 handfuls fresh basil and rosemary leaves, chopped
1 cup freshly shredded mozzarella
1/2 cup freshly grated Parmesan
Salt and pepper to taste
Directions:
Heat the crockpot on high for 10-25 minutes.
Add olive oil and sauté garlic in pot.(This method will not be like cooking in a frying pan, but it is better than throwing it all in with no prep)
Add chopped onion and cook until tender.
Add turkey and coat.
Add tomatoes, lentils and top with spices.
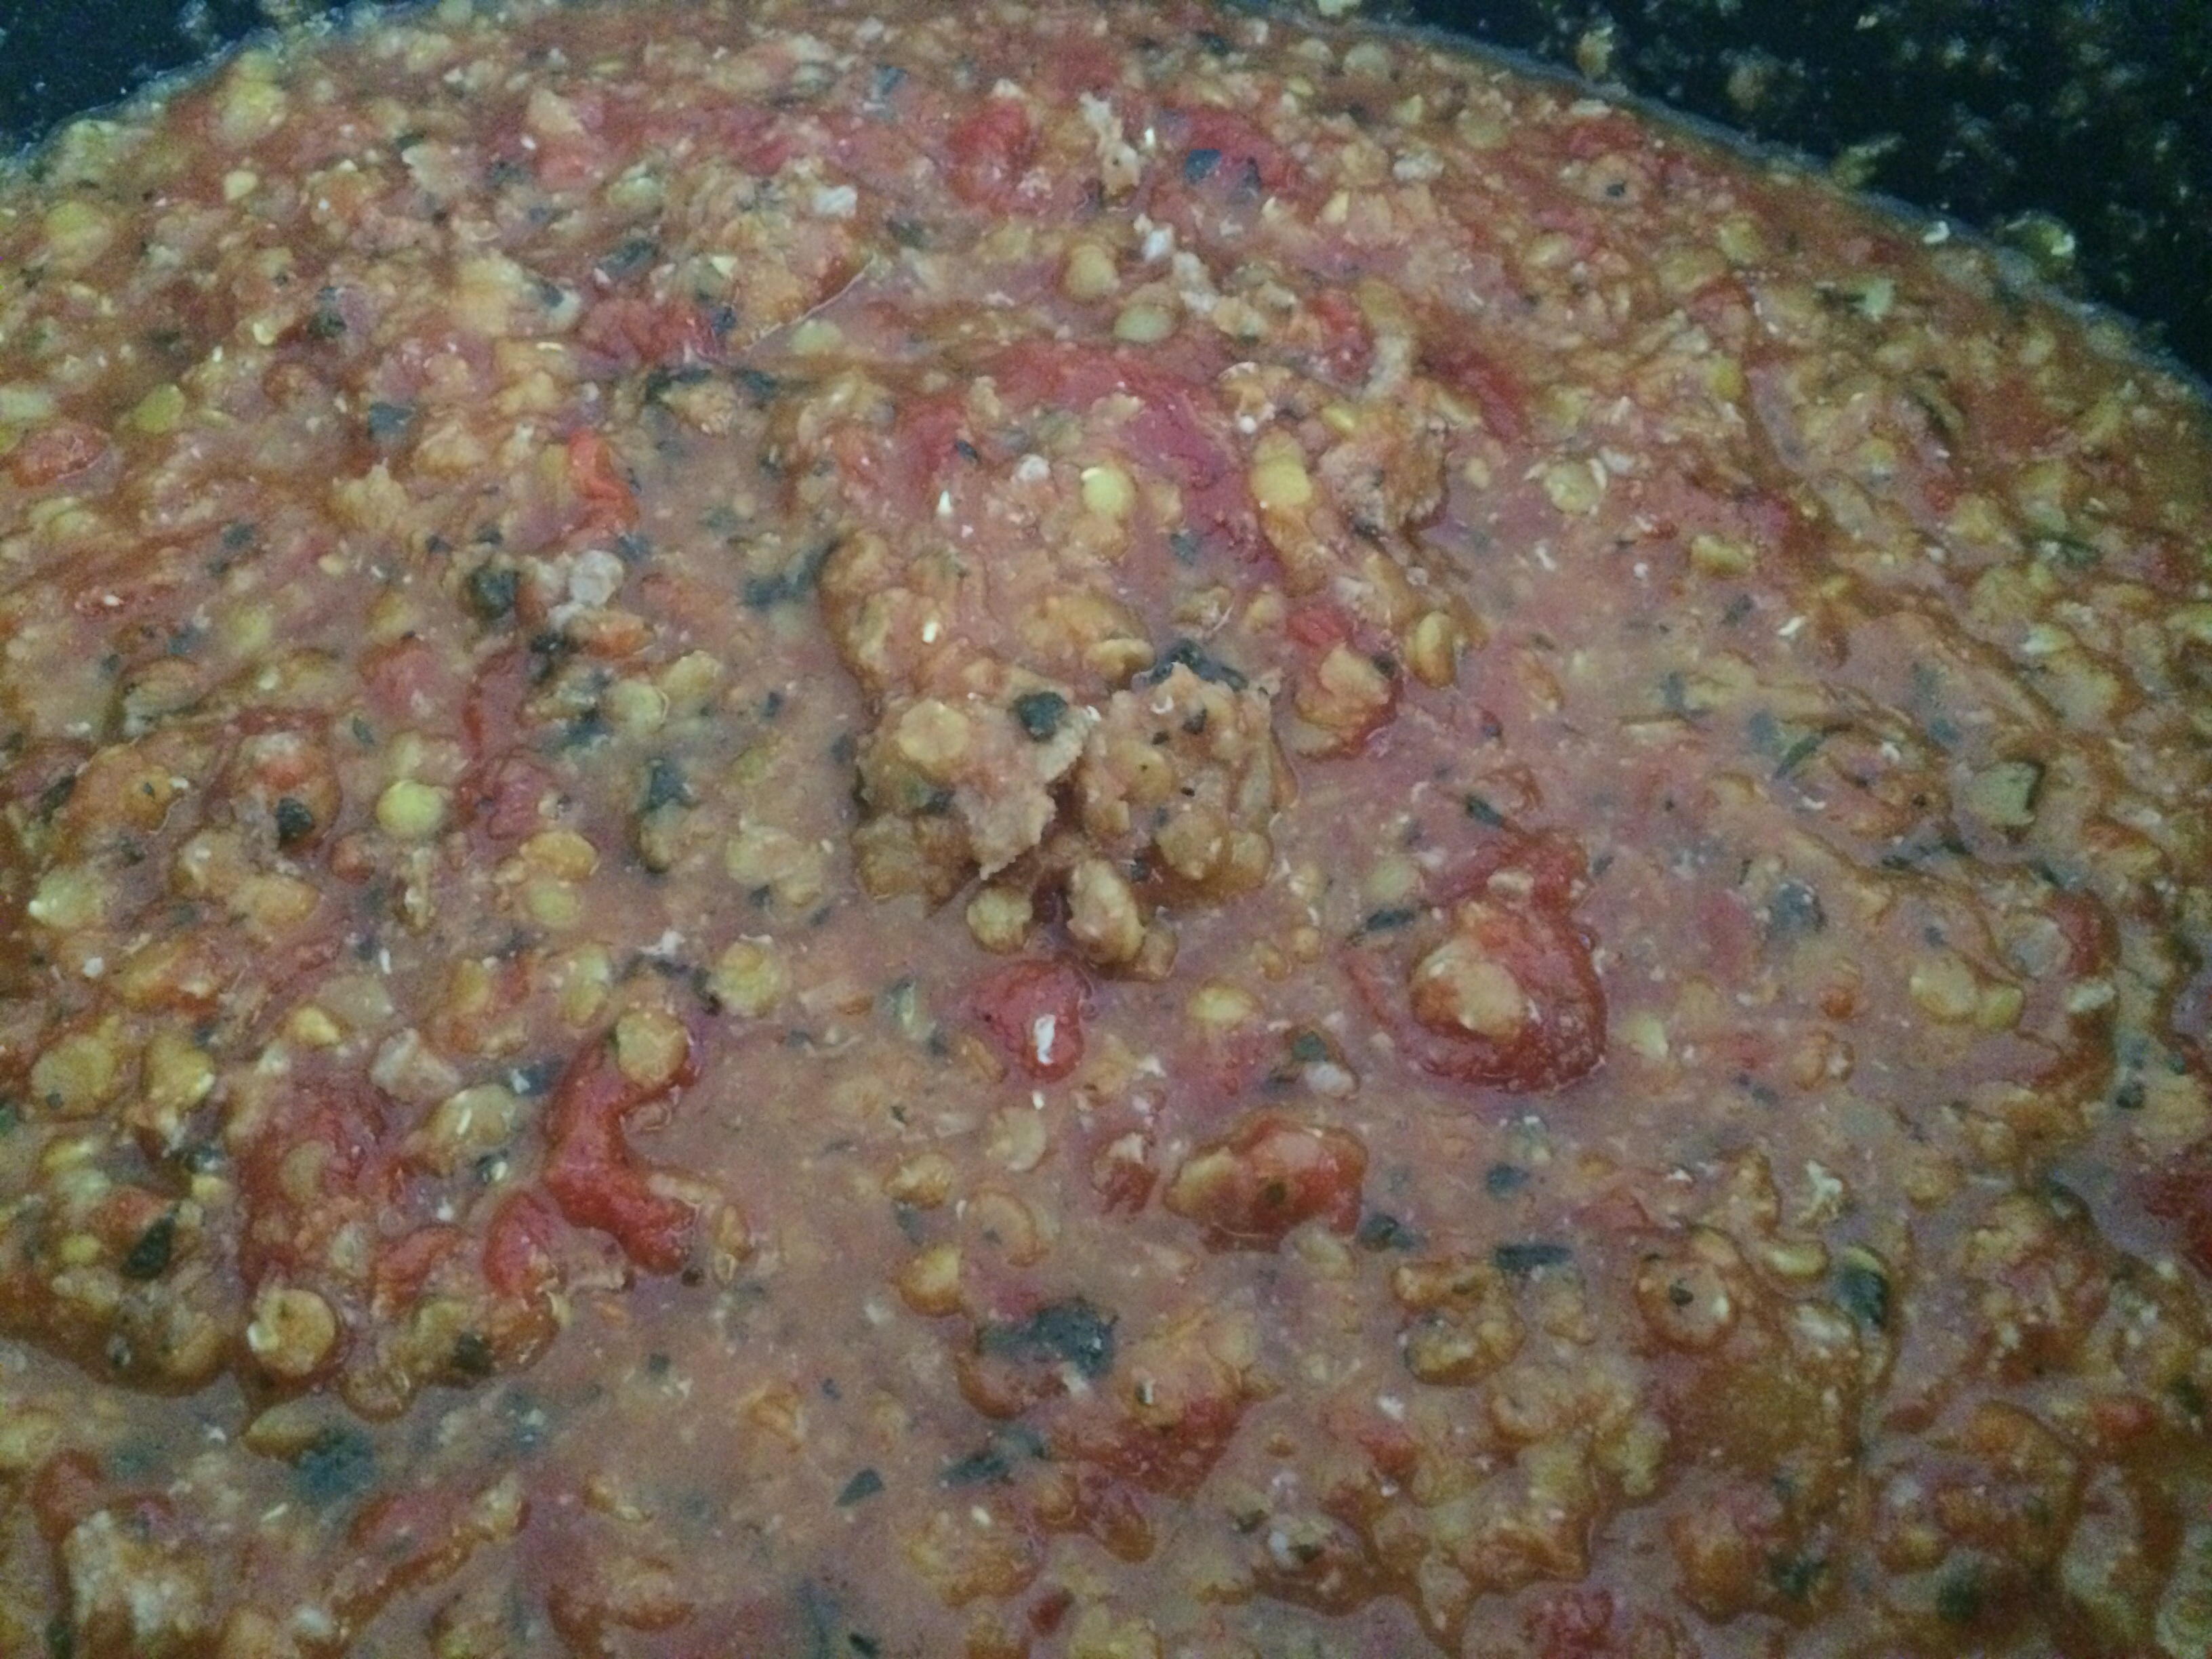
I layer when I use the crockpot versus mixing the ingredients together. There must be magic elves because when I come back, the contents are always beautifully mixed and flavorful! (I top with spices unless it’s a hunk of meat I push garlic cloves into the flesh or layer herbs right on the meat.)
Let cook 6-8 hours on high.
Later…
Preheat oven 350 degrees.
Take the lid off so any liquid evaporates.
Let that little bit of liquid cook off as you are working.
Cook shells 4-6mins…Or don’t!!
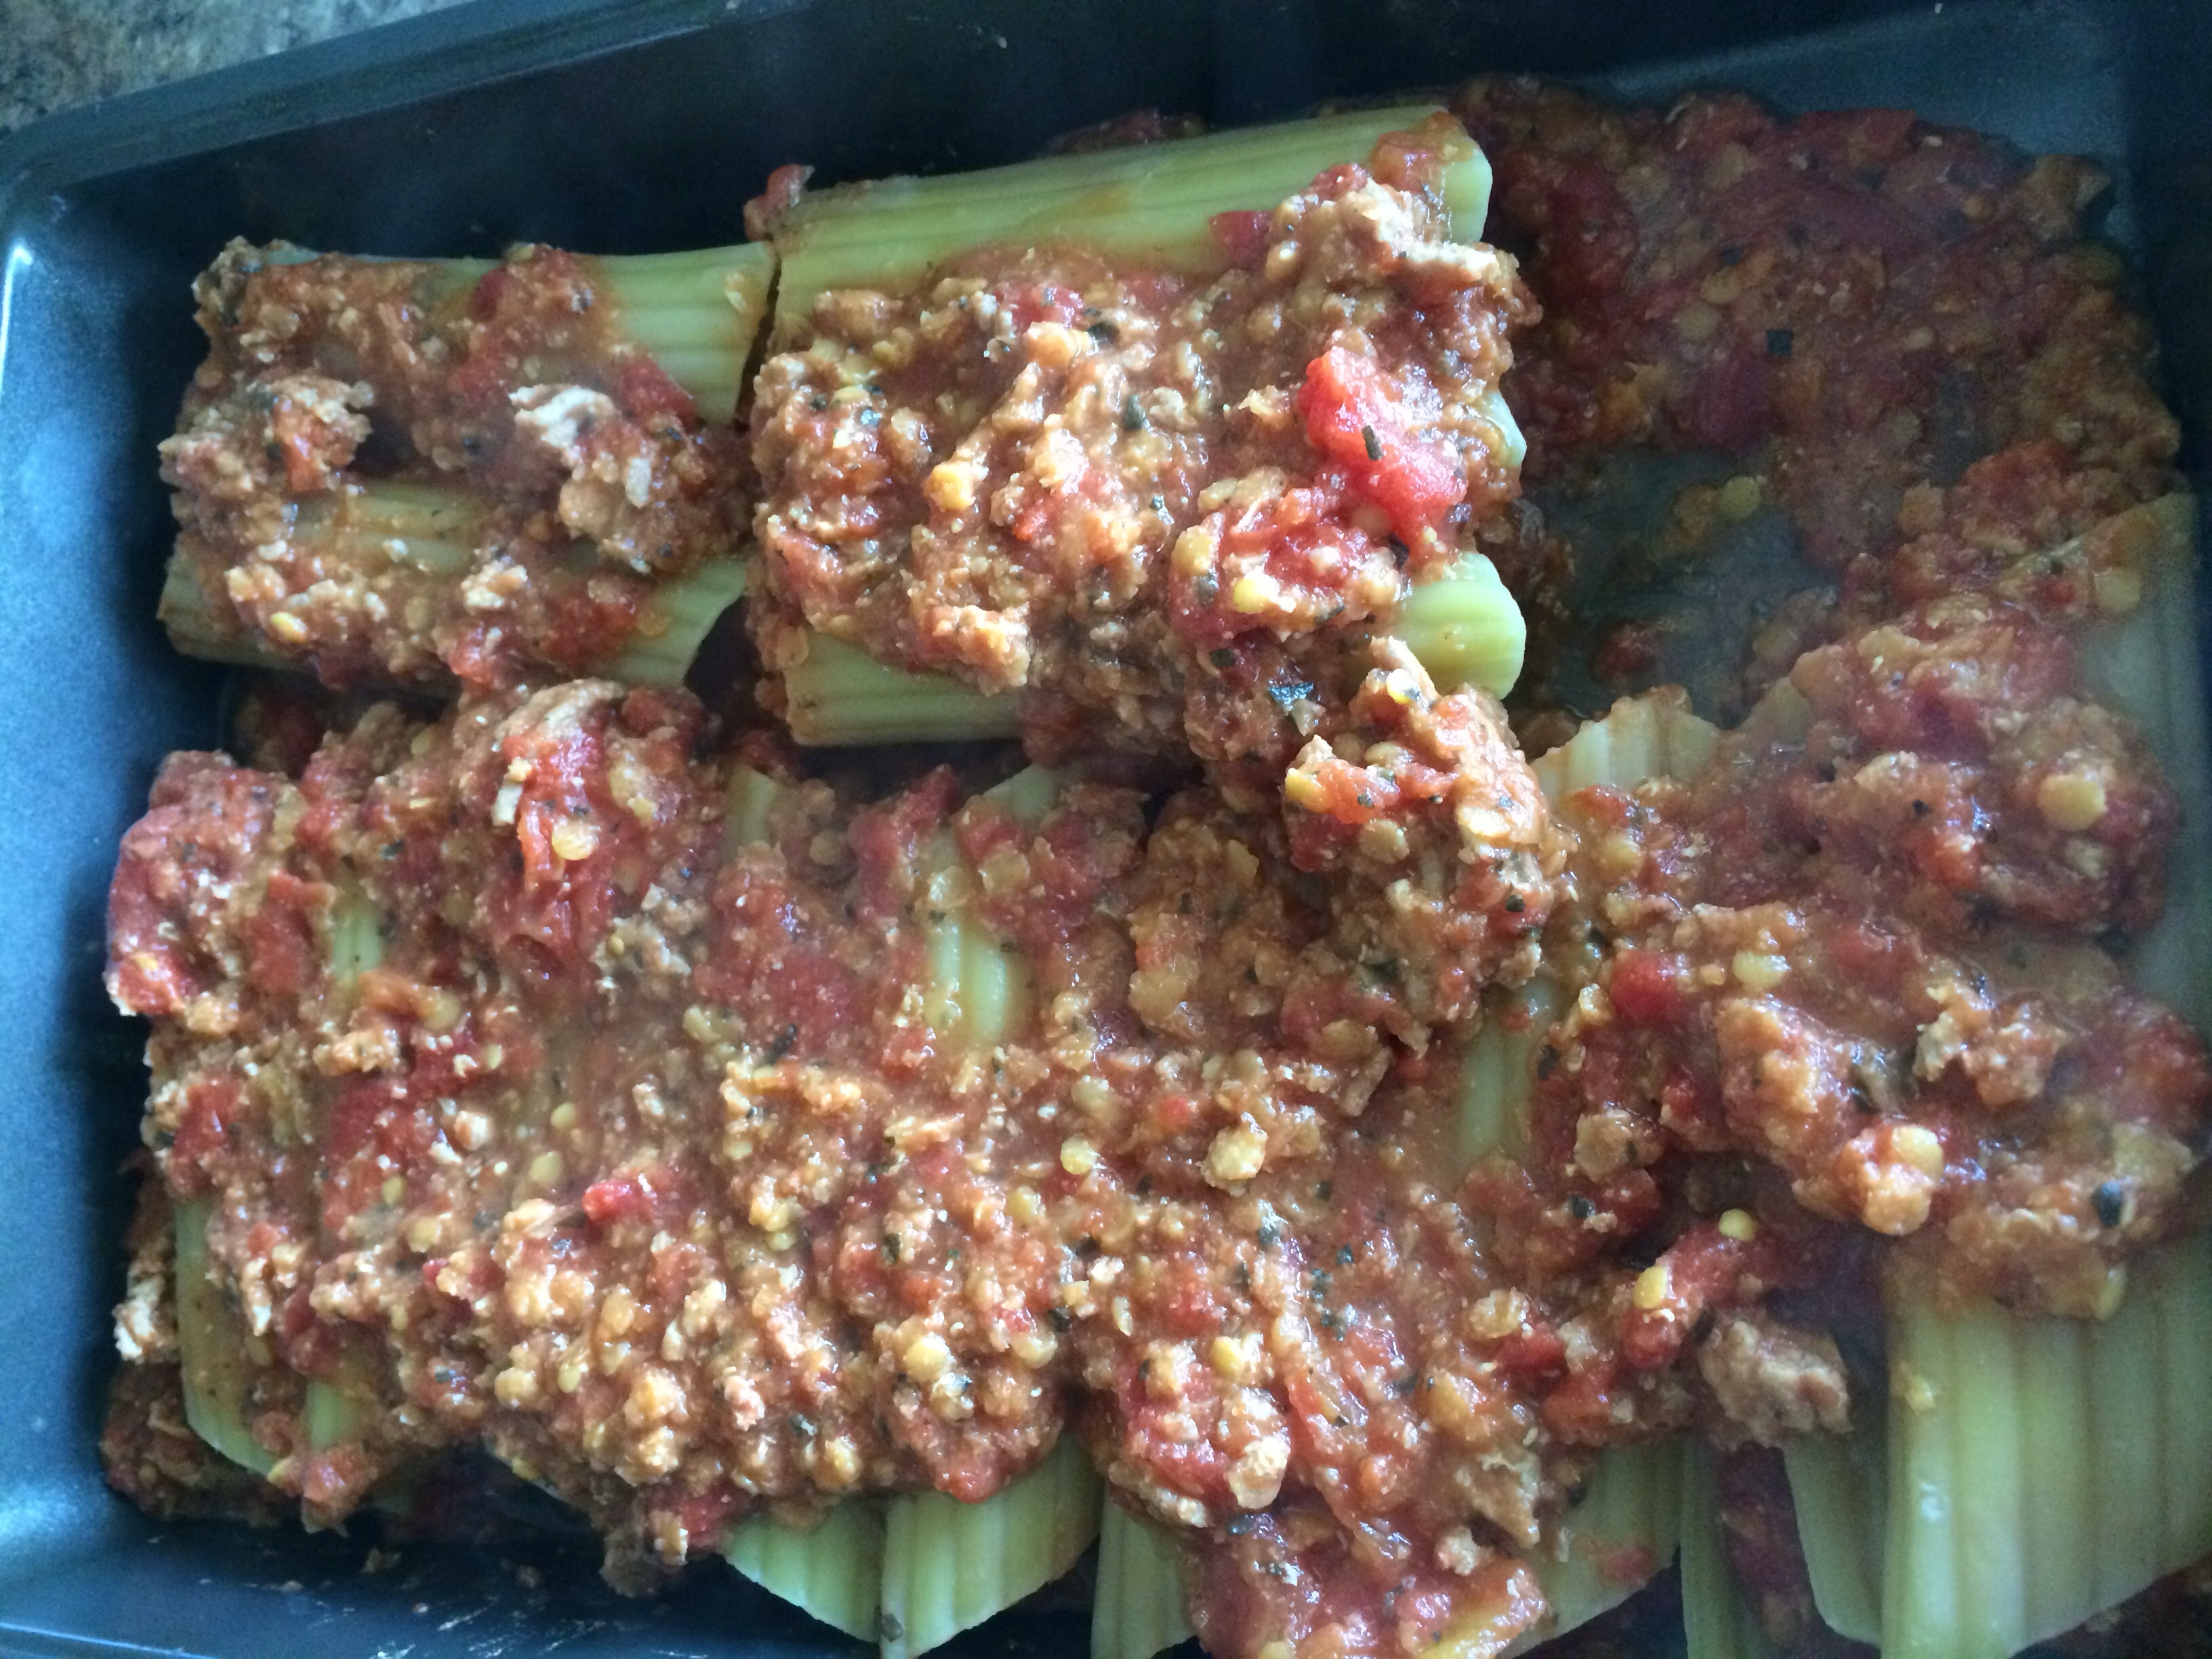
Stuff shells with filling and place in a sauce lined baking dish.
Since my filling contained a tomato base, I did not also make a sauce. I just scooped more filling over the cannelloni before adding the cheese.
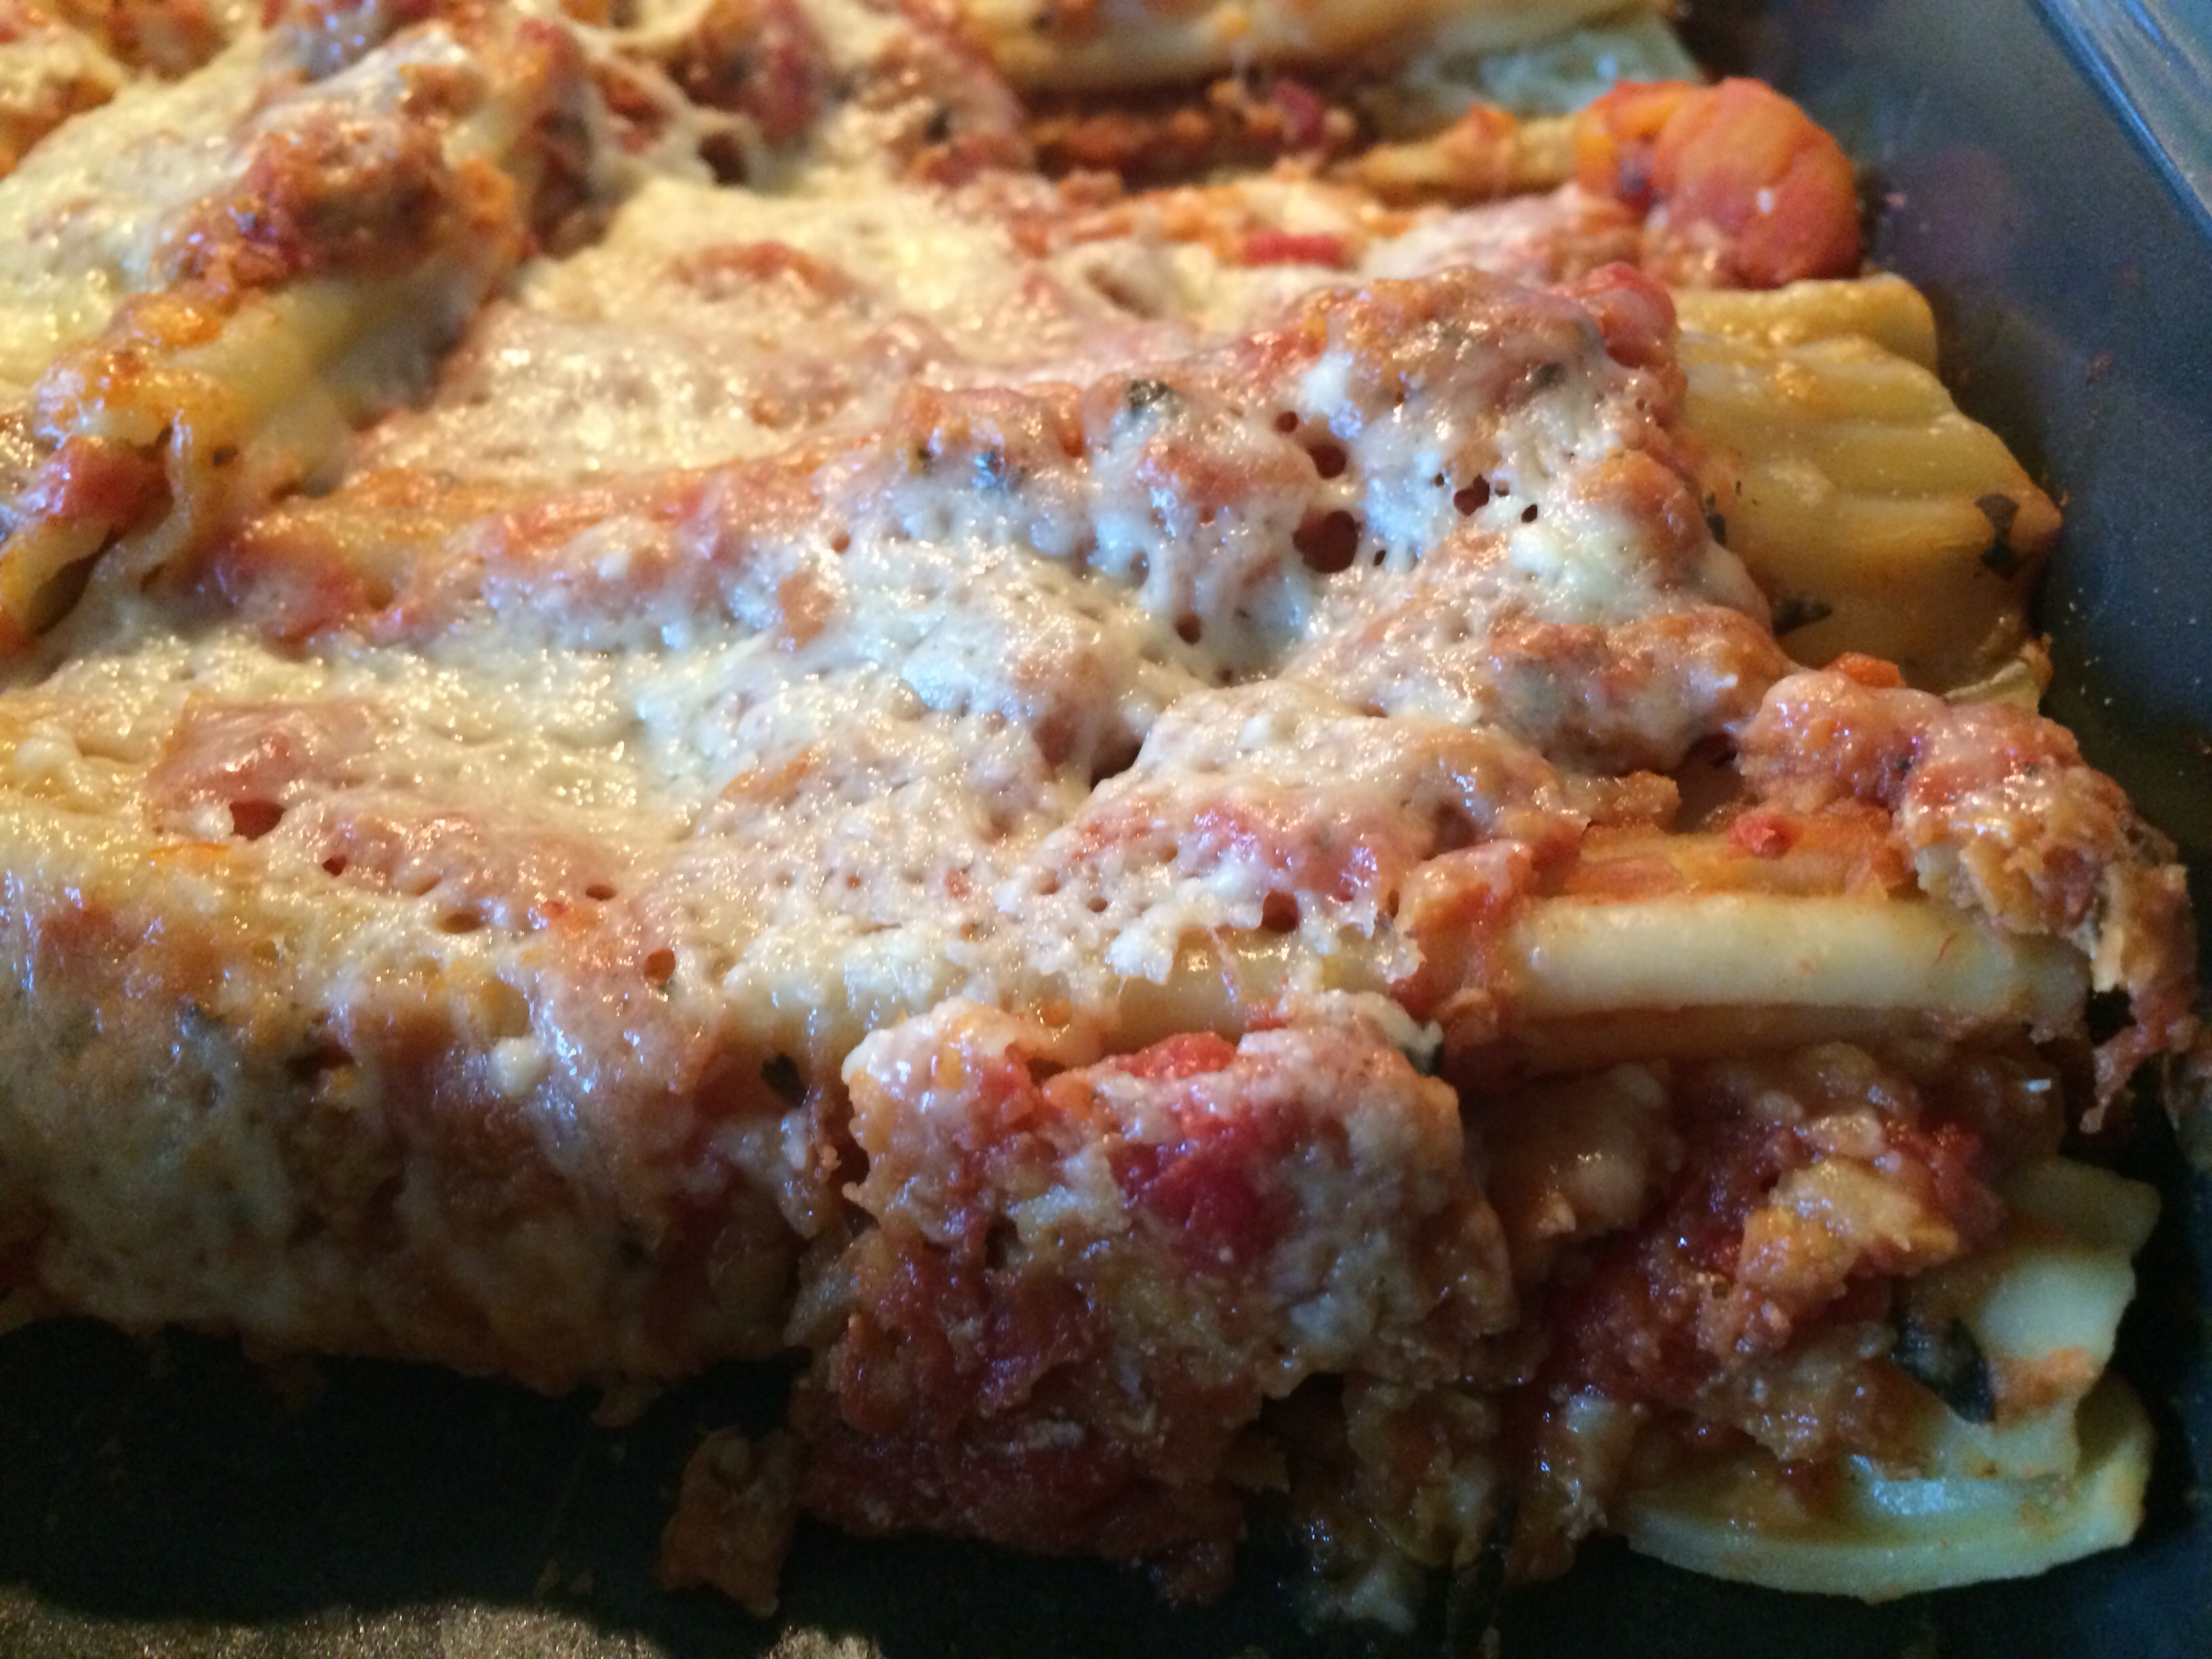
Layer the top with cheeses and cover with foil.
Bake 35-45 minutes until it bubbles and the cheese is melted.